PS: 7 Tutorial
From 
to
to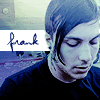
Step One
Open your image (File >> Open). I'm using this one of kick-ass guitarist Frank Iero from My Chemical Romance.
As you can see, this picture is crap with a capital K. So I'm gonna show you how to get rid of that horrible blue, and make it look prettiful.
Step Two
Crop your base in 100 x 100

And Sharpen (Filter >> Sharpen >> Sharpen)
Step Three
Duplicate (Right-click on your layer >> Duplicate) and then Desaturate (Image >> Adjustments >> Desaturate), and set that layer to Soft Light.
Merge (Layer >> Merge Visible)
Step Four
Time to get rid of the blue.
Image >> Adjustments >> Variations
I hit red once, yellow twice, red again, and yellow once more. Of course, it changes with every picture, you just have to experiment until you get something good.
Hit ok.

Getting better, yeah?
Step Five
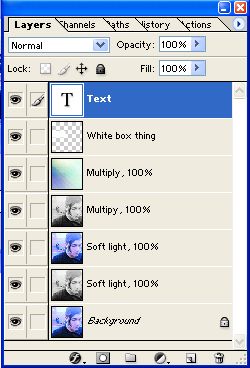
Duplicate your new base, and desaturate it, setting it to Soft Light. Duplicate the base, and drag it to the top, setting it to Soft Light also. Then, duplicate the desaturated layer, drag it to the top and set on Multiply. All at 100% opacity.

Ok, you can stop here now, but I wanted to make it pretty.
Step Six
Add this gradient, by ?? and set it to Multiply

>>
Step Seven
New Layer (Layer >> New >> Layer)
I added this
(outlined in red and on a black background so you can see it) on the left-hand side, and fit it in around Frank's head. It's up to you what you do.
Step Eight
New Layer (Layer >> New >> Layer)
Text!
I wrote "Frank" in Violation at 12pt in colour #031569, a colour I got from the icon.

And voila!
Simple!
My layers pallette:


to

to

Step One
Open your image (File >> Open). I'm using this one of kick-ass guitarist Frank Iero from My Chemical Romance.
As you can see, this picture is crap with a capital K. So I'm gonna show you how to get rid of that horrible blue, and make it look prettiful.
Step Two
Crop your base in 100 x 100

And Sharpen (Filter >> Sharpen >> Sharpen)
Step Three
Duplicate (Right-click on your layer >> Duplicate) and then Desaturate (Image >> Adjustments >> Desaturate), and set that layer to Soft Light.
Merge (Layer >> Merge Visible)
Step Four
Time to get rid of the blue.
Image >> Adjustments >> Variations
I hit red once, yellow twice, red again, and yellow once more. Of course, it changes with every picture, you just have to experiment until you get something good.
Hit ok.

Getting better, yeah?
Step Five
Duplicate your new base, and desaturate it, setting it to Soft Light. Duplicate the base, and drag it to the top, setting it to Soft Light also. Then, duplicate the desaturated layer, drag it to the top and set on Multiply. All at 100% opacity.

Ok, you can stop here now, but I wanted to make it pretty.
Step Six
Add this gradient, by ?? and set it to Multiply

>>

Step Seven
New Layer (Layer >> New >> Layer)
I added this

(outlined in red and on a black background so you can see it) on the left-hand side, and fit it in around Frank's head. It's up to you what you do.
Step Eight
New Layer (Layer >> New >> Layer)
Text!
I wrote "Frank" in Violation at 12pt in colour #031569, a colour I got from the icon.

And voila!

Simple!
My layers pallette:
