(no subject)
First tutorial, so it might be kind of hard to understand
I am using Animation Shop 3 and PSP 7 but all of my steps should be easily translatable to any other program.
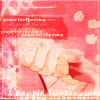
Final icon will look like this:
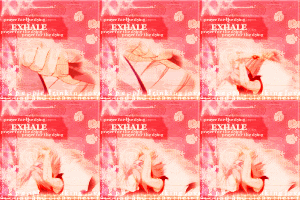
Ok.
1.
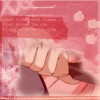
I start of with an animation gif capped by me. (1)
The gif was too big and the file size was large- around 36 frames. You'll be lucky to fit in ten [frames]. So I deleted a lot of the frames and kept only the essentials.
The gif is now 13 frames (final size of the gif was 37 KB- so I could have put one or two more frames in tere but oh well)

2.
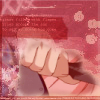
Then I took a texture by the amazing colorfilter. (2)
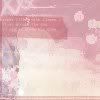
I changed it into a brush on my PSP 7 (3)
3.
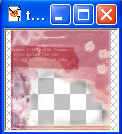
And then hardlighted the actual texture over it. I erased a the white part in the middle of the gif to make it transparent. This is the trickiest part of the entire process.
4.
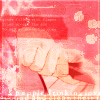
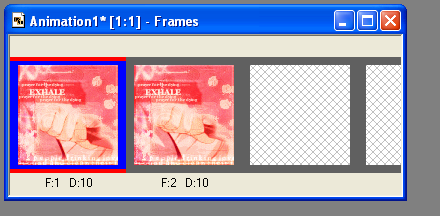
Next I opened my gif in ANIMATION SHOP 3. (4)
First I resize the animation to 75% so it will fit easier in the texture. Animation>Resize or Shift+S. Make sure it's on "smartsize."
5.
Then I copy (select the frame and there should be a blue red highlight and press crl+C) frame 1 into the layer below the textured layer. I have to reposition it to my liking.
If you want to make things easier, make a new layer (Which I will mark invisible later) above it and place two dots where the outlines of the frames are. That way I can easily position each frame by lining it up with the dots.
6.
Then I duplicate my frame image and set it to burn , about 10%. The change is negligible but I do think the small contrast makes it more distinct through later textures.
7.
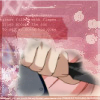
Then I fill a new layer with color #F75D59. I set it to hardlight- 40%.

-->
8.
I duplicate colorfilter's texture, drag it to the top, and set it to multiply 100%.

-->
9.
Then I take another of colorfilter's texture and set it to overlay 100%
-->
10.
Colorfilter's texture had some SMALL text that got lost, but I thought it was pretty. So I took a light color from the icon using color drop and with the color ##FFEFE0 I went to the text tool and typed in a prase with text set at size #3, Georgia and placed it accordingly on the icon

-->
11.
With the same color and same font type, I only change the size (6? 7? I can't remember -___-) and type in the word EXHALE in caps. I positioned accordingly.
12.
However, I thought the word exhale wasn't distinct enough, so I duplicated the layer that EXHALE was on to make it brighter.

13
Then I right click >copy merged. Then I paste it into Animations Shop 3> New animation.
Here comes the easy, but amazingly tedious part.
14
I repeat steps 5 &6 (copying each fame of the gif into the layer below the textures but above the before frame images, and then duplicating it and setting it to burn 10%). Make sure all the framed images are positioned directly above eachother. The annoying part is that because if you try to move and images around, it will automatically select the highest layer. So strike all the above textured images invisible before inserting the frame.

15
Once you get it to the right position make the other layers visible again. Copy, merge visible it again. And the paste it into the frame AFTER the current frame frame. (Shift+Ctrl L)
Rinse. repeat.
Now there are four similar frames. But the gif changes positions after the four frames.
16
Because of this, you must now reposition the next frames to your liking. (once again, if you want- put a new marker frame that helps you position the other frames later on with red dots)
Once I do that, I duplicate the frame and set it to burn 45%.
17
I then repeat number 14. Repeat 13. Until I'm satisfied with I have.

The end result, I have 13 frames and 34 layers.
And thus, we are done. :D.
FOOTNOTES
(1) Gif capping is easy. Narutoex. supplies a good number of small animations for Naruto gifs. If you want to make your own, there's a couple of ways you can do so.
Gif capping using strictly Animation Shop is the best way to get the smoothest animations. You can open certain files on Animation shop (.avi's, ect) where it will open the movie in frames. Unfortunately, there are hundreds/tens of thousands of frames in a single episode and, at best, you might be able to open about 100. Choosing the right numbers if really just a combination of guesstimates and trial and error.
When opening the episode, a pop up box will show up. Deselect All Frames and choose Frames and there will be a 1 to (in this case) 33201. Check the box at the bottom that says "merge identical frames" then choose "take sample for every ____ frames". This makes it easier to get a broader range. Since you can open about 100- if you choose "take sample for every 5 frames" you can choose Frames: "1000-1500" (originally the 1 to large number)

Another, easier, way to do it is to open BS Player (or any other screencaping capable program) and then continously press "P" giving you lots of screencaptures. Then place one image after the next in a new animation in ANIMATION SHOP 3. It's a much easier way. The only problem is that the animation has the potential to be choppy.
2>
The goal of finding the right texture is making sure the gif does not take up all the 100x100 spot or more than likely, to gif size will be too big. This texture provides an interesting looking border of a potential small gif. Sometimes it'll be hard to find such a good texture. In my own icon I created my own borders and put another picture of her on the side to accomplish the fact.
3> You can change pretty much any image on PSP 7 to a brush. The ligheter an image is- the more transparent it will become; and all brushes loose their color. (Duh).
Simply select what you want to be part of the brush with the selection tool. Then, click the PAINTBRUSH option> then click the little paintbrush icon on the "tool option" pallet. There you will click >CUSTOM. A new pop up box will come up and there will be four options. Pick "Create" and whatever you have selected will become a brush.

4>
There you will see two things. The first is F:# and D:#. F is the frame number and goes in sequence. D is the how many 1:100 of a second the frame is shown. You can change D by selected the frame you want (to select multiple frames hold down shift and highlight all of them) and press ALT+Enter to take you to Frame properties. There you change your frame time.

Cross posted in my own journal splintered_soul
I am using Animation Shop 3 and PSP 7 but all of my steps should be easily translatable to any other program.
Final icon will look like this:

Ok.
1.
I start of with an animation gif capped by me. (1)
The gif was too big and the file size was large- around 36 frames. You'll be lucky to fit in ten [frames]. So I deleted a lot of the frames and kept only the essentials.
The gif is now 13 frames (final size of the gif was 37 KB- so I could have put one or two more frames in tere but oh well)

2.
Then I took a texture by the amazing colorfilter. (2)

I changed it into a brush on my PSP 7 (3)
3.
And then hardlighted the actual texture over it. I erased a the white part in the middle of the gif to make it transparent. This is the trickiest part of the entire process.

4.
Next I opened my gif in ANIMATION SHOP 3. (4)
First I resize the animation to 75% so it will fit easier in the texture. Animation>Resize or Shift+S. Make sure it's on "smartsize."
5.
Then I copy (select the frame and there should be a blue red highlight and press crl+C) frame 1 into the layer below the textured layer. I have to reposition it to my liking.
If you want to make things easier, make a new layer (Which I will mark invisible later) above it and place two dots where the outlines of the frames are. That way I can easily position each frame by lining it up with the dots.
6.
Then I duplicate my frame image and set it to burn , about 10%. The change is negligible but I do think the small contrast makes it more distinct through later textures.
7.

Then I fill a new layer with color #F75D59. I set it to hardlight- 40%.

-->

8.
I duplicate colorfilter's texture, drag it to the top, and set it to multiply 100%.

-->

9.
Then I take another of colorfilter's texture and set it to overlay 100%

-->

10.
Colorfilter's texture had some SMALL text that got lost, but I thought it was pretty. So I took a light color from the icon using color drop and with the color ##FFEFE0 I went to the text tool and typed in a prase with text set at size #3, Georgia and placed it accordingly on the icon

-->

11.
With the same color and same font type, I only change the size (6? 7? I can't remember -___-) and type in the word EXHALE in caps. I positioned accordingly.
12.
However, I thought the word exhale wasn't distinct enough, so I duplicated the layer that EXHALE was on to make it brighter.

13
Then I right click >copy merged. Then I paste it into Animations Shop 3> New animation.
Here comes the easy, but amazingly tedious part.
14
I repeat steps 5 &6 (copying each fame of the gif into the layer below the textures but above the before frame images, and then duplicating it and setting it to burn 10%). Make sure all the framed images are positioned directly above eachother. The annoying part is that because if you try to move and images around, it will automatically select the highest layer. So strike all the above textured images invisible before inserting the frame.

15
Once you get it to the right position make the other layers visible again. Copy, merge visible it again. And the paste it into the frame AFTER the current frame frame. (Shift+Ctrl L)

Rinse. repeat.
Now there are four similar frames. But the gif changes positions after the four frames.
16
Because of this, you must now reposition the next frames to your liking. (once again, if you want- put a new marker frame that helps you position the other frames later on with red dots)
Once I do that, I duplicate the frame and set it to burn 45%.
17
I then repeat number 14. Repeat 13. Until I'm satisfied with I have.

The end result, I have 13 frames and 34 layers.
And thus, we are done. :D.
FOOTNOTES
(1) Gif capping is easy. Narutoex. supplies a good number of small animations for Naruto gifs. If you want to make your own, there's a couple of ways you can do so.
Gif capping using strictly Animation Shop is the best way to get the smoothest animations. You can open certain files on Animation shop (.avi's, ect) where it will open the movie in frames. Unfortunately, there are hundreds/tens of thousands of frames in a single episode and, at best, you might be able to open about 100. Choosing the right numbers if really just a combination of guesstimates and trial and error.
When opening the episode, a pop up box will show up. Deselect All Frames and choose Frames and there will be a 1 to (in this case) 33201. Check the box at the bottom that says "merge identical frames" then choose "take sample for every ____ frames". This makes it easier to get a broader range. Since you can open about 100- if you choose "take sample for every 5 frames" you can choose Frames: "1000-1500" (originally the 1 to large number)

Another, easier, way to do it is to open BS Player (or any other screencaping capable program) and then continously press "P" giving you lots of screencaptures. Then place one image after the next in a new animation in ANIMATION SHOP 3. It's a much easier way. The only problem is that the animation has the potential to be choppy.
2>
The goal of finding the right texture is making sure the gif does not take up all the 100x100 spot or more than likely, to gif size will be too big. This texture provides an interesting looking border of a potential small gif. Sometimes it'll be hard to find such a good texture. In my own icon I created my own borders and put another picture of her on the side to accomplish the fact.
3> You can change pretty much any image on PSP 7 to a brush. The ligheter an image is- the more transparent it will become; and all brushes loose their color. (Duh).
Simply select what you want to be part of the brush with the selection tool. Then, click the PAINTBRUSH option> then click the little paintbrush icon on the "tool option" pallet. There you will click >CUSTOM. A new pop up box will come up and there will be four options. Pick "Create" and whatever you have selected will become a brush.

4>
There you will see two things. The first is F:# and D:#. F is the frame number and goes in sequence. D is the how many 1:100 of a second the frame is shown. You can change D by selected the frame you want (to select multiple frames hold down shift and highlight all of them) and press ALT+Enter to take you to Frame properties. There you change your frame time.

Cross posted in my own journal splintered_soul