(no subject)
to

Just a fun simplistic tutorial I created in Photoshop 7. Don't ask me if this works in PSP because I have no clue.
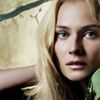
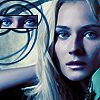
1) I started off with a larger version of the image below.
image I started with:
I cut the eyes out of the pictures and used THIS tutorial to color the eyes a nice blue color.
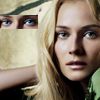
2) Now add a 1 pixel border around the eyes cutout (Layer>>Layer Style>>Stroke). Make sure it's set to 1px, inside, and the color is black (or white I guess you can choose your color)
3) Next you want to add some sort of brush or decoration underneath the cutout. I used a kind of swirl brush from manstomper.com but you can use and brush you want.
Note: If the brush appears too light then duplicate the layer. Make sure that the layer with the brush is underneath the cutout but above the base/background image
4) Now you want to flatten the entire image (Layer>>Flatten Image). Now duplicate the one and only layer you should have.
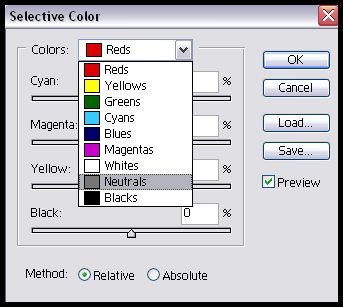
5) Select the top layer. Now go to Image>> Adjustments>> Selective Color.
6) A window should appear on the screen now. There should be a dropdown box at the top of this pop-up that currently says "Reds". Hit the little down arrow on the drop down box and select "Neutrals".
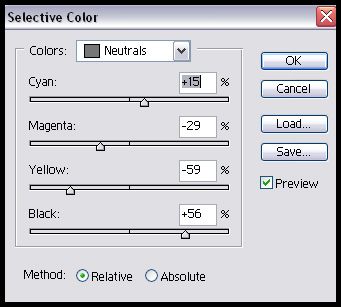
7) Now you should play around with the settings a little. These are the setting I used but really you should play around with them a bit since my setting will come out different on every image.
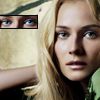
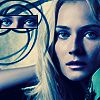
8)Now sharpen the image (Filter>> Sharpen>> Sharpen). This is what I have so far:
< img src="http://img.photobucket.com/albums/v310/base_ment/images/8.jpg">
9) Duplicate the layer that you just applied your coloring to and set it to "softlight"
10) Next I made a new layer between the layer that I set to softlight and the layer the I first applied the selective coloring to. I filled it with #002157 and set the layer mode to "Exclusion"
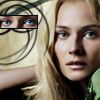
11) Now I used the square shape tool to make a white box at the bottom of my image. Then I added text. For the text I used the font "arial" for both the big and little text set to caps lock. The little text is size 4 and the big text is size 9.
Note: I just selected colors from my image to use for the text colors

12) Now flatten the image again (layer>> flatten image). Go to Filter>> Sharpen>> Sharpen to sharpen the entire image once. Does it look too sharp? If it does then go to Edit>>Fade Sharpen and drag the bar down to however visible you want the sharpness to be.
13) Now you're done!