12 steps: How to make 2 gifs play in one icon
My first tutorial I really have no idea if this is intermediate or advance. I learn backwards, I can do an animated icon better than a regular one. Any who, here’s a tutorial for anyone who wants to make a double anicon (or whatever you call it). 2gifs in one. This will be a lot easier if you’ve made animated icons before.
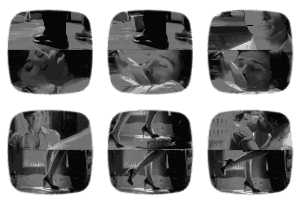
Program: CS3 Extended
Involves: How to import & Time Setting
Translateable: I don't think so maybe if you have CS4
Steps: 12 maybe less if you've made an animated icon before
Difficulty: Intermidate I guess
PSD: included (dunno if it will help you but it is after tut)
Warning: Boring/ image heavy post
1. Make sure everything is capped.
2. Scripts>Load files into stack
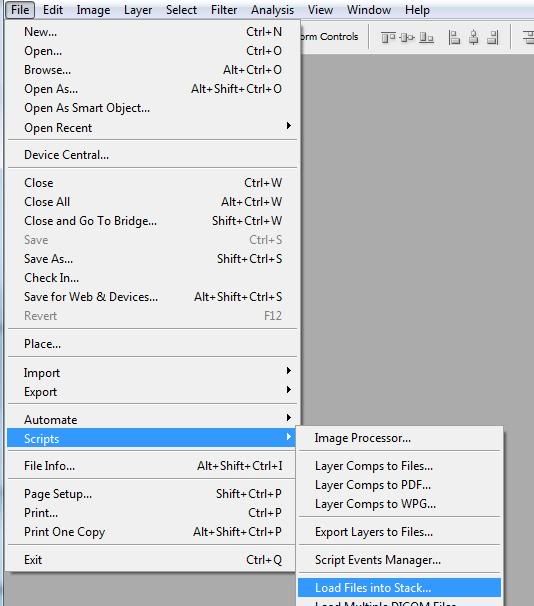
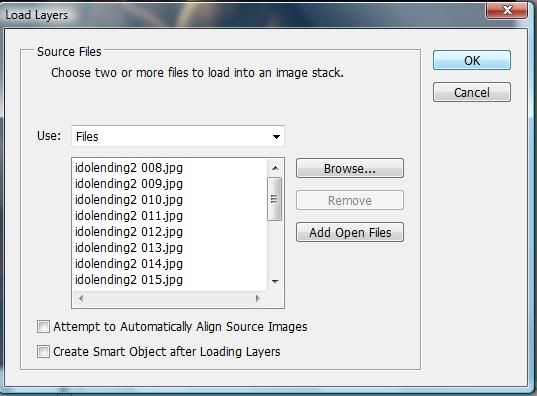
Do this twice once with the clip you want at the bottom then the one at the top. You may want to have them with the same amount. Or you can duplicate/delete layers after you’ve uploaded the files it makes things easier if they are the same.
3. Now that you have your two files open you should resize them.
I suggest 100x50 or lower (i.e. 95x50 85x50) if you want to save space due to the LJ limit just make sure the height is 50 or lower or the images will not fit. For this tutorial I will use 100x50.
Image>Image Size 100x50 Now they look like this
4. Now we move on to animating.
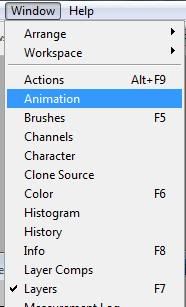
Window>Animation once you do that it will look like this
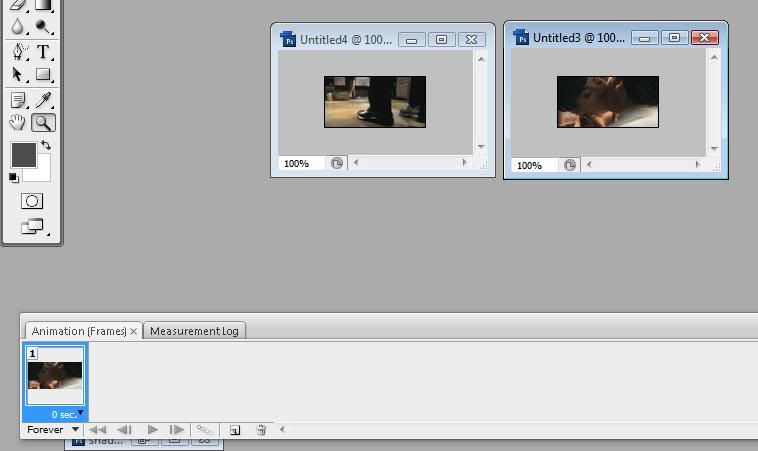
5. Now we need to turn them into frames.
Hit the little guy in the red circle and hit make frames from layers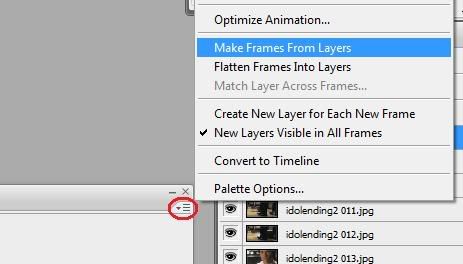
Your animation will come out backwards so we hit reverse frames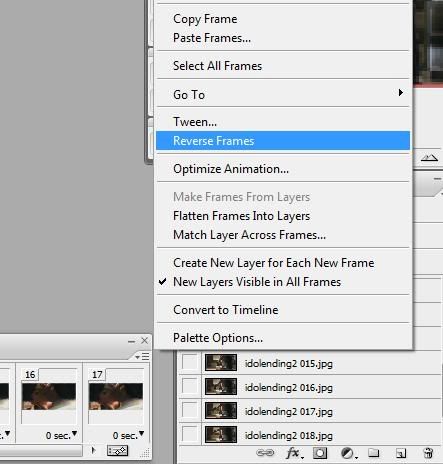
Repeat step for the second animation
6. Now that we have everything in frames we are going to make the actual icon.
Select animation you want at the bottom of your icon. It will be your base. Now we are going to turn it into an icon
Image>Canvas Size
It should say 100x50 (if you are doing it my way) we will change
Change 50 inches to pixels
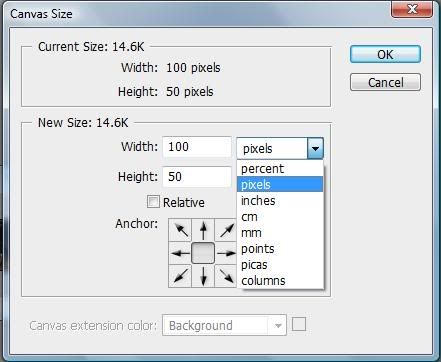
and make it 100. Hit the bottom arrow and it will look like
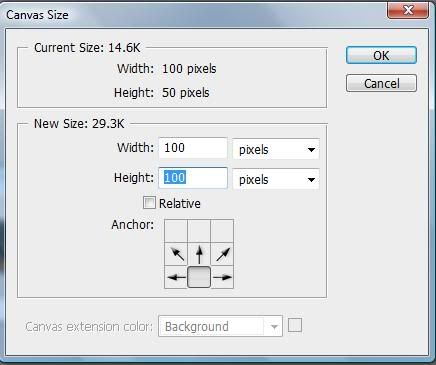
MAKE SURE you do that or you will have to undo and do it again.
Now you have your icon base
7. Now we go to the animation that you want at the top of your icon
Hit the icon that I showed you before in the red circle by the animation and hit select all frames. Again hit the same icon from the red circle and hit copy frames
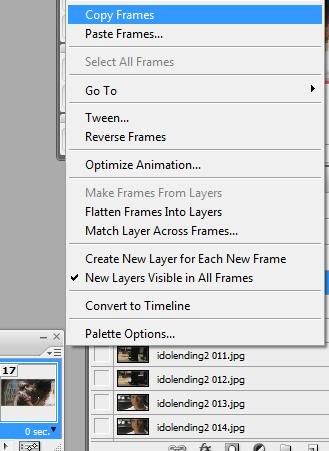
8. Now we are going to go back to the second animation with the canvas
Hit the icon from the red circle and select all frames. This time we will hit paste frames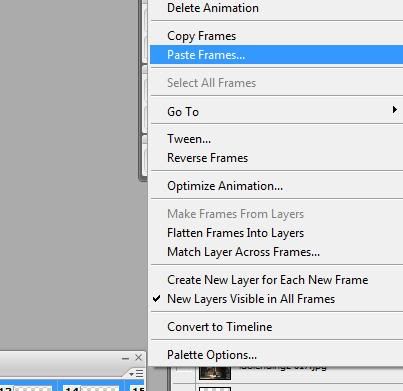
now a little window will pop up make sure you hit paste OVER selection
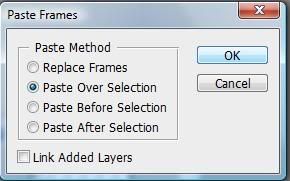
It should look like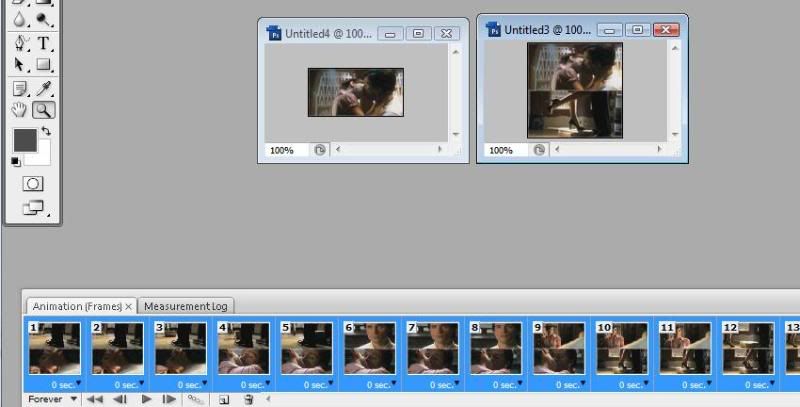
now
You no longer need the top gif. Ignore it. You've copied them where they are needed.
9. Now that you have everything together you can start to edit the actual Icon
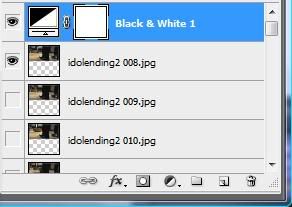
You can treat this like a regular animated icon now. I decided to do black & white make sure you drag to the top or it will NOT show on all frames
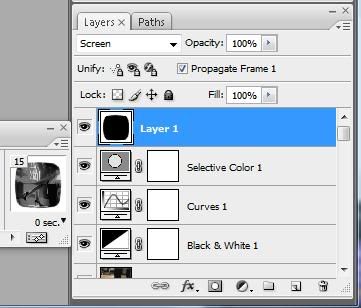
10. Then I add a nice little texture SORRY forgot who its by but that person is credit under my profile/resources
(Screen-100%) to make it look decent I use this obviously you can use whatever you want.
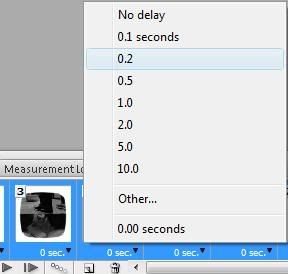
11. Final step timing hit the little icon from the red circle and select all frames then we edit timing press play and see if it is 2 ur liking. Edit if it isn’t move to step 12 if its fine.
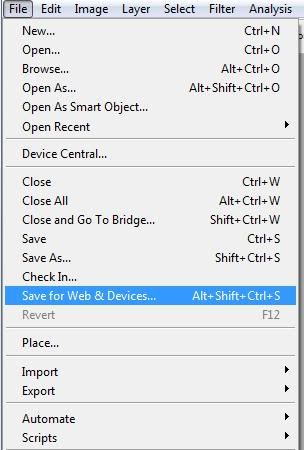
12. Now we are done hit File>Save for Web and devices make sure everything fits LJs needs and YOU ARE DONE!
I included a .PSD HERE I dunno if that will help but it is there if you need it.
This is my first tutorial meant for people who know how to make icons but this one little fact kept bothering them (like it did me). If I left out an important tag please tell me. I'll take any questions if you have them/I left anything out. I hope this helped! Enjoy!

Program: CS3 Extended
Involves: How to import & Time Setting
Translateable: I don't think so maybe if you have CS4
Steps: 12 maybe less if you've made an animated icon before
Difficulty: Intermidate I guess
PSD: included (dunno if it will help you but it is after tut)
Warning: Boring/ image heavy post
1. Make sure everything is capped.
2. Scripts>Load files into stack


Do this twice once with the clip you want at the bottom then the one at the top. You may want to have them with the same amount. Or you can duplicate/delete layers after you’ve uploaded the files it makes things easier if they are the same.
3. Now that you have your two files open you should resize them.
I suggest 100x50 or lower (i.e. 95x50 85x50) if you want to save space due to the LJ limit just make sure the height is 50 or lower or the images will not fit. For this tutorial I will use 100x50.
Image>Image Size 100x50 Now they look like this

4. Now we move on to animating.

Window>Animation once you do that it will look like this

5. Now we need to turn them into frames.
Hit the little guy in the red circle and hit make frames from layers

Your animation will come out backwards so we hit reverse frames

Repeat step for the second animation
6. Now that we have everything in frames we are going to make the actual icon.
Select animation you want at the bottom of your icon. It will be your base. Now we are going to turn it into an icon
Image>Canvas Size
It should say 100x50 (if you are doing it my way) we will change
Change 50 inches to pixels

and make it 100. Hit the bottom arrow and it will look like

MAKE SURE you do that or you will have to undo and do it again.
Now you have your icon base
7. Now we go to the animation that you want at the top of your icon
Hit the icon that I showed you before in the red circle by the animation and hit select all frames. Again hit the same icon from the red circle and hit copy frames

8. Now we are going to go back to the second animation with the canvas
Hit the icon from the red circle and select all frames. This time we will hit paste frames

now a little window will pop up make sure you hit paste OVER selection

It should look like

now
You no longer need the top gif. Ignore it. You've copied them where they are needed.
9. Now that you have everything together you can start to edit the actual Icon
You can treat this like a regular animated icon now. I decided to do black & white make sure you drag to the top or it will NOT show on all frames

10. Then I add a nice little texture SORRY forgot who its by but that person is credit under my profile/resources

(Screen-100%) to make it look decent I use this obviously you can use whatever you want.

11. Final step timing hit the little icon from the red circle and select all frames then we edit timing press play and see if it is 2 ur liking. Edit if it isn’t move to step 12 if its fine.

12. Now we are done hit File>Save for Web and devices make sure everything fits LJs needs and YOU ARE DONE!

I included a .PSD HERE I dunno if that will help but it is there if you need it.
This is my first tutorial meant for people who know how to make icons but this one little fact kept bothering them (like it did me). If I left out an important tag please tell me. I'll take any questions if you have them/I left anything out. I hope this helped! Enjoy!