Tutorial #03
A tutorial requested by
hungrybookworm :3 won 2nd at
clamp_icontest in week 144.
From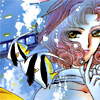
to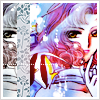
Icon made in: Adobe Photoshop CS

>
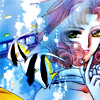
1. Duplicate your base and set it to SOFT LIGHT 100%. Press Ctrl+A to select the new layer, then go to FILTER > BLUR > GAUSSIAN BLUR and set the radius to 1.0. Play with the radius until you get a result that you like.

>
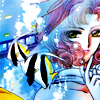
2. Slap on this light texture by
silverqe, SOFT LIGHT 100%

>
3. Use the original base again and set it to SOFT LIGHT 75% on the icon.

>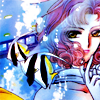
4. Slap on this dark pink colour layer (#9F5073), SOFT LIGHT 78%.

>
5. Apply on this texture by
silverqe and set it to SOFT LIGHT 75%.

>
6. Slap onto the original base ^^" SOFT LIGHT 100%.
>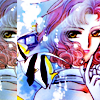
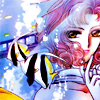
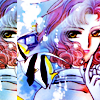
7. Crop a little bit of Karen from the original base and use the move tool and drag it on the very left of the icon (like I did *points above*)

>
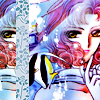
8. Now to make the left small part a little brightened and not so smudged or dark, use the small bit cropped Karen again, dragged it to the very left and set it to OVERLAY 100%.

>
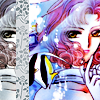
9. Apply this pattern by
77words onto the icon and use the move tool and drag it to where I placed mine *points above*

>
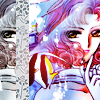
10. Use this black colour layer (#000000) and set it to SATURATION 75%. Use the eraser tool and erase the right side of the icon. So only the small cropped part of Karen on the left and the pattern is saturated.

>
11. Slap this light texture on and set it to SCREEN 100%.
Add tiny text and border, then you're done!
Final product:
~~~
How was the tutorial? Helpful? Easy? Confusing? Feedbacks would be wonderful!
x Like what you see? JOIN
ichiyohime fore more updates~~ :3
hungrybookworm :3 won 2nd at
clamp_icontest in week 144.
From

to
Icon made in: Adobe Photoshop CS

>

1. Duplicate your base and set it to SOFT LIGHT 100%. Press Ctrl+A to select the new layer, then go to FILTER > BLUR > GAUSSIAN BLUR and set the radius to 1.0. Play with the radius until you get a result that you like.

>

2. Slap on this light texture by
silverqe, SOFT LIGHT 100%

>

3. Use the original base again and set it to SOFT LIGHT 75% on the icon.

>

4. Slap on this dark pink colour layer (#9F5073), SOFT LIGHT 78%.

>

5. Apply on this texture by
silverqe and set it to SOFT LIGHT 75%.

>

6. Slap onto the original base ^^" SOFT LIGHT 100%.

>

7. Crop a little bit of Karen from the original base and use the move tool and drag it on the very left of the icon (like I did *points above*)

>

8. Now to make the left small part a little brightened and not so smudged or dark, use the small bit cropped Karen again, dragged it to the very left and set it to OVERLAY 100%.

>

9. Apply this pattern by
77words onto the icon and use the move tool and drag it to where I placed mine *points above*

>

10. Use this black colour layer (#000000) and set it to SATURATION 75%. Use the eraser tool and erase the right side of the icon. So only the small cropped part of Karen on the left and the pattern is saturated.

>

11. Slap this light texture on and set it to SCREEN 100%.
Add tiny text and border, then you're done!
Final product:
~~~
How was the tutorial? Helpful? Easy? Confusing? Feedbacks would be wonderful!
x Like what you see? JOIN
ichiyohime fore more updates~~ :3