? 24 chai; tut 09; bleach no renji
From 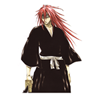
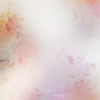
to
12 steps; Color Fill Layer, Selective Coloring, Channel Mixer, Hue/Saturation; not translatable to other programs than Photoshop.
? Crediting is not necessary
? If you try this tutorial, feel free to show your result to me
A Start with your base. I covered the bottom with a soft brush and white to make the change from Renji to the background smoother.
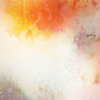
B Then I used this texture (by azuremonkey), flipped it 180° and set it to Multiply at 100%.
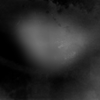
C Another texture, yay! This time I used this one (by azuremonkey, too). I erased the parts where the texture covers Renji too much and set it to Soft Light at 100%.
D Layer -> New Adjustment Layers -> Selective Color
REDS -61, 34, 39, 0
YELLOWS 0, -31, -16, 28
NEUTRALS -11, 0, 0, 12
BLACKS 0, 11, 14, 13
E Color Fill Layer with #260505 set to Exclusion at 51%.
F Color Fill Layer with #200631 set to Exclusion at 33%.
G Layer -> New Adjustment Layers -> Hue/Saturation
MASTER 0, 24, 0
H Layer -> New Adjustment Layers -> Channel Mixer
RED 100, 18, -32; 12
GREEN -3, 104, -10; 3
BLUE -9, -20, 126; 6
I I took this texture then (don't know who the maker is, if you know: please tell me!) and set it to Soft Light at 100%.
J Then paste this texture (by droppingtear) on the bottom half of your picture and set it to Lighten at 61%.
K Nearly finished, just doing the text-thing. I used Carnivalee Freakshow for "I will forgive you", color: #AB1F21, 15pt, and Times New Roman for "when you come back", color: #AB1F21, 8pt.
to
12 steps; Color Fill Layer, Selective Coloring, Channel Mixer, Hue/Saturation; not translatable to other programs than Photoshop.
? Crediting is not necessary
? If you try this tutorial, feel free to show your result to me
A Start with your base. I covered the bottom with a soft brush and white to make the change from Renji to the background smoother.
B Then I used this texture (by azuremonkey), flipped it 180° and set it to Multiply at 100%.
C Another texture, yay! This time I used this one (by azuremonkey, too). I erased the parts where the texture covers Renji too much and set it to Soft Light at 100%.
D Layer -> New Adjustment Layers -> Selective Color
REDS -61, 34, 39, 0
YELLOWS 0, -31, -16, 28
NEUTRALS -11, 0, 0, 12
BLACKS 0, 11, 14, 13
E Color Fill Layer with #260505 set to Exclusion at 51%.
F Color Fill Layer with #200631 set to Exclusion at 33%.
G Layer -> New Adjustment Layers -> Hue/Saturation
MASTER 0, 24, 0
H Layer -> New Adjustment Layers -> Channel Mixer
RED 100, 18, -32; 12
GREEN -3, 104, -10; 3
BLUE -9, -20, 126; 6
I I took this texture then (don't know who the maker is, if you know: please tell me!) and set it to Soft Light at 100%.
J Then paste this texture (by droppingtear) on the bottom half of your picture and set it to Lighten at 61%.
K Nearly finished, just doing the text-thing. I used Carnivalee Freakshow for "I will forgive you", color: #AB1F21, 15pt, and Times New Roman for "when you come back", color: #AB1F21, 8pt.