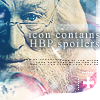
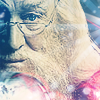
Tutorial #5: Greatest Wizard of our Time
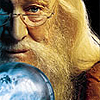
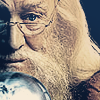
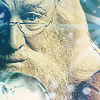
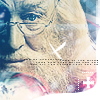
Today we are going from:
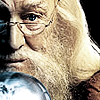
-->
First, cut and crop your pic, and sharpen it once(or twice). My cap is from Hogwarts Gallery.
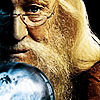
It's important that your icon have these big shadows, and the blue helps a bit too. If your icon doesn't, raise the contrast a bit. Also you can go to "Image->Adjustments->Color Balence", under there you can raise the shadows to more blue.
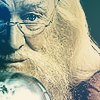
Anywho, copy the base layer twice. Desaturate both and set them to soft light.
Now, duplicate the desaturated layer and set it to screen. It should be at about 80%.
Next, set this gradient to Exclusion, 47% opacity. Gradients are from crumblingwalls

-->
Set this gradient to soft light, 100%.

-->
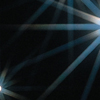
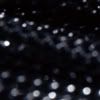
Now for the light textures, which are from colorfilter. Set this one to screen.
-->
Set this one to screen also, but this time the lights are covering his face a bit too much, so erase the dots on his face.
-->
This is my FAVORITE bit of light texture. Set this one, also, to screen.
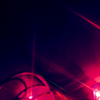
-->
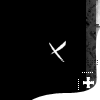
Now add these brushes. I got them from Hybrid Genesis. I've provided this image that you can just set to screen if you don't want to download the brushes. Also, add some tiny text, just random words at 2pt.
-->
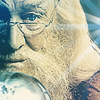
Now, the font I used is 11pt Times New Roman, with 100 as the spacing. To make it glow double-click or right click the text layer so you can go into the Blending Options. Select a drop shadow. Set distance to 0, spread-13%, and size-px. For the color, just pick up any dark blue from the image. I used #0A2E4C. Set opacity to 75%.
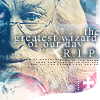
The end! I hope you've enjoyed this little tutorial, and if you use it I would LOVE to see your icons! If you have any questions, feel free to leave a comment.
-->
First, cut and crop your pic, and sharpen it once(or twice). My cap is from Hogwarts Gallery.
It's important that your icon have these big shadows, and the blue helps a bit too. If your icon doesn't, raise the contrast a bit. Also you can go to "Image->Adjustments->Color Balence", under there you can raise the shadows to more blue.
Anywho, copy the base layer twice. Desaturate both and set them to soft light.
Now, duplicate the desaturated layer and set it to screen. It should be at about 80%.
Next, set this gradient to Exclusion, 47% opacity. Gradients are from crumblingwalls
-->
Set this gradient to soft light, 100%.
-->
Now for the light textures, which are from colorfilter. Set this one to screen.
-->
Set this one to screen also, but this time the lights are covering his face a bit too much, so erase the dots on his face.
-->
This is my FAVORITE bit of light texture. Set this one, also, to screen.
-->
Now add these brushes. I got them from Hybrid Genesis. I've provided this image that you can just set to screen if you don't want to download the brushes. Also, add some tiny text, just random words at 2pt.
-->
Now, the font I used is 11pt Times New Roman, with 100 as the spacing. To make it glow double-click or right click the text layer so you can go into the Blending Options. Select a drop shadow. Set distance to 0, spread-13%, and size-px. For the color, just pick up any dark blue from the image. I used #0A2E4C. Set opacity to 75%.
The end! I hope you've enjoyed this little tutorial, and if you use it I would LOVE to see your icons! If you have any questions, feel free to leave a comment.