icon tutorial
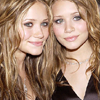
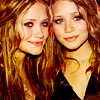
How to go from:
this
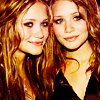
to
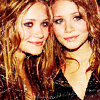
+ with Adobe Photoshop
1- you start with your base:
2- Duplicate your base, set to Soft Light 100% (if your image was dark, add a screen layer)
3- add a selective coloring layer, change to:
Reds:
C: -60
M: 0
Y: 100
B: 100
Yellows:
C: 100
4- Add a new layer, fill with #01101E -- set to exclusion 100%

5- Add a new layer, fill with #F6E1F1 -- set to Color Burn 100% (Burn)

6- Copy this texture, set to Color Burn 60%

>>
7- Duplicate your base, drag to top, set to Soft Light 100%
8- last step, add this texture, set to screen 100%

>>
and you're done ^___^