(no subject)
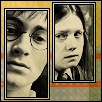
A very very simple icon tutorial but is quite detailed for beginners.
Program:PSP 9
Level:So easy its almost criminal
Go from
and
to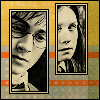
The first part of this tutorial is basically creating the black and white base picture. I'm only going to go through Harry's side because Ginny's steps are exactly the same.
1)Start out with this base>flip>sharpen twice>Automatic Contrast Enhancment set at lighter/normal/bold

--
--
--
2)Use the softening tool and touch up the skin. Avoid the eyes, lips and nostrals

3)Duplicate>set to soft light at 100%

4)Merge all your layers>desaturate (shortcut: SHIFT L)

5)Duplicate base>set to soft light at 100%

6)Merge layers>Enhance photo>clarify>set to 5

7)Enhance photos>Automatic contrast enhancement> darker/normal/bold (Do this 2 or three times until you are satisfied in how it looks)>touch up the photo with the softening tool

--
GINNY

--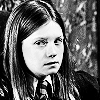
Same thing
SECOND PART
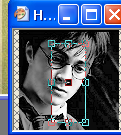
1B)On the Harry icon base crop about a 35x80px section. Be creative with your crop. :)
--
2B) Do the same with Ginny. I cropped a bit smaller (about 25x65)

3B) On both of the cropped images I put 3 1px borders on. 1px black -- 1px white -- 1px black


4B) Paste both of these images onto this texture by grrliz. Arrange creativly.

--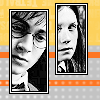
5B) Paste this other texture by grrliz on top of everything and set it to multipy to finish your icon! I added a 1px border around it.

--
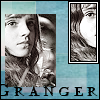
Other examples


Program:PSP 9
Level:So easy its almost criminal
Go from

and

to

The first part of this tutorial is basically creating the black and white base picture. I'm only going to go through Harry's side because Ginny's steps are exactly the same.
1)Start out with this base>flip>sharpen twice>Automatic Contrast Enhancment set at lighter/normal/bold

--

--

--

2)Use the softening tool and touch up the skin. Avoid the eyes, lips and nostrals

3)Duplicate>set to soft light at 100%

4)Merge all your layers>desaturate (shortcut: SHIFT L)

5)Duplicate base>set to soft light at 100%

6)Merge layers>Enhance photo>clarify>set to 5

7)Enhance photos>Automatic contrast enhancement> darker/normal/bold (Do this 2 or three times until you are satisfied in how it looks)>touch up the photo with the softening tool

--

GINNY

--

Same thing
SECOND PART
1B)On the Harry icon base crop about a 35x80px section. Be creative with your crop. :)

--

2B) Do the same with Ginny. I cropped a bit smaller (about 25x65)

3B) On both of the cropped images I put 3 1px borders on. 1px black -- 1px white -- 1px black


4B) Paste both of these images onto this texture by grrliz. Arrange creativly.

--

5B) Paste this other texture by grrliz on top of everything and set it to multipy to finish your icon! I added a 1px border around it.

--

Other examples
