Full Icon Tutorial: Variations, Layer Masking, and Vibrant Coloring
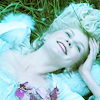
Going from 
to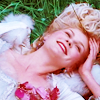
01. Crop your screencap to 100x100. We will be using this screencap of Kirsten Dunst from the Marie Antoinette trailer (capped by exclusivelove).

02. Duplicate your base and set the blend mode to 'Screen'. Merge your layers (Ctrl E).
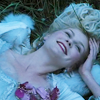
03. Go to Image>Adjustments>Variations. Make sure that 'Midtones' is selected and that the pointer is halfway between 'Fine' and 'Coarse'. Click 'More Yellow' and 'More Red' once each. Click 'OK'.
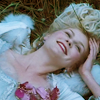
04. Duplicate your new base and set the blend mode to 'Screen'.
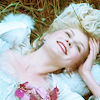
05. Create a new solid color fill layer of #00CCFF (Layer> New Fill Layer>Solid Color). Set the blend mode to 'Overlay', at 44%.
06. Reset your colors (D). Create a layer mask by clicking the
icon in the Layers palette. Fill the mask layer with Black (Shift F5). Using a soft default brush (5px Diameter, 0% Hardness), paint the grass surrounding Kirsten with White. You may need to change the brush diameter to 3px for detailed areas.

07. Create a new solid fill layer of #FFDDDD and set the blend mode to 'Color Burn'. Create another layer mask and right-click on the layer mask image from the previous layer in the Layers palette. Click 'Set Selection To Layer Mask'. Now select your newest layer mask and fill the selection with Black (Shift F5).
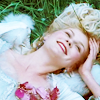
08. Create a third solid color fill layer, this time of #AF2548. Set the blend mode to 'Soft Light'. Right-click the layer mask image from the first layer in the Layers palette. Click 'Set Selection To Layer Mask'. Now select your newest layer mask and fill the selection with Black (Shift F5).

You're done! Thanks for reading, and if you have any questions/comments, please feel free to post them here.
Other tutorials by me:


to

01. Crop your screencap to 100x100. We will be using this screencap of Kirsten Dunst from the Marie Antoinette trailer (capped by exclusivelove).

02. Duplicate your base and set the blend mode to 'Screen'. Merge your layers (Ctrl E).

03. Go to Image>Adjustments>Variations. Make sure that 'Midtones' is selected and that the pointer is halfway between 'Fine' and 'Coarse'. Click 'More Yellow' and 'More Red' once each. Click 'OK'.

04. Duplicate your new base and set the blend mode to 'Screen'.

05. Create a new solid color fill layer of #00CCFF (Layer> New Fill Layer>Solid Color). Set the blend mode to 'Overlay', at 44%.

06. Reset your colors (D). Create a layer mask by clicking the
icon in the Layers palette. Fill the mask layer with Black (Shift F5). Using a soft default brush (5px Diameter, 0% Hardness), paint the grass surrounding Kirsten with White. You may need to change the brush diameter to 3px for detailed areas.

07. Create a new solid fill layer of #FFDDDD and set the blend mode to 'Color Burn'. Create another layer mask and right-click on the layer mask image from the previous layer in the Layers palette. Click 'Set Selection To Layer Mask'. Now select your newest layer mask and fill the selection with Black (Shift F5).

08. Create a third solid color fill layer, this time of #AF2548. Set the blend mode to 'Soft Light'. Right-click the layer mask image from the first layer in the Layers palette. Click 'Set Selection To Layer Mask'. Now select your newest layer mask and fill the selection with Black (Shift F5).

You're done! Thanks for reading, and if you have any questions/comments, please feel free to post them here.
Other tutorials by me:

