GRAPHIC TUTORIALS: BLEND MODES, BRUSHES, TEXTURES
I didn't realize I never posted the last part in my tutorial series, my apologies!
Program(s): Paint Shop Pro 9
Involves: Basic tips
Translatable: It's quite specific to PSP, but is translatable to most other programs.
Steps: 0 - It's just a list of tips.
Difficulty: Beginner
The main purpose of textures and brushes are to enhance your image, not completely distract from it. You want to attain a certain effect, not compromise the integrity of your base image. Because as I’ve continually said before you add textures, brushes or text you need a quality base image. When using certain textures or brushes however there are times when you create the base to match or fit them. Even on that occasion you still need to concentrate on the quality of that image, don’t let the brush or texture distract you.
NOTE: These do's, don'ts and tips are written based on the assumption you have read the previous tutorials. These tutorials are to be used as steps. By this point you should be somewhat more comfortable in the basics and tools of your Paint Shop Pro.

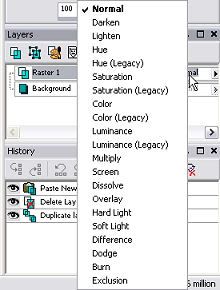
BLEND MODES: Normal. Darken. Lighten. Hue. Hue (Legacy). Saturation. Saturation (Legacy). Color. Color (Legacy). Lumincance. Luminance (Legacy). Multiply. Screen. Dissolve. Overlay. Hardlight. Softlight. Difference. Dodge. Burn. Exclusion.
You can set a layer (except your background layer) to any one of those. But what do they do? Sure many of them are fairly self explanitory, but when do you know which to choose? Here I'm going to try and explain when and with what I'd use each 'Blend Mode'.
NORMAL
Normal is normal. There is no special effect, you cannot see through it. You can erase parts of it or stamp a brush onto it, but it is what it is.
+
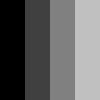
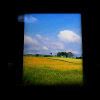
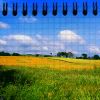
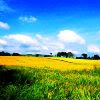
DARKEN/LIGHTEN
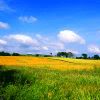
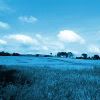
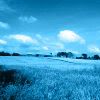
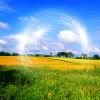
These two do the same thing, only at opposite ends of the spectrum. It sounds simple enough, but when you use a brush and set it to Darken the darker parts of that brush is what you will see the most of over your base image. Set it to lighten and the lightest parts of the brush will be seen over your base image.
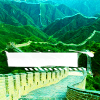
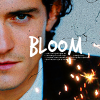
I use lighten to add light textures (though I mostly use screen - see below).
Light texture by masterjinn @ deviantart.
+
/
DARKEN / LIGHTEN
HUE/HUE(LEGACY)
COLOR/COLOR(LEGACY)
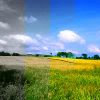
These are all really very similar. Basically, if you make a new layer and fill it with a color or brush and set it to any of these blend modes the background with be tinted with the color of your new layer. The difference between the regular and legacy is the contrast.
+
/
HUE / HUE (LEGACY)
/
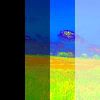
SATURATION / SATURATION (LEGACY)
SATURATION/SAT.(LEGACY)
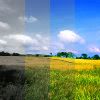
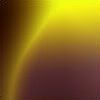
When you make a new layer and fill it with a color or texture and set it to this it can make the colors in your base image either duller or brighter (higher saturation of colors). Again, the difference between regular saturation and the one with legacy is basically just the contrast.
I've used different tones on the layers to show the different variations without having to make four different icons.
+
/
SATURATION / SATURATION (LEGACY)
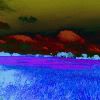
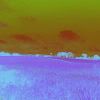
LUMINANCE/LUM.(LEGAGY)
I never use this blend mode. There may very well be a brilliant way to use it, but I haven’t been patient enough to experiment with it. Basically what it seems to do is make the colors in your icon base become as saturated as possible, usual to a degree and contrast that is undesirable. Even when I change the opacity percentage I’m not very happy with the effect achieved. It doesn’t even matter what color you use, only what brightness.
I've used different tones on the layers to show the different variations without having to make four different icons.
+
/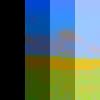
LUMINANCE / LUMINANCE (LEGACY)
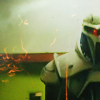
MULTIPLY
This is one of the blend modes I use most and find most useful for adding textures and brushes.
When you set a brush to multiply all the darkest areas will stay normal and the lighter areas will be see through. Though only the black areas will stay, anything lighter will be come slightly see through, but the darker it is the darker it makes the base image below it.
First brush by threeeyespei.
Second brush by deleted user.
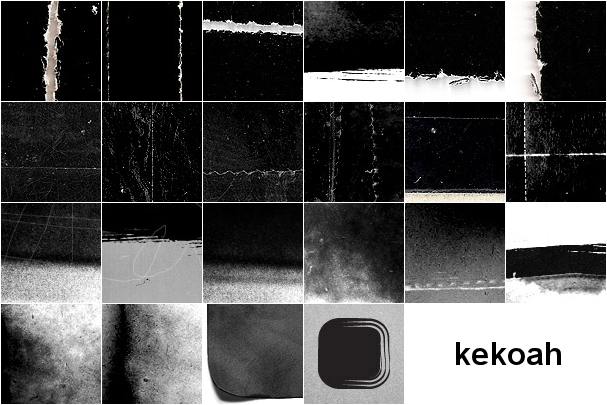
Third brush by kekoah.
+
=
+
=
+
=
SCREEN
This is the opposite of Multiply. I didn't put them together because I use them so much I felt they deserved seperate descriptions.
When you set a layer to screen all the lightest parts will show up, the darkest parts will be harder to see. I mainly use this blend mode for light textures.
First brush by innocent_lexys.
Second brush by deleted user.
Third brush by kekoah.
+
=
+
=
+
=
DISSOLVE
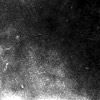
I've never found a use for this blend mode. I can't see what purpose it could serve for graphic making. No matter the opacity you set it at it will look like a bunch of dots.

100% AND 80% OPACITY
40% AND 10% OPACITY
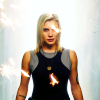
OVERLAY / DODGE
Overlay and Dodge are not exactly the same, but they are very similar. They both achieve the similar effect of brightening the base image. It's just that Dodge does it to a much higher degree. So for the most part you don't want to use dodge at 100% opacity. If you want it to be a little more subtle I suggest you set the layer to overlay.
I sometimes use overlay to achieve a brighter more contrasted icon. Try duplicating the base image and setting it to overlay, see what you get. Granted it won't work with every base, and you should be sure to fiddle with the opacity.
+
BASE IMAGE + NEW LAYER
/
OVERLAY W/ NEW LAYER AT 100% vs OVERLAY USING DUPLICATED BASE
/
DODGE AT 100% OPACITY vs DODGE AT 50% OPACITY
HARDLIGHT / SOFTLIGHT
I use these blend modes quite a bit. I tend to duplicate the bases and set them to either softlight or hardlight. It helps to give just a little more contrast and depth to an icon. They both do the same thing only Hardlight, as it's name implies... does it harder, to a slightly harsher degree.
/
/
BASE / BASE DUPLICATED & SET TO SOFTLIGHT / SET TO HARDLIGHT
DIFFERENCE / EXCLUSION
Again these achieve similar effects, just to different degrees. Depending on the color and brightness it can look a bit like a negative image.

NEW LAYER / DIFFERENCE / EXCLUSION

NEW LAYER / DIFFERENCE / EXCLUSION
BURN
This is basically the exact opposite of Dodge. In stead of brightening it will bring out the darker tones in your base image. The darker the brush or new layer, the darker the base image will be.
LIGHTER COLOR SET TO BURN
DARKER COLOR SET TO BURN / THEN SET TO 50% OPACITY

But what is a brush? Well, brushes I tend to liken to a stamp. If you can add it to your PSP brushes, enabling you to change the size and color then it's a brush. You wouldn't want to do that with a texture, as you'd mostly want to use them as-is.
Brushes can be any size, as you can always resize it for the icons. So perhaps the bigger the better, as resizing to make something smaller is best. Resizing to make something bigger will make it look grainy and of poor quality.
How do you make a brush in Paint Shop Pro? I explain it here.
BRUSH DON'Ts
You need to make the brush a part of the image. That means creating shadow, or perhaps erasing part of it with the eraser brush set to a lower percentage hardness. Slapping on a brush doesn't make it a good icon. Where you place the brush can make or break your icon. A perfectly good base can be wasted with poor brush placement. It's not just about placement either, the wrong color or size is just as disastrous.
To the right are examples of poor brush placement. Below this are the DO'S, how that particular brush should be used with each base.
Also, remember LAYERS ARE YOUR FRIEND. Always create a new rastor layer for EVERY brush you use. That way they are each seperate and can be moved around and edit seperately!
ICON 01 - ICON 02
ICON 03 - ICON 04
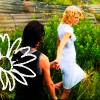
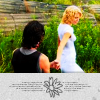
BRUSH DO'S - ICON 01
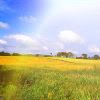
For this particular base slapping a flower brush on doesn't quite work. The people and grass already make it a bit busy. So let's use a technique we used for text: use a texture. I used the same texture and shadow technique as I did before.
Notice how in the second icon the flower brush isn't overpowering the image. However the color of the flower brush still ties it in with the image and makes the icon one cohesive unit. Again I added tiny text for a little more detail, but made sure to erase the part of the tiny text brush that was over the flower.
DON'T ------ DO
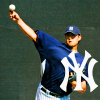
BRUSH DO'S - ICON 02
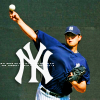
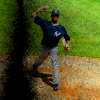
Placing a brush directly over your subject is a bad idea 98% of the time. I don't say 100% because there are always artistic exceptions. Until you've reached a level where you can tell the difference between artistic and just bad placement however, I suggest you offset your brush or place it in the less busiest part of your icon.
To correct this brush don't I just moved it over off the center of the subject. It's still partially on the subject, yes; but it's over a less busy area and the white shows up well against the dark blue. I added a shadow to the brush as well to really make it stand out. Yet again I've added tiny text. I like using it, I can't help it! If you don't like the way it looks then don't use it.
DON'T ------ DO
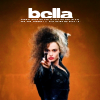
BRUSH DO'S - ICON 03
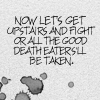
Like I said in Text: Tips and Suggestions, don't overuse tiny text! Slapping a tiny text brush on an icon to fill space can help, but not if it looks like an essay length brush like this icon don't. If I've said it once I've said it a dozen times: LESS IS MORE. If your subject is centered then put a small line of tiny text centered over top like I've done to the right.
Maybe add some real text as well, tiny text doesn't always look good alone. If you can't figure out what text or other brushes to use with the tiny text maybe the icon would just be better off plain.
DON'T ------ DO
BRUSH DO'S - ICON 04
One of the biggest issues I see with icons today is poor brush use. Please understand, putting a brush on an icon will not and cannot make it look better if you don't do it right! A bad base image cannot be made better with a random brush. And a good base image can be ruined by a bad choice in brush, I've seen it happen many more times then I would like. You may look at this brush DON't and think "Why would anyone do that?" I ask myself the same thing when I actually see people use brushes like this.
What I would do to correct this particular poor brush use is move it, make the brush a different size and use it much like I used the texture in Text Meets Texture. I gave the same larger brush a shadow (at 36% opacity) and added some text (Georgia, size 6) and tiny text. The new final product is better, not great, but better.
DON'T ------ DO
EXAMPLES
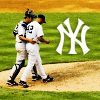
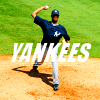
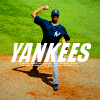
Here are a few more examples of icons with brushes. I tend not to use brushes very much. I mostly use tiny text, my Yankee symbol brush or any brush that will help text stand out. That doesn't mean other brushes wouldn't look good, but like I said I feel less is more.


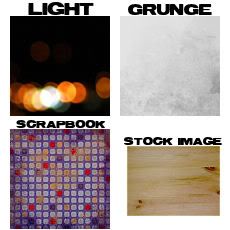
Now what is a texture, what's the difference between them and brushes? A texture is, obviously, something you use to add texture. It's not a simple stamp brush. It has a certain texture or design. It may be done in black and white or have a brilliant color scheme. They can be as simple as a light texture, added to give the icon some dabs of color and light. Or maybe a light grey gunge texture to give the icon an aged look. Or they can be as complex as a scrapbook texture. They could also be stock images.
Also, you tend to set the texture layers to something other than 'Normal' to achieve an effect. You'd set a light texture to 'Screen' or 'Lighten'. A grey texture you'd want to set to 'Multiply'. Whereas a brush layer you'd most likely want to leave set to 'Normal'.
They can be 100x100 pixels or the size of a desktop wallpaper. As I've said before I prefer most of my textures to be much larger than icon sized. That way I can move it around and choose just the right part of the texture to use. I prefer having one very large texture than 10 small ones, it just seems much more versatile to me.
TEXTURE DON'Ts
Just like brushes you need to make the texture a part of the image. Textures can be a bit trickier. Not only are there many different types, but because of that they have many more uses. Experiment with different types, check out different tutorials. There may be many ways to use them, but that doesn't mean there's less room for error. If anything there's more.
To the right are examples of poor texture use. Below this are the DO'S, how that particular texture type should be used with each base.
TEXTURE DO'S - ICON 01
Light textures can take away just as much as they can add to your icon. They're often and easily extremely missused. Take my DON'T example, I see this far too often. Not only is the light texture covering the face, but you can't make most of it out because it's being used with an image with such a bright background. How do I fix this? Simple.
First... CHOOSE A DIFFERENT LIGHT TEXTURE! One that doesn't cover the face. I used THESE light textures by ohstarfish over at tenandathird. So I chose one that fit better.
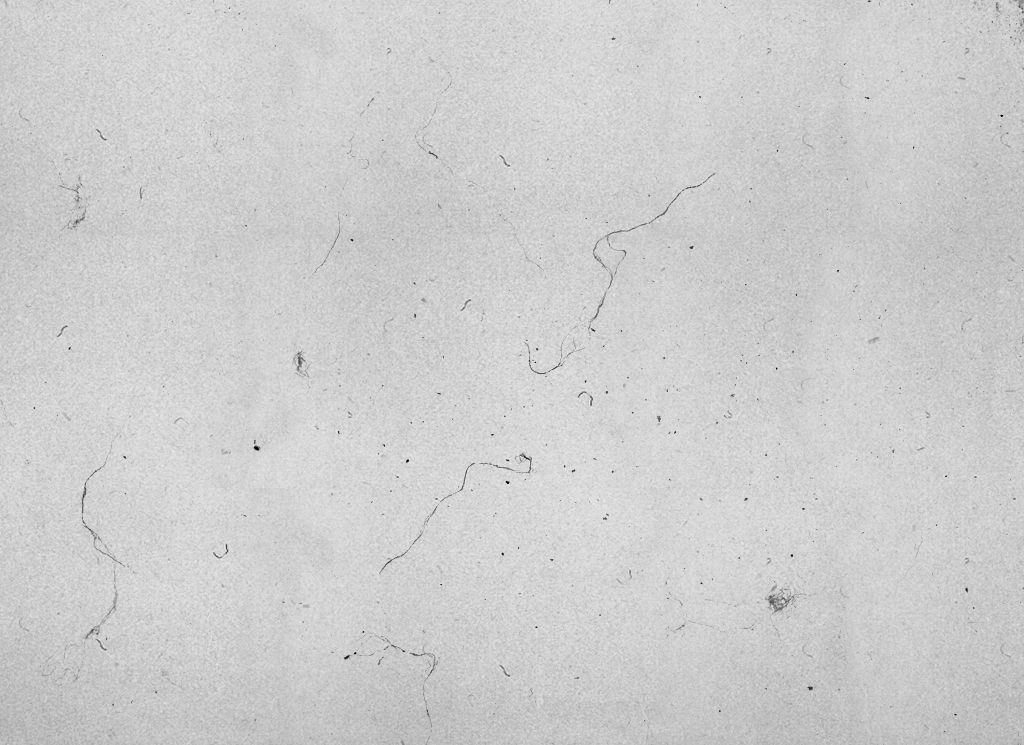
Still, how do we make the light texture more visible? For this I added a grey texture by sanami276. I moved it around so that the big scratches didn't cover the icon, just the grey areas. I added it as a new layer and set that layer to MULTIPLY. The light texture I set to SCREEN above the grey texture..
NOTE: I played with the Hue/Saturation/Lightness a bit, but I put that layer OVER the grey texture layer and UNDER the light texture layer.
DON'T ------ DO
TEXTURE DO'S - ICON 02
A grunge texture can, like any other texture, work well if you choose the right texture for the right icon. This icon for example has the wrong texture. It's far too dark and distracting. It might work if it were paired with text that might explain why the subject is being covered. However to correct this I just chose a different texture.
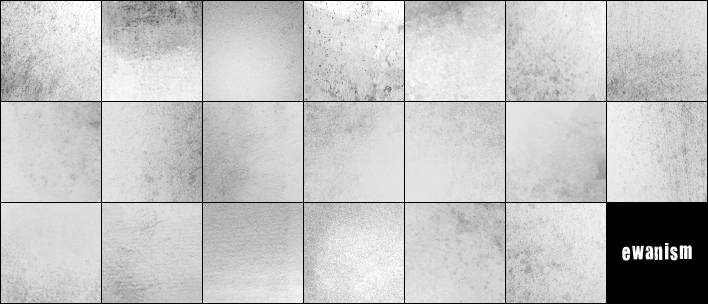
Texture on first icon by kekoah, texture in second icon is by ewanism.
Adding a grey grungy texture can help tone down the contrast and color of an image. This can make it easier to use text or a lighter brush on top and have it visible without having to give it a shadow.
DON'T ------ DO
W/OUT TEXTURE -- W/ TEXTURE
TEXTURE DO'S - ICON 03
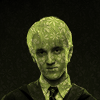
Setting a texture to 'Multiply' is not always a good idea. It works well when you have a grey texture and a subject on a light background. However it doesn't work well with more colorfully designed textures. Even a grey texture set to Multiply on a subject with a dark background won't always look very good. Take our third DON'T example. Setting this scrapbook texture to Multiply has only succeeded in making Draco Malfoy look green.
To fix this one I set the texture to 'Normal' and erased enough so that only half of Draco's face was showing. I gave the texture a bit of a shadow as well. This isn't the only option you'd have, but this is how I tend to use textures.
Go here for three other texture tutorials I made back in 2006. I'm not as fond of the icons anymore but the techniques are still relevant.
DON'T ------ DO
Scrapbook textures by tragic_icons.
TEXTURE DO'S - ICON 04
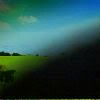
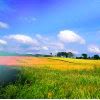
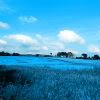
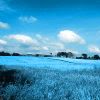
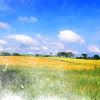
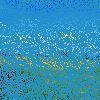
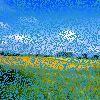
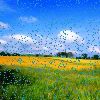
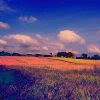
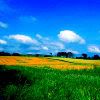
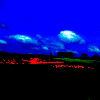
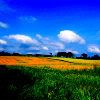
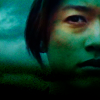
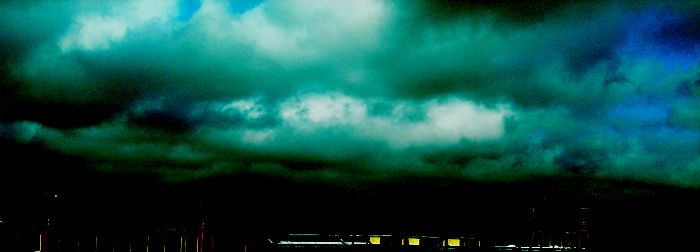
Stock images can be very useful textures. For this particular DON'T and DO I used this cloud stock image by bea_lost. When placed as a new layer and set to Multiply you get the DON'T, but if you just move the texture a bit and set it to Screen you get the DO. A small change, but a huge difference.
DON'T ------ DO
EXAMPLES
Here are examples of various ways I've used textures. I'm not sure how to teach you how to use a texture, it was such a trial and error process for me. Plus with the sheer number and varieties of textures the possibilities are so vast. It's hard to know where to begin.
However HERE are three other texture tutorials I made back in '06; three different ways to use textures.

TUTORIAL SERIES:
INTRODUCTION
A GOOD BASE
BEGINNERS GUIDE TO FONTS
TEXT TECHNIQUES
>>>BLEND MODES; BRUSHES & TEXTURES: THE DO'S AND DON'TS<<<
Program(s): Paint Shop Pro 9
Involves: Basic tips
Translatable: It's quite specific to PSP, but is translatable to most other programs.
Steps: 0 - It's just a list of tips.
Difficulty: Beginner
The main purpose of textures and brushes are to enhance your image, not completely distract from it. You want to attain a certain effect, not compromise the integrity of your base image. Because as I’ve continually said before you add textures, brushes or text you need a quality base image. When using certain textures or brushes however there are times when you create the base to match or fit them. Even on that occasion you still need to concentrate on the quality of that image, don’t let the brush or texture distract you.
NOTE: These do's, don'ts and tips are written based on the assumption you have read the previous tutorials. These tutorials are to be used as steps. By this point you should be somewhat more comfortable in the basics and tools of your Paint Shop Pro.
BLEND MODES: Normal. Darken. Lighten. Hue. Hue (Legacy). Saturation. Saturation (Legacy). Color. Color (Legacy). Lumincance. Luminance (Legacy). Multiply. Screen. Dissolve. Overlay. Hardlight. Softlight. Difference. Dodge. Burn. Exclusion.
You can set a layer (except your background layer) to any one of those. But what do they do? Sure many of them are fairly self explanitory, but when do you know which to choose? Here I'm going to try and explain when and with what I'd use each 'Blend Mode'.
NORMAL
Normal is normal. There is no special effect, you cannot see through it. You can erase parts of it or stamp a brush onto it, but it is what it is.
+
DARKEN/LIGHTEN
These two do the same thing, only at opposite ends of the spectrum. It sounds simple enough, but when you use a brush and set it to Darken the darker parts of that brush is what you will see the most of over your base image. Set it to lighten and the lightest parts of the brush will be seen over your base image.
I use lighten to add light textures (though I mostly use screen - see below).
Light texture by masterjinn @ deviantart.
+
/
DARKEN / LIGHTEN
HUE/HUE(LEGACY)
COLOR/COLOR(LEGACY)
These are all really very similar. Basically, if you make a new layer and fill it with a color or brush and set it to any of these blend modes the background with be tinted with the color of your new layer. The difference between the regular and legacy is the contrast.
+
/
HUE / HUE (LEGACY)
/
SATURATION / SATURATION (LEGACY)
SATURATION/SAT.(LEGACY)
When you make a new layer and fill it with a color or texture and set it to this it can make the colors in your base image either duller or brighter (higher saturation of colors). Again, the difference between regular saturation and the one with legacy is basically just the contrast.
I've used different tones on the layers to show the different variations without having to make four different icons.
+
/
SATURATION / SATURATION (LEGACY)
LUMINANCE/LUM.(LEGAGY)
I never use this blend mode. There may very well be a brilliant way to use it, but I haven’t been patient enough to experiment with it. Basically what it seems to do is make the colors in your icon base become as saturated as possible, usual to a degree and contrast that is undesirable. Even when I change the opacity percentage I’m not very happy with the effect achieved. It doesn’t even matter what color you use, only what brightness.
I've used different tones on the layers to show the different variations without having to make four different icons.
+
/
LUMINANCE / LUMINANCE (LEGACY)
MULTIPLY
This is one of the blend modes I use most and find most useful for adding textures and brushes.
When you set a brush to multiply all the darkest areas will stay normal and the lighter areas will be see through. Though only the black areas will stay, anything lighter will be come slightly see through, but the darker it is the darker it makes the base image below it.
First brush by threeeyespei.
Second brush by deleted user.
Third brush by kekoah.
+
=
+
=
+
=
SCREEN
This is the opposite of Multiply. I didn't put them together because I use them so much I felt they deserved seperate descriptions.
When you set a layer to screen all the lightest parts will show up, the darkest parts will be harder to see. I mainly use this blend mode for light textures.
First brush by innocent_lexys.
Second brush by deleted user.
Third brush by kekoah.
+
=
+
=
+
=
DISSOLVE
I've never found a use for this blend mode. I can't see what purpose it could serve for graphic making. No matter the opacity you set it at it will look like a bunch of dots.
100% AND 80% OPACITY
40% AND 10% OPACITY
OVERLAY / DODGE
Overlay and Dodge are not exactly the same, but they are very similar. They both achieve the similar effect of brightening the base image. It's just that Dodge does it to a much higher degree. So for the most part you don't want to use dodge at 100% opacity. If you want it to be a little more subtle I suggest you set the layer to overlay.
I sometimes use overlay to achieve a brighter more contrasted icon. Try duplicating the base image and setting it to overlay, see what you get. Granted it won't work with every base, and you should be sure to fiddle with the opacity.
+
BASE IMAGE + NEW LAYER
/
OVERLAY W/ NEW LAYER AT 100% vs OVERLAY USING DUPLICATED BASE
/
DODGE AT 100% OPACITY vs DODGE AT 50% OPACITY
HARDLIGHT / SOFTLIGHT
I use these blend modes quite a bit. I tend to duplicate the bases and set them to either softlight or hardlight. It helps to give just a little more contrast and depth to an icon. They both do the same thing only Hardlight, as it's name implies... does it harder, to a slightly harsher degree.
/
/
BASE / BASE DUPLICATED & SET TO SOFTLIGHT / SET TO HARDLIGHT
DIFFERENCE / EXCLUSION
Again these achieve similar effects, just to different degrees. Depending on the color and brightness it can look a bit like a negative image.
NEW LAYER / DIFFERENCE / EXCLUSION
NEW LAYER / DIFFERENCE / EXCLUSION
BURN
This is basically the exact opposite of Dodge. In stead of brightening it will bring out the darker tones in your base image. The darker the brush or new layer, the darker the base image will be.
LIGHTER COLOR SET TO BURN
DARKER COLOR SET TO BURN / THEN SET TO 50% OPACITY
But what is a brush? Well, brushes I tend to liken to a stamp. If you can add it to your PSP brushes, enabling you to change the size and color then it's a brush. You wouldn't want to do that with a texture, as you'd mostly want to use them as-is.
Brushes can be any size, as you can always resize it for the icons. So perhaps the bigger the better, as resizing to make something smaller is best. Resizing to make something bigger will make it look grainy and of poor quality.
How do you make a brush in Paint Shop Pro? I explain it here.
BRUSH DON'Ts
You need to make the brush a part of the image. That means creating shadow, or perhaps erasing part of it with the eraser brush set to a lower percentage hardness. Slapping on a brush doesn't make it a good icon. Where you place the brush can make or break your icon. A perfectly good base can be wasted with poor brush placement. It's not just about placement either, the wrong color or size is just as disastrous.
To the right are examples of poor brush placement. Below this are the DO'S, how that particular brush should be used with each base.
Also, remember LAYERS ARE YOUR FRIEND. Always create a new rastor layer for EVERY brush you use. That way they are each seperate and can be moved around and edit seperately!
ICON 01 - ICON 02
ICON 03 - ICON 04
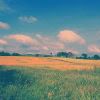
BRUSH DO'S - ICON 01
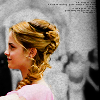
For this particular base slapping a flower brush on doesn't quite work. The people and grass already make it a bit busy. So let's use a technique we used for text: use a texture. I used the same texture and shadow technique as I did before.
Notice how in the second icon the flower brush isn't overpowering the image. However the color of the flower brush still ties it in with the image and makes the icon one cohesive unit. Again I added tiny text for a little more detail, but made sure to erase the part of the tiny text brush that was over the flower.
DON'T ------ DO
BRUSH DO'S - ICON 02
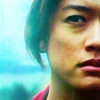
Placing a brush directly over your subject is a bad idea 98% of the time. I don't say 100% because there are always artistic exceptions. Until you've reached a level where you can tell the difference between artistic and just bad placement however, I suggest you offset your brush or place it in the less busiest part of your icon.
To correct this brush don't I just moved it over off the center of the subject. It's still partially on the subject, yes; but it's over a less busy area and the white shows up well against the dark blue. I added a shadow to the brush as well to really make it stand out. Yet again I've added tiny text. I like using it, I can't help it! If you don't like the way it looks then don't use it.
DON'T ------ DO
BRUSH DO'S - ICON 03
Like I said in Text: Tips and Suggestions, don't overuse tiny text! Slapping a tiny text brush on an icon to fill space can help, but not if it looks like an essay length brush like this icon don't. If I've said it once I've said it a dozen times: LESS IS MORE. If your subject is centered then put a small line of tiny text centered over top like I've done to the right.
Maybe add some real text as well, tiny text doesn't always look good alone. If you can't figure out what text or other brushes to use with the tiny text maybe the icon would just be better off plain.
DON'T ------ DO
BRUSH DO'S - ICON 04
One of the biggest issues I see with icons today is poor brush use. Please understand, putting a brush on an icon will not and cannot make it look better if you don't do it right! A bad base image cannot be made better with a random brush. And a good base image can be ruined by a bad choice in brush, I've seen it happen many more times then I would like. You may look at this brush DON't and think "Why would anyone do that?" I ask myself the same thing when I actually see people use brushes like this.
What I would do to correct this particular poor brush use is move it, make the brush a different size and use it much like I used the texture in Text Meets Texture. I gave the same larger brush a shadow (at 36% opacity) and added some text (Georgia, size 6) and tiny text. The new final product is better, not great, but better.
DON'T ------ DO
EXAMPLES
Here are a few more examples of icons with brushes. I tend not to use brushes very much. I mostly use tiny text, my Yankee symbol brush or any brush that will help text stand out. That doesn't mean other brushes wouldn't look good, but like I said I feel less is more.
Now what is a texture, what's the difference between them and brushes? A texture is, obviously, something you use to add texture. It's not a simple stamp brush. It has a certain texture or design. It may be done in black and white or have a brilliant color scheme. They can be as simple as a light texture, added to give the icon some dabs of color and light. Or maybe a light grey gunge texture to give the icon an aged look. Or they can be as complex as a scrapbook texture. They could also be stock images.
Also, you tend to set the texture layers to something other than 'Normal' to achieve an effect. You'd set a light texture to 'Screen' or 'Lighten'. A grey texture you'd want to set to 'Multiply'. Whereas a brush layer you'd most likely want to leave set to 'Normal'.
They can be 100x100 pixels or the size of a desktop wallpaper. As I've said before I prefer most of my textures to be much larger than icon sized. That way I can move it around and choose just the right part of the texture to use. I prefer having one very large texture than 10 small ones, it just seems much more versatile to me.
TEXTURE DON'Ts
Just like brushes you need to make the texture a part of the image. Textures can be a bit trickier. Not only are there many different types, but because of that they have many more uses. Experiment with different types, check out different tutorials. There may be many ways to use them, but that doesn't mean there's less room for error. If anything there's more.
To the right are examples of poor texture use. Below this are the DO'S, how that particular texture type should be used with each base.
TEXTURE DO'S - ICON 01
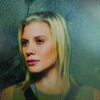
Light textures can take away just as much as they can add to your icon. They're often and easily extremely missused. Take my DON'T example, I see this far too often. Not only is the light texture covering the face, but you can't make most of it out because it's being used with an image with such a bright background. How do I fix this? Simple.
First... CHOOSE A DIFFERENT LIGHT TEXTURE! One that doesn't cover the face. I used THESE light textures by ohstarfish over at tenandathird. So I chose one that fit better.
Still, how do we make the light texture more visible? For this I added a grey texture by sanami276. I moved it around so that the big scratches didn't cover the icon, just the grey areas. I added it as a new layer and set that layer to MULTIPLY. The light texture I set to SCREEN above the grey texture..
NOTE: I played with the Hue/Saturation/Lightness a bit, but I put that layer OVER the grey texture layer and UNDER the light texture layer.
DON'T ------ DO
TEXTURE DO'S - ICON 02
A grunge texture can, like any other texture, work well if you choose the right texture for the right icon. This icon for example has the wrong texture. It's far too dark and distracting. It might work if it were paired with text that might explain why the subject is being covered. However to correct this I just chose a different texture.
Texture on first icon by kekoah, texture in second icon is by ewanism.
Adding a grey grungy texture can help tone down the contrast and color of an image. This can make it easier to use text or a lighter brush on top and have it visible without having to give it a shadow.
DON'T ------ DO
W/OUT TEXTURE -- W/ TEXTURE
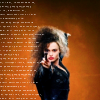
TEXTURE DO'S - ICON 03
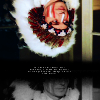
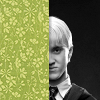
Setting a texture to 'Multiply' is not always a good idea. It works well when you have a grey texture and a subject on a light background. However it doesn't work well with more colorfully designed textures. Even a grey texture set to Multiply on a subject with a dark background won't always look very good. Take our third DON'T example. Setting this scrapbook texture to Multiply has only succeeded in making Draco Malfoy look green.
To fix this one I set the texture to 'Normal' and erased enough so that only half of Draco's face was showing. I gave the texture a bit of a shadow as well. This isn't the only option you'd have, but this is how I tend to use textures.
Go here for three other texture tutorials I made back in 2006. I'm not as fond of the icons anymore but the techniques are still relevant.
DON'T ------ DO
Scrapbook textures by tragic_icons.
TEXTURE DO'S - ICON 04
Stock images can be very useful textures. For this particular DON'T and DO I used this cloud stock image by bea_lost. When placed as a new layer and set to Multiply you get the DON'T, but if you just move the texture a bit and set it to Screen you get the DO. A small change, but a huge difference.
DON'T ------ DO
EXAMPLES
Here are examples of various ways I've used textures. I'm not sure how to teach you how to use a texture, it was such a trial and error process for me. Plus with the sheer number and varieties of textures the possibilities are so vast. It's hard to know where to begin.
However HERE are three other texture tutorials I made back in '06; three different ways to use textures.
TUTORIAL SERIES:
INTRODUCTION
A GOOD BASE
BEGINNERS GUIDE TO FONTS
TEXT TECHNIQUES
>>>BLEND MODES; BRUSHES & TEXTURES: THE DO'S AND DON'TS<<<