2 Tutorials
2 Tutorials
They are both made with PS CS2 and use selective coloring
The first one is for the lovely _iconographer. I know you didn't really request it, but you always make such wonderful resources so it's my turn now ^^ *hugs*
we'll be going from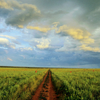
to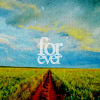
1. At first we need our base - obviously. I don't know if this works with anything else than stock Images... you can try.

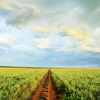
2. Dublicate and set to screen at 80%
->
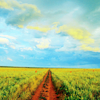
3. Now New Adjustment Layer >> Selective Color
RED: -100 | +15 | +100 | 0
YELLOW: -100 | 0 | +100 | 0
GREEN: +25 | -100 | -15 | 0
CYAN: +100 | 0 | -100 | 0
BLUE: +100 | 0 | -100 | 0
MAGENTA: 0 | +100 | 0 | 0
NEUTRALS: +45 | +20 | +17 | -20
->
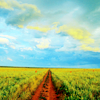
4. New Adjustment Layer >> Lightness/Contrast
Lightness: -6
Contrast: +7
->
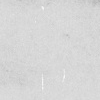
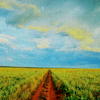
5. Now I added a grey texture (I don't know exactly who made it - check the Resource Post) and set it to Multiply
->
6.
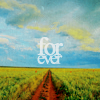
I like the turn-out so far, but something's missing so I simply add some text.
Times New Roman ("for" size: 25pt. | tracking: -100 | bold /// "ever" size: 18pt. | tracking: -140 | bold)
both set to 80% opacity
->
7. However, I still think it looks kinda plain so I dublicate the Texture from step 5, drag it on top and set it to "Color Burn"
->
Done! Feel free to show me your results or ask if you don't understand anything =)
and the second one is my choice, because I like this coloring a lot and maybe it'll help someone :D
from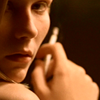
to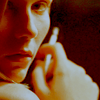
1. Again we start with our base - I cropped it so I have the cigarette in the center.

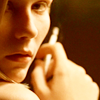
2. Dublicate and set to screen (100%)
->
3. New Adjustement Layer >> Fill Layer: #210000 set to Difference
->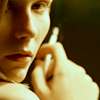
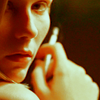
4. New Adjustment Layer >> Selective Color
RED: -100 | +15 | +100 | 0
YELLOW: -39 | 0 | +27 | 0
NEUTRALS: +50 | +35 | +20 | -15
->
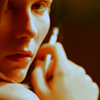
5. New Adjustment Layer >> Channel Mixer
RED: +90 | +10 | -10 (Contrast: 0)
GREEN: 0 | +90 | 0 (Contrast: 0)
BLUE: 0 | 0 | +110 (Contrast: 0)
->
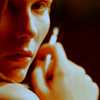
6. New Adjustment Layer >> Lightness/Contrast
Lightness: -14
Contrast: +6
->
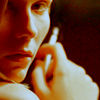
7. New Adjustment Layer >> Fill Layer: #fffdc1 set to Soft Light at 30%
->
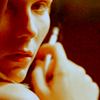
8. New Adjustment Layer >> Fill Layer: #ffcbc1 set to Soft Light at 30%
->
9. New Adjustment Layer >> Fill Layer: #d4d4d4 set to Soft Light at 50%
->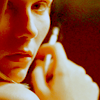
10. Dublicate the grey layer from step 9 and set to Linear Burn at 100%
->
And done! Feel free to show me your result or ask any questions =)
PLEASE: Don't ask if I upload the .psd-file - I won't!!
I'm just a dial-up user and these files are both too big for me to upload them!
The first one is for the lovely _iconographer. I know you didn't really request it, but you always make such wonderful resources so it's my turn now ^^ *hugs*
we'll be going from

to

1. At first we need our base - obviously. I don't know if this works with anything else than stock Images... you can try.

2. Dublicate and set to screen at 80%
->

3. Now New Adjustment Layer >> Selective Color
RED: -100 | +15 | +100 | 0
YELLOW: -100 | 0 | +100 | 0
GREEN: +25 | -100 | -15 | 0
CYAN: +100 | 0 | -100 | 0
BLUE: +100 | 0 | -100 | 0
MAGENTA: 0 | +100 | 0 | 0
NEUTRALS: +45 | +20 | +17 | -20
->

4. New Adjustment Layer >> Lightness/Contrast
Lightness: -6
Contrast: +7
->

5. Now I added a grey texture (I don't know exactly who made it - check the Resource Post) and set it to Multiply

->

6.
I like the turn-out so far, but something's missing so I simply add some text.
Times New Roman ("for" size: 25pt. | tracking: -100 | bold /// "ever" size: 18pt. | tracking: -140 | bold)
both set to 80% opacity
->

7. However, I still think it looks kinda plain so I dublicate the Texture from step 5, drag it on top and set it to "Color Burn"
->

Done! Feel free to show me your results or ask if you don't understand anything =)
and the second one is my choice, because I like this coloring a lot and maybe it'll help someone :D
from

to

1. Again we start with our base - I cropped it so I have the cigarette in the center.

2. Dublicate and set to screen (100%)
->

3. New Adjustement Layer >> Fill Layer: #210000 set to Difference

->

4. New Adjustment Layer >> Selective Color
RED: -100 | +15 | +100 | 0
YELLOW: -39 | 0 | +27 | 0
NEUTRALS: +50 | +35 | +20 | -15
->

5. New Adjustment Layer >> Channel Mixer
RED: +90 | +10 | -10 (Contrast: 0)
GREEN: 0 | +90 | 0 (Contrast: 0)
BLUE: 0 | 0 | +110 (Contrast: 0)
->

6. New Adjustment Layer >> Lightness/Contrast
Lightness: -14
Contrast: +6
->

7. New Adjustment Layer >> Fill Layer: #fffdc1 set to Soft Light at 30%

->

8. New Adjustment Layer >> Fill Layer: #ffcbc1 set to Soft Light at 30%

->

9. New Adjustment Layer >> Fill Layer: #d4d4d4 set to Soft Light at 50%

->

10. Dublicate the grey layer from step 9 and set to Linear Burn at 100%
->

And done! Feel free to show me your result or ask any questions =)
PLEASE: Don't ask if I upload the .psd-file - I won't!!
I'm just a dial-up user and these files are both too big for me to upload them!