full icon tutorial for PS 7.0
my tenth tutorial -- how to make this icon in 18 steps:
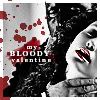
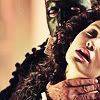
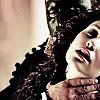
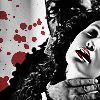
i'm going to make a tutorial on how i created this icon:
step 01:
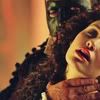
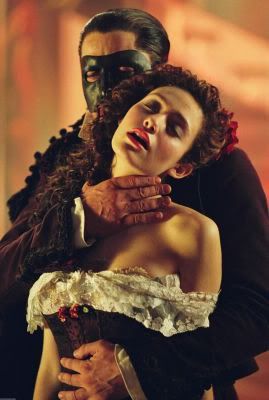
decide on the picture you want to use. i chose this one.
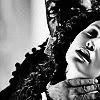
step 02:
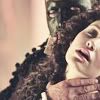
resize your image and crop it:
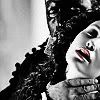
step 03:
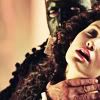
duplicate the image. desaturate (image >> adjustments >> desaturate) the second layer and set it to screen.
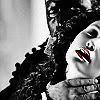
step 04:
duplicate the base image again. leave it in color and set that layer to soft light.
step 05:
merge the layers and then sharpen (filter >> sharpen) twice.
step 06:
using the blur tool, using the preset rounded feathered brush (5pt) set at 30%, smooth out the face.
step 07:
go to image >> adjustments >> auto color and select it. now the image is less orangey and is prepped.
step 08:
this tutorial is not for a colored icon, but a crisp, clear one; therefore, i'm going to show you how i get my icons to look crisp. duplicate the image you have (it should be only one layer at this point). desaturate that layer and set it to soft light.

step 09:
go to select >> all and make sure that the icon is selected. next go to edit >> copy merge and then select paste. you should have an exact double of the previous image (made up of the base and the desaturated layer on soft light). make sure that you do not just merge the image and duplicate because we will need to insert something in a following step. in this step, you want to sharpen the top layer once and set it to 20% opacity.

step 10:
directly under the top layer, create a layer and, using the flood fill tool, fill it with white (#FFFFFF). set that layer to color, 30% opacity.
step 11:
go to select >> all, and then edit >> copy merge and paste again. bring that image to the top and set that to multiply, 30% opacity (to make the icon a bit darker).
step 12:
i decided to make this icon black and white. to do this, i created another layer on top and filled it with black (#000000); set that layer to color.
step 13:
to bring a little color to the icon, i used a small rounded brush and erased the b&w on christine's lip.
step 14:
use the lasso tool to select christine's lips; copy the last image layer and then paste it. bring it to the top and then sharpen it, then set it to multiply.
step 15:
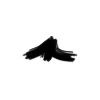
now i'm ready to spice it up. because it's black and white, i decided to go with a spatter brush:

i did mine in the color #951819:
step 16:
underneath the layer with the spatters, create a 5px white border.
step 17:
now that our icon is complete, it's now time for the text. i used lyrics from good charlotte's my bloody valentine; the font for the smaller text was georgia, size 6, normal, tracking size: 300 -- the font for the larger text was georgia, size 7, bold, tracking size: . to get the shadow effect i right-clicked on the layer, selected blending options and chose drop-down shadow for the effect. my settings were:
blend mode: multiply
opacity: 50%
angle: 120
distance: 1
spread: 0
size: 2
then, depending, i duplicate the text layer.

step 18:
i found it hard to read the text so i used a preset brush:

and made a little squiggle:
underneath the text in red, set to hard light:
and, there it is. 18 steps to making an icon.
+ comments are appreciated; i'd love to see what you created.
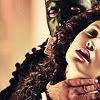
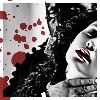
i'm going to make a tutorial on how i created this icon:
step 01:
decide on the picture you want to use. i chose this one.
step 02:
resize your image and crop it:
step 03:
duplicate the image. desaturate (image >> adjustments >> desaturate) the second layer and set it to screen.
step 04:
duplicate the base image again. leave it in color and set that layer to soft light.
step 05:
merge the layers and then sharpen (filter >> sharpen) twice.
step 06:
using the blur tool, using the preset rounded feathered brush (5pt) set at 30%, smooth out the face.
step 07:
go to image >> adjustments >> auto color and select it. now the image is less orangey and is prepped.
step 08:
this tutorial is not for a colored icon, but a crisp, clear one; therefore, i'm going to show you how i get my icons to look crisp. duplicate the image you have (it should be only one layer at this point). desaturate that layer and set it to soft light.
step 09:
go to select >> all and make sure that the icon is selected. next go to edit >> copy merge and then select paste. you should have an exact double of the previous image (made up of the base and the desaturated layer on soft light). make sure that you do not just merge the image and duplicate because we will need to insert something in a following step. in this step, you want to sharpen the top layer once and set it to 20% opacity.
step 10:
directly under the top layer, create a layer and, using the flood fill tool, fill it with white (#FFFFFF). set that layer to color, 30% opacity.
step 11:
go to select >> all, and then edit >> copy merge and paste again. bring that image to the top and set that to multiply, 30% opacity (to make the icon a bit darker).
step 12:
i decided to make this icon black and white. to do this, i created another layer on top and filled it with black (#000000); set that layer to color.
step 13:
to bring a little color to the icon, i used a small rounded brush and erased the b&w on christine's lip.
step 14:
use the lasso tool to select christine's lips; copy the last image layer and then paste it. bring it to the top and then sharpen it, then set it to multiply.
step 15:
now i'm ready to spice it up. because it's black and white, i decided to go with a spatter brush:
i did mine in the color #951819:
step 16:
underneath the layer with the spatters, create a 5px white border.
step 17:
now that our icon is complete, it's now time for the text. i used lyrics from good charlotte's my bloody valentine; the font for the smaller text was georgia, size 6, normal, tracking size: 300 -- the font for the larger text was georgia, size 7, bold, tracking size: . to get the shadow effect i right-clicked on the layer, selected blending options and chose drop-down shadow for the effect. my settings were:
blend mode: multiply
opacity: 50%
angle: 120
distance: 1
spread: 0
size: 2
then, depending, i duplicate the text layer.
step 18:
i found it hard to read the text so i used a preset brush:
and made a little squiggle:
underneath the text in red, set to hard light:
and, there it is. 18 steps to making an icon.
+ comments are appreciated; i'd love to see what you created.