Tutorial 02 :: Selective Coloring and textures, featuring Fran of FFXII
Hello, I've got another tutorial for you all :D This one I actually like quite a bit, as it's quick and has a lovely result. This one, too, has Selective Coloring, but never fear! I shall have a general guide on Selective Coloring up soon. This tutorial works wonderfully on concept art, or images that have completely solid white/light color backgrounds, and doesn't really work so well on images with more normal backgrounds, like, say, this.
Learn how to go from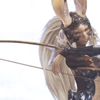
to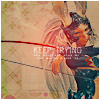
Done in Photoshop Elements 3.0 with a Selective Coloring add-on, translatable to other versions of PS, not translatable to PSP. For intermediate to advanced Photoshop users with a good grasp on using Selective Coloring.
Step 1: Take your base and crop it to 100x100 pixels so that your subject is to the side and about half of the icon is blank.

Step 2: Clean up your base: sharpening, getting rid of grain-y-ness, etc. Note: I reccommend using the Unsharp Mask tool for sharpening your icons. Not only does it sharpen without oversharpening, it gives a nice contrast to drab images :)
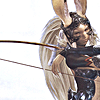
Step 3: Duplicate your base once and set the new layer to Screen, 27% opacity. Depending on the darkness/brightness of your image, you may have to make the opacity higher/lower.
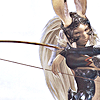
Step 4: If the reds/oranges/pinks in your images aren't very bright, go over them in a light reddish color, such as #FFA79B, on a new layer, and set it to soft light. I usually do this on the skin of the people in my icons even if the reds & such are bright, 'cause they need to be bright for later steps :) If it ends up too bright, play with the opacity a bit.
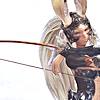
Step 5: Add a new Hue/Saturation layer, with settings similar to this:
Reds: (0, 20, 0)
You may need to play with the settings a bit if the reds end up too bright or dark.
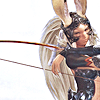
Step 6: Selective Coloring time! I won't give you any specific vaules, as it varies depending on the image you're using, plus it's better to learn how SC works on your own instead of just punching numbers in. Try playing with the settings a bit. I suggest pumping up the reds and yellows in the Reds category, and increasing the cyans and decreasing the yellows in the Neutrals category. You can do pretty much anything you want, however, so long as your reds are pretty bright.
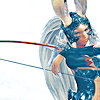
Step 7: Duplicate your Hue/Saturation layer and bring make it the top layer. Make a new Brightness/Contrast layer with settings similar to these:
Brightness (+0)
Contrast (+20)
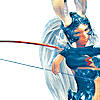
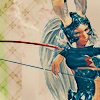
Step 8: Take 2 textures from 77words' Mixed Bag set. It doesn't matter which in particular, but I suggest ones with designs on the sides. If you have textures of your own that are similar to 77words's, those'll work fine too. Anyways, take 2, and set them both to Multiply 100%. For the first one I chose, (this), I had to rotate it so the design didn't cover Fran. I got this:
Then I took another, (this), and set it to Multiply too.
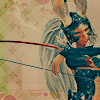
Step 9: Take this texture, (by me, no credit required), and set it to Screen 100%. I suggest moving it so that the red dot is located in the general area where you plan on placing your text. I, myself, like putting the text near on the neck, so that is where I put the dot.

Step 10: Add text, brushes, borders, etc, to your icon. I used bolded Print Dashed font, size 10, for my text, as I like how it looks on icons like these. I also used a tiny text brush by colorfilter under the text, and added a 1 pixel white border.

And you're done! :)
Other icons made using this technique:


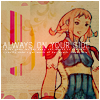


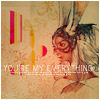
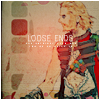


Um, as you can see, I really like the effect XD;;
No credit is required if you use the tutorial or the icons, but if you use 77words's textures, those'll probably require credit. I'd absolutely love to see what you came up with from this tutorial, so go ahead and show if you want :D
Want a basic guide on selective coloring? Go here.
Use PSP? I suggest looking at these tutorials to see how to get the Selective Coloring look without Selective Coloring.
Use Photoshop Elements? You can download a Selective Coloring add-on here.
Edit: PSP users may also find this helpful.
Learn how to go from

to

Done in Photoshop Elements 3.0 with a Selective Coloring add-on, translatable to other versions of PS, not translatable to PSP. For intermediate to advanced Photoshop users with a good grasp on using Selective Coloring.
Step 1: Take your base and crop it to 100x100 pixels so that your subject is to the side and about half of the icon is blank.

Step 2: Clean up your base: sharpening, getting rid of grain-y-ness, etc. Note: I reccommend using the Unsharp Mask tool for sharpening your icons. Not only does it sharpen without oversharpening, it gives a nice contrast to drab images :)

Step 3: Duplicate your base once and set the new layer to Screen, 27% opacity. Depending on the darkness/brightness of your image, you may have to make the opacity higher/lower.

Step 4: If the reds/oranges/pinks in your images aren't very bright, go over them in a light reddish color, such as #FFA79B, on a new layer, and set it to soft light. I usually do this on the skin of the people in my icons even if the reds & such are bright, 'cause they need to be bright for later steps :) If it ends up too bright, play with the opacity a bit.

Step 5: Add a new Hue/Saturation layer, with settings similar to this:
Reds: (0, 20, 0)
You may need to play with the settings a bit if the reds end up too bright or dark.

Step 6: Selective Coloring time! I won't give you any specific vaules, as it varies depending on the image you're using, plus it's better to learn how SC works on your own instead of just punching numbers in. Try playing with the settings a bit. I suggest pumping up the reds and yellows in the Reds category, and increasing the cyans and decreasing the yellows in the Neutrals category. You can do pretty much anything you want, however, so long as your reds are pretty bright.

Step 7: Duplicate your Hue/Saturation layer and bring make it the top layer. Make a new Brightness/Contrast layer with settings similar to these:
Brightness (+0)
Contrast (+20)

Step 8: Take 2 textures from 77words' Mixed Bag set. It doesn't matter which in particular, but I suggest ones with designs on the sides. If you have textures of your own that are similar to 77words's, those'll work fine too. Anyways, take 2, and set them both to Multiply 100%. For the first one I chose, (this), I had to rotate it so the design didn't cover Fran. I got this:

Then I took another, (this), and set it to Multiply too.

Step 9: Take this texture, (by me, no credit required), and set it to Screen 100%. I suggest moving it so that the red dot is located in the general area where you plan on placing your text. I, myself, like putting the text near on the neck, so that is where I put the dot.

Step 10: Add text, brushes, borders, etc, to your icon. I used bolded Print Dashed font, size 10, for my text, as I like how it looks on icons like these. I also used a tiny text brush by colorfilter under the text, and added a 1 pixel white border.

And you're done! :)
Other icons made using this technique:
Um, as you can see, I really like the effect XD;;
No credit is required if you use the tutorial or the icons, but if you use 77words's textures, those'll probably require credit. I'd absolutely love to see what you came up with from this tutorial, so go ahead and show if you want :D
Want a basic guide on selective coloring? Go here.
Use PSP? I suggest looking at these tutorials to see how to get the Selective Coloring look without Selective Coloring.
Use Photoshop Elements? You can download a Selective Coloring add-on here.
Edit: PSP users may also find this helpful.