tutorialll
OMG111!!!!1

i haven't written tutorials in ages! this is the first one in six months or so but i think i'm writing another one soon : )
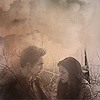
as you know we'll be making this: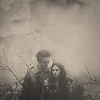
1. at first you have to choose your base. i think if you choose a picture with the whole body or upper body is the easiest. if the picture lacks a head or something like that it makes working with harder.
but if you want to work with picture that only has half a head; draw the missing part or smudge.
i'm working with this twilight picture.
resize your picture to the size you want.
2. create a new 100x100px canvas and drag your base to it OR duplicate your base and go image > canvas size > 100x100 (make sure that you have unchecked "relative")
place your base to the bottom or side or up; you can choose and you can change later : D
3. there are a few ways to make your base go with the background
way 1: use smudge-tool (press r and right click to select the right tool
)and "continue" the picture. use soft rounded brush and lower the strenght if needed. i used this to get a soft and calm background.
my icon looks like this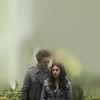
way 2: masking. go layer>layer mask>reveall all. i'm not explaining this very detailed, there are tons of masking tuts out there.
if you want to have a sharp border on your pic use a sharp rounded brush and if only want to get rid of the background and leave some stuff around the person etc you want to keep, use soft rounded brush. zoom close to the picture, it makes working easier.
make sure you have the layer mask box selected, there should be white and black border around the white box.
black erases and white brings back the erased parts, so if you screw up you don't have to start all over again!
remember to choose a background, it's up to you > you can use textures or just one color
so after smudging/masking you should have some kind of background.
4. now some textures.
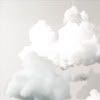
by dakotageiger set to multiply 100%. i rotated this so the "cloudy" part is up.
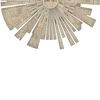
by dakotageiger set to multiply 100%, place bottom of your icon. (i resized and rotated this > hit ctrl+t and press shift down while shrinking, so the ratio stays the same)
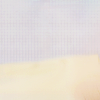
by bijouu, set to multiply 100%
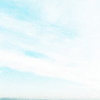
(don't know who made this), set to multiply 100%
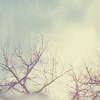
by bijouu set to multiply 100%. i desaturated this texture (image>adjustments>desaturate) and brightened it and added some contrast, but it's up to you.
at this point my icon looks like this: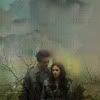
horrible? x D
5. do a curves layer or brightness/contrast layer. brighten the icon if needed.
6. i used the first coloring. download the .psd for it or use some other.

7. i decided to continue the coloring : D
new fill layer with #111111 set to difference 100%
8. selective color
reds: 17, 0, 15, 13
yellows: 10, 0, -32, 21
blacks: 0, 0, 0, 8
my icon is dark
gotta fix that
9.
set to screen 27%
set hard light 68%
playa round with opacities, the hard lightlayer might make your icon look rather weird.
try to get something like this:
10. curves layer, channel RGB
1st point: output 112, input 107
2nd point: output 174, input 165
11. another curves layer
1st point: output 126 input 112
2nd point: output 184, input 160
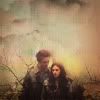
12. fill layer
#c7b299, soft light 67%
13.
by teh_s0njanator, screen, 27&
14. curves layer againn
1st point: output 102 input 113
2nd point: output 135, input 144

15. take a soft rounded brush, sized 100px.
pick some light color, for example #fdc689 and do a soft rounded circle. like this
and set it to screen 24%
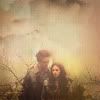
16. this is optional step to make your icon get the b/w look.
go to layer>new adjustment layer>gradient map
take a gradient that has only black and white.
instructions in the picture here
pick #decdb9 for the one that has black and do the same thing for white, choose #191919
hit ok and if your icon looks weird, check "reverse"
17. and to finish the icon, hit ctrl+alt+shift+e and you'll get a layer with all the layers merged. sharpen this and lower the opacity if the icon is over-sharpened.
flatten image and you're ready : D
icons done with technique like this:

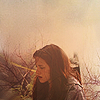
DOWNLOAD THE .PSD
- i hope this was useful
- ask if you have questions : )
- please tell if you take the .psd!
- enjoyy~~

i haven't written tutorials in ages! this is the first one in six months or so but i think i'm writing another one soon : )
as you know we'll be making this:

1. at first you have to choose your base. i think if you choose a picture with the whole body or upper body is the easiest. if the picture lacks a head or something like that it makes working with harder.
but if you want to work with picture that only has half a head; draw the missing part or smudge.
i'm working with this twilight picture.
resize your picture to the size you want.
2. create a new 100x100px canvas and drag your base to it OR duplicate your base and go image > canvas size > 100x100 (make sure that you have unchecked "relative")
place your base to the bottom or side or up; you can choose and you can change later : D
3. there are a few ways to make your base go with the background
way 1: use smudge-tool (press r and right click to select the right tool

)and "continue" the picture. use soft rounded brush and lower the strenght if needed. i used this to get a soft and calm background.
my icon looks like this

way 2: masking. go layer>layer mask>reveall all. i'm not explaining this very detailed, there are tons of masking tuts out there.
if you want to have a sharp border on your pic use a sharp rounded brush and if only want to get rid of the background and leave some stuff around the person etc you want to keep, use soft rounded brush. zoom close to the picture, it makes working easier.
make sure you have the layer mask box selected, there should be white and black border around the white box.
black erases and white brings back the erased parts, so if you screw up you don't have to start all over again!
remember to choose a background, it's up to you > you can use textures or just one color
so after smudging/masking you should have some kind of background.
4. now some textures.

by dakotageiger set to multiply 100%. i rotated this so the "cloudy" part is up.

by dakotageiger set to multiply 100%, place bottom of your icon. (i resized and rotated this > hit ctrl+t and press shift down while shrinking, so the ratio stays the same)

by bijouu, set to multiply 100%

(don't know who made this), set to multiply 100%

by bijouu set to multiply 100%. i desaturated this texture (image>adjustments>desaturate) and brightened it and added some contrast, but it's up to you.
at this point my icon looks like this:

horrible? x D
5. do a curves layer or brightness/contrast layer. brighten the icon if needed.
6. i used the first coloring. download the .psd for it or use some other.

7. i decided to continue the coloring : D
new fill layer with #111111 set to difference 100%
8. selective color
reds: 17, 0, 15, 13
yellows: 10, 0, -32, 21
blacks: 0, 0, 0, 8
my icon is dark

gotta fix that
9.

set to screen 27%

set hard light 68%
playa round with opacities, the hard lightlayer might make your icon look rather weird.
try to get something like this:

10. curves layer, channel RGB
1st point: output 112, input 107
2nd point: output 174, input 165
11. another curves layer
1st point: output 126 input 112
2nd point: output 184, input 160

12. fill layer
#c7b299, soft light 67%
13.

by teh_s0njanator, screen, 27&
14. curves layer againn
1st point: output 102 input 113
2nd point: output 135, input 144

15. take a soft rounded brush, sized 100px.
pick some light color, for example #fdc689 and do a soft rounded circle. like this
and set it to screen 24%

16. this is optional step to make your icon get the b/w look.
go to layer>new adjustment layer>gradient map
take a gradient that has only black and white.
instructions in the picture here
pick #decdb9 for the one that has black and do the same thing for white, choose #191919
hit ok and if your icon looks weird, check "reverse"
17. and to finish the icon, hit ctrl+alt+shift+e and you'll get a layer with all the layers merged. sharpen this and lower the opacity if the icon is over-sharpened.
flatten image and you're ready : D
icons done with technique like this:


DOWNLOAD THE .PSD
- i hope this was useful
- ask if you have questions : )
- please tell if you take the .psd!
- enjoyy~~