Bradley/Katie banner tutorial
SO! I decided to make a tutorial today :D No, that is not that coloring that use all the time but I guess the result is pretty good, what do you think, huh?
I must warn you, this is my first try and I don't have any experience in writing tutorials. However, I hope you will enjoy it and I wrote everything clearly. I have a psd file but I doubt it will help you anything but if you need ask me I'll send it to you via pm.
And, guys, I don't want to be bitchy but please, comment. It took me several hours to make this for you.
If you want to use it, please credit me in you resources post :) Thank you in advance.
btw, if you like the banners as well, you can use it but credit the community.

All images are clickable.
Step 1. All you need to have is this.

Step 2. Lessen Katie's photo on 12% like on this picture.

The same I did with Bradley but now he is around 37. So you got something like this.

Step 3. Coloring. I set Bradley’s layer as invisible ‘cause I have to work with Katie’s photo first.
Go to Layer/ New Adjustment Layer/ Curves and set first point input to 118 and output to 101 and the second one input to 137 and output to 143 to get this.
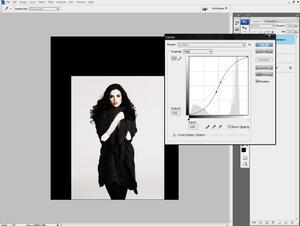
Then you need to create new level layer and set RBG input to 14. Duplicate Katie’s photo and set the first one as invisible.

Then you should take eraser tool and start to erase the background of the photo. I prefer to use zero hardness brush and for this image the best size is 24 or around. You get this.

Set the first picture to visible and set opacity to 34. I got this.
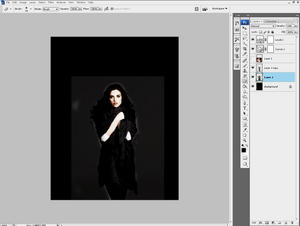
And now you see what parts you didn’t erase. Now erase the background from the first photo. When you are done set the opacity from 34% to 100%. Set the second layer to screen.

And start to erase background from the first photo again. I also erase face and hands part from second layer and set the opacity to 71.

The problem is we don’t see her hair and that’s bothering me. So we should create some sort of a lighting effect. Take a brush tool (hardness should be on 0, size is 119) and create a new layer (Layer/New/Layer) and paint once on her hair. You get this.

Set this layer to soft light and opacity to 78%. I moved this layer a bit that you can actually see her curvy hair. Duplicate this layer and move it to another side. Here opacity should be on 52%. Erase all light that on her face/clothes from both “lightning” layers.

The next coloring layer (it should be placed above all layers!) is color balance. Go Layer/ New Adjustment Layer/Color Balance.
Highlights:
0 0 +6
Midtones:
+ 33 +10 -14
Shadows
-6 -16 +6
Then go to Layer/ New Adjustment Layer/Selective Colors and points should be like this:
Yellow:
+51 +19 +31 + 27
Magentas:
-35 -26 0 0
Neutrals
+16 0 0 0
I get this.

The next are curves again - Layer/ New Adjustment Layer/ Curves.
Green (1st)
Output 92 and Input 108
Green (2nd)
Output 114 Input 123
You get this
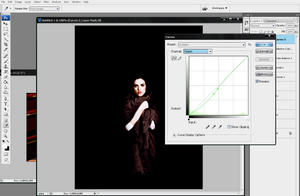
Blue (1st)
Output 112 and Input 124
Blue (2nd) (top point)
Output 143 Input 144
You get this.

Step 4. It’s time to make Bradley’s layer visible. As you can see there is too much red. You need just to cool it a bit. I used photo filter but you can use color balance as well. Go to image/adjustments/photo filter (remember! You need to choose Bradley’s layer). To cool image I chose to use Cyan photo filter and set density to 36% as it shown here.

I suggest you to set all Katie layers as invisible ones.
Duplicate Bradley’s photo (Layer/Duplicate Layer). Then go to image/adjustments/color balance and set the points like this:
Midtones
-47 +19 -26
Shadows
+12 -13 +24
You get this.

Duplicate this layer and by using Gradient Map (image/adjustments/gradient map) you should make it black and white. You get this.

Set the b&w layer’s opacity to 29%. And the second layer’s opacity to 59%, so you have this.

Set all other layers as invisible ones but three Bradley layers must be visible and chose the last one that is black and white. Now press ALT+CTRL+SHIFT+E and you’ll get all these 3 layers as one. Set this one to lighten and set these 3 layers as invisible. And make all other layers visible. Now you have this.
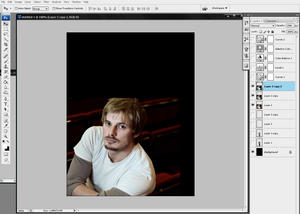
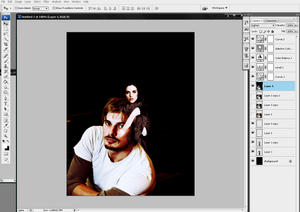
I decided to lessen a bit Bradley’s photo and move it closer to Katie. So you have this.

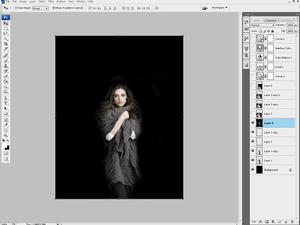
Now it’s time to merge Katie. Set all layers to invisible except four Katie layers. Choose the last one and press ALT+CTRL+SHIFT+E. You need to have this.
I suggest you to delete all invisible layers.
You need to use eraser tool again to erase Bradley’s background. There is not too much but still...
Now set eraser tool opacity to 40 ‘cause we need to erase this part.

Then I set it to 12 end erased a bit from his shoulders so in the end I had this.
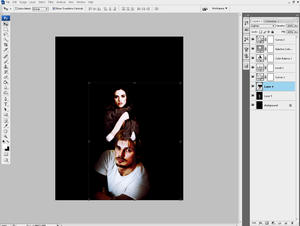
As you can see there is Katie’s scarf in his eye. Erase it with small brush. However, I have erased one of her hands as well and I have this.

Then I used this texture by zeldona and set it to soft light. But before I turned it on 90CW.

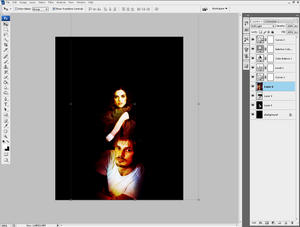
Go to Layer/ New Adjustment Layer/Gradient Map and then set the opacity to 30%. And erase Katie’s part from gradient map layer with brush opacity 52%. You will have this.
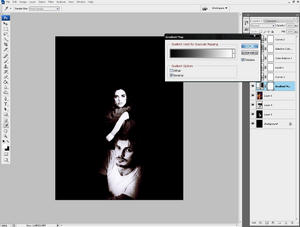
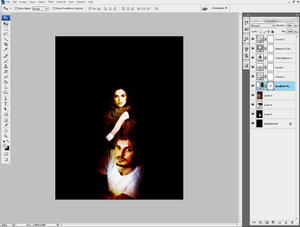
Then use this texture by aulxdayz and set it to Exclusion.

The layer should be above Katie and Bradley but under another texture so you have this.

Bradley’s shoulder seems very awkward so erase it a bit with eraser tool’s opacity on 35; Erase the another texture border as well.
You will have this.

Then I just add some stock and use this texture by spooky_window, set it to multiply and opacity to 39% and put it over the bridge.


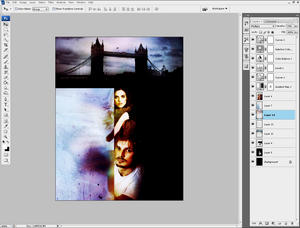
I used the same lighting effect that I used with Katie’s hair. However, in the end I used it to bright a bit Bradley’s face.
Then I used clock shock and put it above Katie and Bradley. Set it to Lighten and opacity to 50%. Erase the part that covers Bradley and Katie with brush opacity set on 14%. And you will get this.
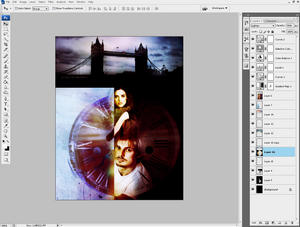
Now set coloring layers to invisible and press ALT+CTRL+SHIFT+E. Then go to the filter/blur/Gaussian Blur. I set radius to 8. Then press okay and set this layer’s opacity to 30%.
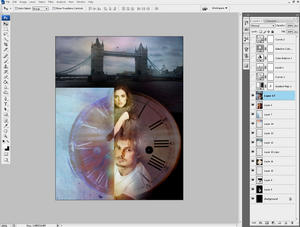
Then set all layers as visible and choose the last that is Curves. Press again ALT+CTRL+SHIFT+E. Then go to Filter/Sharpen/Smart Sharpen.Set it like this
Amount 56 and radius 0,7.
And, everything is done :)


I must warn you, this is my first try and I don't have any experience in writing tutorials. However, I hope you will enjoy it and I wrote everything clearly. I have a psd file but I doubt it will help you anything but if you need ask me I'll send it to you via pm.
And, guys, I don't want to be bitchy but please, comment. It took me several hours to make this for you.
If you want to use it, please credit me in you resources post :) Thank you in advance.
btw, if you like the banners as well, you can use it but credit the community.

All images are clickable.
Step 1. All you need to have is this.

Step 2. Lessen Katie's photo on 12% like on this picture.

The same I did with Bradley but now he is around 37. So you got something like this.

Step 3. Coloring. I set Bradley’s layer as invisible ‘cause I have to work with Katie’s photo first.
Go to Layer/ New Adjustment Layer/ Curves and set first point input to 118 and output to 101 and the second one input to 137 and output to 143 to get this.

Then you need to create new level layer and set RBG input to 14. Duplicate Katie’s photo and set the first one as invisible.

Then you should take eraser tool and start to erase the background of the photo. I prefer to use zero hardness brush and for this image the best size is 24 or around. You get this.

Set the first picture to visible and set opacity to 34. I got this.

And now you see what parts you didn’t erase. Now erase the background from the first photo. When you are done set the opacity from 34% to 100%. Set the second layer to screen.

And start to erase background from the first photo again. I also erase face and hands part from second layer and set the opacity to 71.

The problem is we don’t see her hair and that’s bothering me. So we should create some sort of a lighting effect. Take a brush tool (hardness should be on 0, size is 119) and create a new layer (Layer/New/Layer) and paint once on her hair. You get this.

Set this layer to soft light and opacity to 78%. I moved this layer a bit that you can actually see her curvy hair. Duplicate this layer and move it to another side. Here opacity should be on 52%. Erase all light that on her face/clothes from both “lightning” layers.

The next coloring layer (it should be placed above all layers!) is color balance. Go Layer/ New Adjustment Layer/Color Balance.
Highlights:
0 0 +6
Midtones:
+ 33 +10 -14
Shadows
-6 -16 +6
Then go to Layer/ New Adjustment Layer/Selective Colors and points should be like this:
Yellow:
+51 +19 +31 + 27
Magentas:
-35 -26 0 0
Neutrals
+16 0 0 0
I get this.

The next are curves again - Layer/ New Adjustment Layer/ Curves.
Green (1st)
Output 92 and Input 108
Green (2nd)
Output 114 Input 123
You get this

Blue (1st)
Output 112 and Input 124
Blue (2nd) (top point)
Output 143 Input 144
You get this.

Step 4. It’s time to make Bradley’s layer visible. As you can see there is too much red. You need just to cool it a bit. I used photo filter but you can use color balance as well. Go to image/adjustments/photo filter (remember! You need to choose Bradley’s layer). To cool image I chose to use Cyan photo filter and set density to 36% as it shown here.

I suggest you to set all Katie layers as invisible ones.
Duplicate Bradley’s photo (Layer/Duplicate Layer). Then go to image/adjustments/color balance and set the points like this:
Midtones
-47 +19 -26
Shadows
+12 -13 +24
You get this.

Duplicate this layer and by using Gradient Map (image/adjustments/gradient map) you should make it black and white. You get this.

Set the b&w layer’s opacity to 29%. And the second layer’s opacity to 59%, so you have this.

Set all other layers as invisible ones but three Bradley layers must be visible and chose the last one that is black and white. Now press ALT+CTRL+SHIFT+E and you’ll get all these 3 layers as one. Set this one to lighten and set these 3 layers as invisible. And make all other layers visible. Now you have this.


I decided to lessen a bit Bradley’s photo and move it closer to Katie. So you have this.

Now it’s time to merge Katie. Set all layers to invisible except four Katie layers. Choose the last one and press ALT+CTRL+SHIFT+E. You need to have this.

I suggest you to delete all invisible layers.
You need to use eraser tool again to erase Bradley’s background. There is not too much but still...
Now set eraser tool opacity to 40 ‘cause we need to erase this part.

Then I set it to 12 end erased a bit from his shoulders so in the end I had this.

As you can see there is Katie’s scarf in his eye. Erase it with small brush. However, I have erased one of her hands as well and I have this.

Then I used this texture by zeldona and set it to soft light. But before I turned it on 90CW.


Go to Layer/ New Adjustment Layer/Gradient Map and then set the opacity to 30%. And erase Katie’s part from gradient map layer with brush opacity 52%. You will have this.


Then use this texture by aulxdayz and set it to Exclusion.

The layer should be above Katie and Bradley but under another texture so you have this.

Bradley’s shoulder seems very awkward so erase it a bit with eraser tool’s opacity on 35; Erase the another texture border as well.
You will have this.

Then I just add some stock and use this texture by spooky_window, set it to multiply and opacity to 39% and put it over the bridge.


I used the same lighting effect that I used with Katie’s hair. However, in the end I used it to bright a bit Bradley’s face.
Then I used clock shock and put it above Katie and Bradley. Set it to Lighten and opacity to 50%. Erase the part that covers Bradley and Katie with brush opacity set on 14%. And you will get this.

Now set coloring layers to invisible and press ALT+CTRL+SHIFT+E. Then go to the filter/blur/Gaussian Blur. I set radius to 8. Then press okay and set this layer’s opacity to 30%.

Then set all layers as visible and choose the last that is Curves. Press again ALT+CTRL+SHIFT+E. Then go to Filter/Sharpen/Smart Sharpen.Set it like this
Amount 56 and radius 0,7.
And, everything is done :)

