(no subject)
So, kids, today, I have another tutorial!
It's for mitsukiame.
We're going from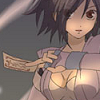
to
or
, in PSPX!
1. First, have a base.

[It is fanart coming from this site, and is used with permission.]
2. Duplicate your base and set it to Screen, 100%.
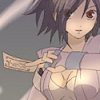
3. Make a new layer, yadda yadda, fill it with #0a2e5e [<
] and set it to, yadda yadda, Exclusion, 100%.

4. Duplicate the base, bring to top, press Shift+H or go to Adjust->Hue and Saturation->Hue/Saturation/Lightness, and set it to Saturation -100, Lightness -5.
Set this layer to Overlay, 100%.

5. Take these gradients:
<
[by me] and set them to Screen, 100% and Overlay, 100%, respectively.

6. Take this texture
[which was done by silverqe, I think] and set it to Soft Light, 100%. Then, duplicate it.

7. Make a new layer, fill with #071a41 [
] and set to Exclusion, 100%.

8. Now, duplicate the desaturated base [see step #4] and bring it to top. Lowet the opacity to 70%.

9. Now, this step is optional. I wanted to lighten the icon a bit, so I used Curves to do so. I can't really give you the exact settings - PSP decided not to show them they depend on the picture and your likeness.
After this step, I ended up with this:

10. Anyway, use this gradient
[I think it's either by me or crumblingwalls, and set it to Soft Light, 100%.

11. Duplicate the desaturated layer from step #8, bring it to top and change the mode from Overlay to Soft Light and make sure it's still on 70%.

12. Now, text. I couldn't think of anything to put on the icon, so I simply used some tinytext. :333
Settings:
Font - 18th Century
Size - 1
Kerning - 1000
Layer - Normal, 70%

13. Now, if you want, add the border. I made a three-pixel border in #fbf2e9 and a one-pixel border in #795f69.
And ta-dah, icon done!

In the case you skipped step #9, you'd get this:

which looks better actually
It's for mitsukiame.
We're going from

to

or

, in PSPX!
1. First, have a base.

[It is fanart coming from this site, and is used with permission.]
2. Duplicate your base and set it to Screen, 100%.

3. Make a new layer, yadda yadda, fill it with #0a2e5e [<

] and set it to, yadda yadda, Exclusion, 100%.

4. Duplicate the base, bring to top, press Shift+H or go to Adjust->Hue and Saturation->Hue/Saturation/Lightness, and set it to Saturation -100, Lightness -5.
Set this layer to Overlay, 100%.

5. Take these gradients:

<

[by me] and set them to Screen, 100% and Overlay, 100%, respectively.

6. Take this texture

[which was done by silverqe, I think] and set it to Soft Light, 100%. Then, duplicate it.

7. Make a new layer, fill with #071a41 [

] and set to Exclusion, 100%.

8. Now, duplicate the desaturated base [see step #4] and bring it to top. Lowet the opacity to 70%.

9. Now, this step is optional. I wanted to lighten the icon a bit, so I used Curves to do so. I can't really give you the exact settings - PSP decided not to show them they depend on the picture and your likeness.
After this step, I ended up with this:

10. Anyway, use this gradient

[I think it's either by me or crumblingwalls, and set it to Soft Light, 100%.

11. Duplicate the desaturated layer from step #8, bring it to top and change the mode from Overlay to Soft Light and make sure it's still on 70%.

12. Now, text. I couldn't think of anything to put on the icon, so I simply used some tinytext. :333
Settings:
Font - 18th Century
Size - 1
Kerning - 1000
Layer - Normal, 70%

13. Now, if you want, add the border. I made a three-pixel border in #fbf2e9 and a one-pixel border in #795f69.
And ta-dah, icon done!

In the case you skipped step #9, you'd get this:

which looks better actually