almateria (94)
Request by lolichigorock.
Using PSP10, we'll be making
. This tutorial is translatable.
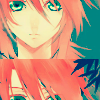
01 Start with your base. Here's my base. I set up my icon this way before I started the actual coloring. I just duplicated the image twice and moved the pieces around, really.
02 Duplicate your base and set it to softlight 100%.
03 Make a new layer and fill it with #05074f. Set it to exclusion 100%.
04 Make a new layer and fill it with #f1c785. Set it to multiply 75%.
05 Make a new layer and fill it with #49ebe8. Set it to burn 100%.
06 Make a new layer and fill it with #fedcd6. Set it to softlight 100%. Duplicate this layer and change the opacity to 50%.
07 Make a new Hue/Saturation/Lightness adjustment layer, and set master saturation to 30.
08 Duplicate your base and bring it to the top. Set it to softlight 100%.
09 Make a new Color Balance adjustment layer, and input these settings: Midtones: 0 0 80
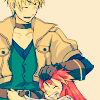
10 Because Luke's hair had really strong and pixely blue lines, I Copy Merged my finished icon and used the Smudge Tool to blur the lines.
I'd love to see what you guys come up with, so please post your results! Hope this tutorial helped :)
OTHER EXAMPLES FOR THIS TUTORIAL


Like what you see? Why don't you friend us!
Using PSP10, we'll be making

. This tutorial is translatable.
01 Start with your base. Here's my base. I set up my icon this way before I started the actual coloring. I just duplicated the image twice and moved the pieces around, really.
02 Duplicate your base and set it to softlight 100%.
03 Make a new layer and fill it with #05074f. Set it to exclusion 100%.
04 Make a new layer and fill it with #f1c785. Set it to multiply 75%.
05 Make a new layer and fill it with #49ebe8. Set it to burn 100%.
06 Make a new layer and fill it with #fedcd6. Set it to softlight 100%. Duplicate this layer and change the opacity to 50%.
07 Make a new Hue/Saturation/Lightness adjustment layer, and set master saturation to 30.
08 Duplicate your base and bring it to the top. Set it to softlight 100%.
09 Make a new Color Balance adjustment layer, and input these settings: Midtones: 0 0 80
10 Because Luke's hair had really strong and pixely blue lines, I Copy Merged my finished icon and used the Smudge Tool to blur the lines.
I'd love to see what you guys come up with, so please post your results! Hope this tutorial helped :)
OTHER EXAMPLES FOR THIS TUTORIAL


Like what you see? Why don't you friend us!