Tutorial (46)
Request by ryin_ryuiji!
Make
from
using PSP8. Translatable. Image heavy!
Original coloring: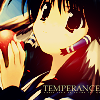
Sharpen base if need be. Duplicate base and bring to the top. Set to screen 100%.

=
Duplicate base and bring to the top. Set to screen 100%.

=
Duplicate base and bring to the top. Set to softlight 100%.

=
Duplicate base and bring to the top. Set to softlight 100%.

=
Set #03083B to exclusion 100%.

=
Set #C1FBFF to burn 100%.

=
Set #B8FDB3 to burn 100%.

=
Set #FFBABB to softlight 100%.

=
Set #F0C096 to multiply 100%.

=
Duplicate base and bring to the top. Set to softlight 100%.

=
Duplicate base and bring to the top. Set to softlight 100%.

=
Go to Layers > New Adjustment Layer > Color Balance. Set midtones red to 19, midtones burn to 23, shadows red to 37, shadows blue to 51, and highlights yellow to -24.
=
Duplicate base and bring to the top. Desaturate it and set to softlight 100%.

=
Paste this texture (by me) and set it to lighten 100%. Move around to your liking.

=
Go to Layers > New Adjustment Layer > Color Balance. Set midtones cyan to -35.

=
Set #FCE1A0 to darken 50%.

=
Play around with the opacity if your icon is too dark or too light. Please don't copy exactly. Thanks for reading :)
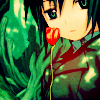
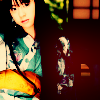
Icons made using this tutorial
Like what you see? Why don't you friend us!
Make

from

using PSP8. Translatable. Image heavy!
Original coloring:

Sharpen base if need be. Duplicate base and bring to the top. Set to screen 100%.

=

Duplicate base and bring to the top. Set to screen 100%.

=

Duplicate base and bring to the top. Set to softlight 100%.

=

Duplicate base and bring to the top. Set to softlight 100%.

=

Set #03083B to exclusion 100%.

=

Set #C1FBFF to burn 100%.

=

Set #B8FDB3 to burn 100%.

=

Set #FFBABB to softlight 100%.

=

Set #F0C096 to multiply 100%.

=

Duplicate base and bring to the top. Set to softlight 100%.

=

Duplicate base and bring to the top. Set to softlight 100%.

=

Go to Layers > New Adjustment Layer > Color Balance. Set midtones red to 19, midtones burn to 23, shadows red to 37, shadows blue to 51, and highlights yellow to -24.

=

Duplicate base and bring to the top. Desaturate it and set to softlight 100%.

=

Paste this texture (by me) and set it to lighten 100%. Move around to your liking.

=

Go to Layers > New Adjustment Layer > Color Balance. Set midtones cyan to -35.

=

Set #FCE1A0 to darken 50%.

=

Play around with the opacity if your icon is too dark or too light. Please don't copy exactly. Thanks for reading :)
Icons made using this tutorial


Like what you see? Why don't you friend us!