(no subject)
Unfortunately, I cannot write up tutorials for my previous icons beacause I use Photoshop Elements, which normally doesn't have Selective Coloring, but I downloaded a plug-in and now it does. The problem is once you set the selective coloring you can't go back and change it or even look at it.
Anyway, the tutorial. I was smart this time around by writing down the SC before clicking "okay."
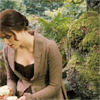
to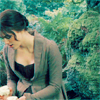
Crop the image and do whatever you normally do to prep it, like brightness/contrast (which I forgot to do on the base, stupid me), sharpening, whatever.
Make a new Selective Coloring layer.
REDS
C: -100, M: +30, Y: +100, B: +5
YELLOWS
C: -75, M: -58, Y: -40
GREENS
Everything -100
CYANS
C: +100, M: -10, Y: +80
BLUES
C: +50, B: +5
NEUTRALS
C: +65, M: -10, Y: -25
Make a new Hue/Saturation layer. Bring up the Saturation in Reds +15. Change the Hue in Cyans -10 and the Saturation +5, and you're done!
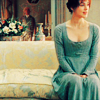
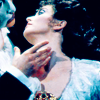
Other icons made with the same technique

Feel free to use the icons, mem this, comment, join or watch, whatever. If you use this for anything, I would love to see your results!
Anyway, the tutorial. I was smart this time around by writing down the SC before clicking "okay."
to
Crop the image and do whatever you normally do to prep it, like brightness/contrast (which I forgot to do on the base, stupid me), sharpening, whatever.
Make a new Selective Coloring layer.
REDS
C: -100, M: +30, Y: +100, B: +5
YELLOWS
C: -75, M: -58, Y: -40
GREENS
Everything -100
CYANS
C: +100, M: -10, Y: +80
BLUES
C: +50, B: +5
NEUTRALS
C: +65, M: -10, Y: -25
Make a new Hue/Saturation layer. Bring up the Saturation in Reds +15. Change the Hue in Cyans -10 and the Saturation +5, and you're done!
Other icons made with the same technique
Feel free to use the icons, mem this, comment, join or watch, whatever. If you use this for anything, I would love to see your results!