Full-Icon Tutorial
This is my first tutorial and it wasn't easy to put it together. I suck at explaining stuff... So, if you don't understand anything at all, I won't be surprised. lol But honestly, I did my best. Actually I think this icon/style is pretty easy to make, so there shouldn't be any problems. But if there are, let me know. :)
It was fiesty_red who asked me to make it when I posted these KOH icons. If it weren't for her, this tut wouldn't exist. :P
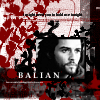
We're going to learn how to make this icon:
General information:
This icon was made using Paintshop Pro 7, but I think it can be translated to other programs quite easily. As I said, it isn't a difficult tutorial at all. Also, please keep in mind that this tutorial is merely a guide for you. So that you know that there are other alternatives on your program that you can perfectly use. Don't copy this tutorial, be creative. ;)
Now are you ready? :D
Step 01
I created a new 100x100 canvas with a white background. Afterwards, I openned my brush gallery and chose one brush from Hybrid-Genesis,
. Color: #000000, Layer Mode: Normal. I applied it to the canvas on the right side like this:

Note: I added a grey border to make it clear for you.
Step 02
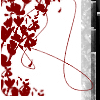
This tutorial is all about brushes, so I went to my gallery again and chose another one (
). Color: #800000, Layer Mode: Normal.
Step 03
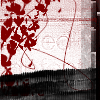
Yep more brushes! First I added this large brush
, without resizing it, Color: #800000, Layer Mode: Normal. Then I applied
on the bottom. But I thought it needed to be a bit darker, so I added the same brush again on the top of the other. Color: #000000, Layer Mode: Normal. It looked like this afterwards:
Step 04
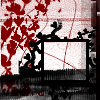
Ok, tired of brushes? Well, you're lucky, this is the last one. ;) So, I wanted something where I could put the image on, because there wasn't a specific place yet, so that's why I picked up this brush I enjoy so much,
. Color: #000000, Layer Mode: Normal. I placed it on the bottom right corner, as so:
Step 05
Now, let's leave the canvas aside for a while and let's work on the picture. As I was making Kingdom of Heaven icons, I chose this Balian picture. Then resized it and cropped it. I know others do it the other way, but I go to Colors, Colorize, leave Hue and Saturation to 0 so that the picture turns to black and white. I can't remember the exact settings, but I played with the brightness/contrast so it would look better.
That done, I added it to the canvas:
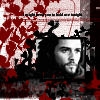
I decorated the bottom as I felt it was too dark for my taste and it needed some color (#800000). Also applied a tiny text brush in color #000000 on the top.
Step 06
Finally I added the text. It couldn't be more simple, because I really couldn't be less imaginative with text... so it's Balian. I used Palatino Linotype, size 6, bold, white. And voilá!

Some tips if you decide to try out this style:
On that particular icon you saw I started off with a white background and worked with the brushes set on black and red.
You can vary the colors. Start with a red background and work with white and black brushes or start with a black background and use red and white brushes.
It's done! :D Hope I didn't confuse you.
All the brushes I used can be found at Hybrid-Genesis, under Freebies.
It was fiesty_red who asked me to make it when I posted these KOH icons. If it weren't for her, this tut wouldn't exist. :P
We're going to learn how to make this icon:
General information:
This icon was made using Paintshop Pro 7, but I think it can be translated to other programs quite easily. As I said, it isn't a difficult tutorial at all. Also, please keep in mind that this tutorial is merely a guide for you. So that you know that there are other alternatives on your program that you can perfectly use. Don't copy this tutorial, be creative. ;)
Now are you ready? :D
Step 01
I created a new 100x100 canvas with a white background. Afterwards, I openned my brush gallery and chose one brush from Hybrid-Genesis,
. Color: #000000, Layer Mode: Normal. I applied it to the canvas on the right side like this:
Note: I added a grey border to make it clear for you.
Step 02
This tutorial is all about brushes, so I went to my gallery again and chose another one (
). Color: #800000, Layer Mode: Normal.
Step 03
Yep more brushes! First I added this large brush
, without resizing it, Color: #800000, Layer Mode: Normal. Then I applied
on the bottom. But I thought it needed to be a bit darker, so I added the same brush again on the top of the other. Color: #000000, Layer Mode: Normal. It looked like this afterwards:
Step 04
Ok, tired of brushes? Well, you're lucky, this is the last one. ;) So, I wanted something where I could put the image on, because there wasn't a specific place yet, so that's why I picked up this brush I enjoy so much,
. Color: #000000, Layer Mode: Normal. I placed it on the bottom right corner, as so:
Step 05
Now, let's leave the canvas aside for a while and let's work on the picture. As I was making Kingdom of Heaven icons, I chose this Balian picture. Then resized it and cropped it. I know others do it the other way, but I go to Colors, Colorize, leave Hue and Saturation to 0 so that the picture turns to black and white. I can't remember the exact settings, but I played with the brightness/contrast so it would look better.
That done, I added it to the canvas:
I decorated the bottom as I felt it was too dark for my taste and it needed some color (#800000). Also applied a tiny text brush in color #000000 on the top.
Step 06
Finally I added the text. It couldn't be more simple, because I really couldn't be less imaginative with text... so it's Balian. I used Palatino Linotype, size 6, bold, white. And voilá!
Some tips if you decide to try out this style:
On that particular icon you saw I started off with a white background and worked with the brushes set on black and red.
You can vary the colors. Start with a red background and work with white and black brushes or start with a black background and use red and white brushes.
It's done! :D Hope I didn't confuse you.
All the brushes I used can be found at Hybrid-Genesis, under Freebies.