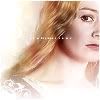
Icon tutorial #1 - Eowyn for PSP9
Here is the requested tutorial for PSP9, but I'm sure it can be easily translated to PS. My very first so please, be gentle ;) eleidiel I hope it helps. Tell me if it works for you ;)
How to go from
to
Step 1:
-Create your base then sharpen it two times. (or one time, it depends how blurry the base is)
Now it looks like this

Horrible, isn't it? That's very good ;) We can go on :)
Step 2:
-Duplicate your base, and set the new one to soft light and desaturate it. Merge all.

Step 3:
-Use the soften brush (settings: size: 3 , hardness: 50, step: 25, Density:100, Thickness: 100, Rotation: 0 and Opacity: 38) to soften Eowyn's skin, but avoid the eyes and lips.
-Then use Smudge Brush (but not too big and not too much ;)) on Eowyn's hair.

Step 4:
-Create a new layer and apply this
texture made by nerwende then go to >> Image >>flip and then >>mirror >> so it is placed like this
-Now set it to soft light at opacity 8-12 %
Step 5:
-Copy the layer with texture, desaturate it just a little bit using Automatic Saturation Enhancement, set opacity to screen and smudge it a little bit.
This is my texture after these changes, but the truth is, I smudged it only to achieve the effect of shadows and light on Eowyn's face and hair :) So you have to fiddle with this texture to achieve what you want. My outcome was this:


Step 6:
-Create another layer and put this light texture on it
made by colorfilter desaturate it and set opacity to screen

Step 7:
-Create another layer and put this brush on it (color black)
made by (?) and set the opacity at soft light 42 % to 58 %

Step 8:
-Create new layer and apply this brush made by sugarplumkitten(in white colour)on it (here it is only a stamp in white colour)
erase the border to the right and the part of the brush to the left so it looks like this :


If you don't have an original brush, just take this stamp, but in case of using only this stamp,you have to set the layer opacity to screen.
Step 9:
-Create a new layer, apply thin border on it (in white colour), and add some small text brush.

Step 10:
-Create another layer and apply small decorative brush on the left corner. Now I don't remember which brush I used, but I'm sure it was only a fragment, something like this:


Now it's almost finished ;)
Step 11:
-Merge all the layers.
-Then go to Adjust ---> Automatic Contrast Enhancement and set the options like this:
Bias: Lighter, Strength: Normal, Appearance: Flat.
And with this last step, we should achieve a final outcome:

I hope you will find this tutorial useful. Feel free to ask the questions, I'll try to answer if I can :)
If you want to show me something you've made following this tutorial, I'd be more than happy if I could see it :)
How to go from

to

Step 1:
-Create your base then sharpen it two times. (or one time, it depends how blurry the base is)
Now it looks like this

Horrible, isn't it? That's very good ;) We can go on :)
Step 2:
-Duplicate your base, and set the new one to soft light and desaturate it. Merge all.

Step 3:
-Use the soften brush (settings: size: 3 , hardness: 50, step: 25, Density:100, Thickness: 100, Rotation: 0 and Opacity: 38) to soften Eowyn's skin, but avoid the eyes and lips.
-Then use Smudge Brush (but not too big and not too much ;)) on Eowyn's hair.

Step 4:
-Create a new layer and apply this

texture made by nerwende then go to >> Image >>flip and then >>mirror >> so it is placed like this

-Now set it to soft light at opacity 8-12 %
Step 5:
-Copy the layer with texture, desaturate it just a little bit using Automatic Saturation Enhancement, set opacity to screen and smudge it a little bit.
This is my texture after these changes, but the truth is, I smudged it only to achieve the effect of shadows and light on Eowyn's face and hair :) So you have to fiddle with this texture to achieve what you want. My outcome was this:


Step 6:
-Create another layer and put this light texture on it

made by colorfilter desaturate it and set opacity to screen

Step 7:
-Create another layer and put this brush on it (color black)

made by (?) and set the opacity at soft light 42 % to 58 %

Step 8:
-Create new layer and apply this brush made by sugarplumkitten(in white colour)on it (here it is only a stamp in white colour)

erase the border to the right and the part of the brush to the left so it looks like this :


If you don't have an original brush, just take this stamp, but in case of using only this stamp,you have to set the layer opacity to screen.
Step 9:
-Create a new layer, apply thin border on it (in white colour), and add some small text brush.

Step 10:
-Create another layer and apply small decorative brush on the left corner. Now I don't remember which brush I used, but I'm sure it was only a fragment, something like this:


Now it's almost finished ;)
Step 11:
-Merge all the layers.
-Then go to Adjust ---> Automatic Contrast Enhancement and set the options like this:
Bias: Lighter, Strength: Normal, Appearance: Flat.
And with this last step, we should achieve a final outcome:

I hope you will find this tutorial useful. Feel free to ask the questions, I'll try to answer if I can :)
If you want to show me something you've made following this tutorial, I'd be more than happy if I could see it :)