2nd tutorial
As bombshell_dolly asked, here is another tutorial.
Learn how I did:

>>
First of all, try to don’t follow this step by step, try to be creative and create your own style. I would love to see what do you make following this :)
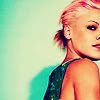
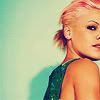
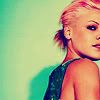
01. Crop your base.
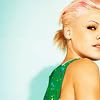
02. Duplicate the base once and set it to Softlight, 100%
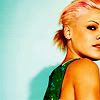
03. New layer, fill it with #959595 and set it to Color Burn 100%

>>
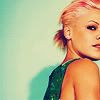
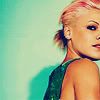
04. New layer, fill it with #0a133e and set it to Exclusion 100%

>>
05. Duplicte the exclusion layer and set it to Exclusion 22%
>>
06. New layer, fill it with #b2fbfe Color Burn 100%

>>
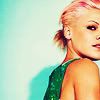
07. New layer, fill it with #f6d7f0 Color Burn 51%

>>
08. Here comes a confusing thing. Duplicate your base, bring it to the top and set it to Screen 52%. Go to Image>>Adjustments>>Hue/saturation.
Master
Hue: -17
Saturation: +31
Lightness: -33
Red
Saturation: +16
09. New layer, fill it with #d1c6c6 and set it to Color Burn 100%

>>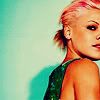
10. New layer, fill it with #00034a and set it to Exclusion 100%

>>
11. Finally, duplicate yourbase, bring it to the top and set it to Soft Light 100%
And you're done!!
If you don't understand something, please, let me know. And remember that this may doesn't work with every pics, you have to experiment :)
By the way, I'm taking requests here, First 20 people get an interest icon :)
Learn how I did:
>>
First of all, try to don’t follow this step by step, try to be creative and create your own style. I would love to see what do you make following this :)
01. Crop your base.
02. Duplicate the base once and set it to Softlight, 100%
03. New layer, fill it with #959595 and set it to Color Burn 100%
>>
04. New layer, fill it with #0a133e and set it to Exclusion 100%
>>
05. Duplicte the exclusion layer and set it to Exclusion 22%
>>
06. New layer, fill it with #b2fbfe Color Burn 100%
>>
07. New layer, fill it with #f6d7f0 Color Burn 51%
>>
08. Here comes a confusing thing. Duplicate your base, bring it to the top and set it to Screen 52%. Go to Image>>Adjustments>>Hue/saturation.
Master
Hue: -17
Saturation: +31
Lightness: -33
Red
Saturation: +16
09. New layer, fill it with #d1c6c6 and set it to Color Burn 100%
>>
10. New layer, fill it with #00034a and set it to Exclusion 100%
>>
11. Finally, duplicate yourbase, bring it to the top and set it to Soft Light 100%
And you're done!!
If you don't understand something, please, let me know. And remember that this may doesn't work with every pics, you have to experiment :)
By the way, I'm taking requests here, First 20 people get an interest icon :)