Tutorial #1 - Clemence Posey and Daniel Radcliffe
My first crack at a tutorial. If you have any questions, just comment.
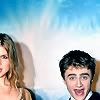
This tutorial requires you to have basic knowledge of PSP, layers, and the tools. We'll be going from...

to
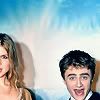
.
I'm going to use this picture of Clemence Posey and Daniel Radcliffe from RABlade. First, you need to clean up the picture and crop and resize it to what you want. Sharpen until you're satisfied. I sharpened it twice.

Next, create a new layer and fill it with a light blue (#A4E0F4) and set it to Burn.

Create a new layer on top of the Burn layer and fill it with a dark blue (#05040C) and set it to Exclusion.

Create, yet another, new layer on top of the Exclusion layer and fill it with a pink (#F4C4BA) and set it to Burn.

Finally, create a new layer on top of the pink Burn layer and fill it with an orangey-tan (#EACF7E), set it to Multiply and the ocapity to 60, and MERGE ALL (FLATTEN).

To finish up, add the text. I used the pen tool so my text was written at an angle. I used the font "NoodleScript", tan colored (#F2E5B1), and at size 13. I set it as a promoted layer and set it to overlay with the ocapity set to 80 then Merge All.

And, finally, create a new layer, fill it with an orangey-tan (#EACF7E), set it to Multiply and the ocapity to 20, Merge All, and voila!

Of course, this tutorial isn't meant to be followed step-by-step. Play around with the layer colors, ocapity levels, text, and such to get the icon how you like it and make it your own. I hope this has been helpful! Comments are appreciated. :)
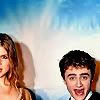
This tutorial requires you to have basic knowledge of PSP, layers, and the tools. We'll be going from...
to
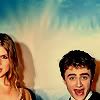
.
I'm going to use this picture of Clemence Posey and Daniel Radcliffe from RABlade. First, you need to clean up the picture and crop and resize it to what you want. Sharpen until you're satisfied. I sharpened it twice.
Next, create a new layer and fill it with a light blue (#A4E0F4) and set it to Burn.
Create a new layer on top of the Burn layer and fill it with a dark blue (#05040C) and set it to Exclusion.
Create, yet another, new layer on top of the Exclusion layer and fill it with a pink (#F4C4BA) and set it to Burn.
Finally, create a new layer on top of the pink Burn layer and fill it with an orangey-tan (#EACF7E), set it to Multiply and the ocapity to 60, and MERGE ALL (FLATTEN).
To finish up, add the text. I used the pen tool so my text was written at an angle. I used the font "NoodleScript", tan colored (#F2E5B1), and at size 13. I set it as a promoted layer and set it to overlay with the ocapity set to 80 then Merge All.
And, finally, create a new layer, fill it with an orangey-tan (#EACF7E), set it to Multiply and the ocapity to 20, Merge All, and voila!
Of course, this tutorial isn't meant to be followed step-by-step. Play around with the layer colors, ocapity levels, text, and such to get the icon how you like it and make it your own. I hope this has been helpful! Comments are appreciated. :)