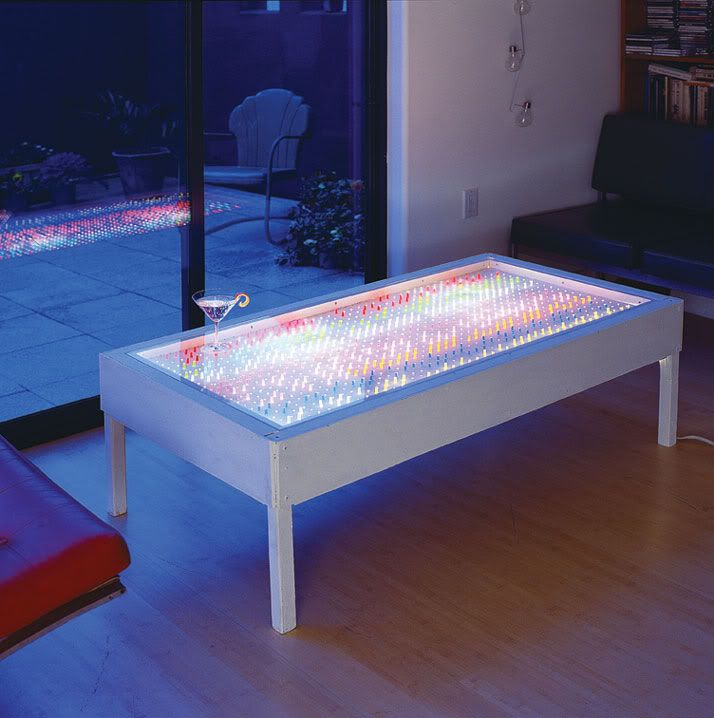
Lite Brite Coffee Table
You know what I've always wanted? A table that doubles as a Lite Brite. That's right. A LITE BRITE COFFEE TABLE! I mean, could you imagine unwrapping this bad boy?
I haven't gotten around to making one of these yet, but it's been in my inspiration folder for quite some time. I can't wait until I have the resources to make this epic table!
You'll Need:
-1 18" fluorescent light and fixture
-1 2'x4' sheet 1/4" thick Acrylite or Plexiglas
-1/2 gallon flat white paint
-Light pegs (get them at Hasbro.com)
-2" wood screws
-1 1/4" wood screws
-Hammer
-Paint brush
-Pencil
-Power drill
-Saw
-Tape measure
-Lumber:
-1 8' long 1x8
-1 6' long 1x8
-1 8' long 1x2
-1 6' long 1x2
-1 8' long 2x2
-2 6' long 2x2s
-1 2'x4' sheet 1/8" pegboard
-1 2'x4' sheet 1/4" masonite
-Wood cuts:
Sides:
-2 45" long 2x2s
-2 21" long 2x2s
-2 48" long 1x8s
-2 25 1/2" long 1x8s
-2 46 1/2" long 1x2s
-2 24" long 1x2s
Legs:
-4 16" long 2x2s
Bottom and Brace:
-4 12" long 2x2s
Masonite:
-22 1/2" x 46 1/2" sheet, with three 1 1/2" square corners and one 1 1/2" x 2 1/2" corner cut out
Directions:
1. Start by assembling the short sides: Take one of the 251/2" 1 x 8s and scribe a horizontal line 1/4" from the top at each end for placement.
2. Attach one of the 24" 1 x 2s with several 11/4" screws, so that each end is exactly 1/4" from the top and exactly 3/4" in from each end of the 1 x 8s.
3. Mount a 21" 2 x 2 under the 1 x 2 so that it is exactly 21/4" from each end of the 1 x 8. Use several 2" screws to secure the 2 x 2 to the 1 x 8.
4. Repeat Steps 1 through 3 for the other short side.
5. To make the long sides: Take one of the 48" 1 x 8s and scribe a horizontal line 1/4" from the top at each end for placement.
6. Attach one of the 461/2" 1 x 2s with several 11/4" screws so that each end is exactly 1/4" from the top and exactly 3/4" in from each end of the 1 x 8.
7. Mount a 45" 2 x 2 under the 1 x 2 so that it is exactly 11/2" from each end of the 1 x 8. Secure the 2 x 2 to the 1 x 8 with several 2" screws.
8. Repeat Steps 5 through 7 for the other long side.
9. Once the sides are constructed, screw them together with a 11/4" screw at each corner to complete the basic frame.
10. Insert the legs into the frame and secure with a couple of 2" screws through the long sides. (Be sure to avoid hitting any of the screws holding the frame together.)
11. Without removing the protective film, place the Plexiglas on a hard, level surface. Invert the table frame and set it on top of the Plexiglas. The top tier should fit around the Plexiglas.
12. With the table upside down, attach the four 12" 2 x 2s to the inside of the frame, centered on each side and 1/2" down from the inside edge, all the way around with a few 2" screws holding each piece.
13. Set the 24" x 48" piece of masonite with the cut-out corners into the frame. It should rest evenly on the 2 x 2s you just installed. Use a couple of 11/4" screws to fasten the masonite to the 12" 2 x 2s. The screws should be about 10" apart, 3/4" from the inner edge, and centered on each side.
14. Paint all interior surfaces white. This will help reflect light onto the pegs. Remember that the underside of the pegboard will be an interior surface and should also be painted white. Let dry.
15. With the table standing upright, attach the fluorescent light fixture to the masonite bottom and run the electric cord out through the larger corner.
16. Set the pegboard inside the box (resting on the 2 x 2 inner rail) and arrange the light pegs.
17. Remove the protective film from the Plexiglas and fit into the box (resting on the 1 x 2 inner rail).
18. Paint the exterior.
19. Turn out the lights, plug in, and get pegged.
Original source is here, but this post links back to ReadyMade Magazine.