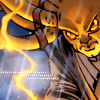
Icon Tutorial: Kit Fisto
Welcome to my first tutorial! Today we will be going from 
to
.
Before we begin, prepare your base through cropping, sharpening etc. As of now, do not attempt to lighten it via screen or any other method. Once you're done, you may move on to the steps outlined below. This a very simple tutorial, to hopefully get you to try gradients on different layer settings.

STEP ONE: Duplicate the base and set to overlay


STEP TWO: Add this brush (in white) to a new transperant layer


STEP THREE: Add this gradient and set it to burn

But remember, a lot of making icons is trial and error - the gradient and brush I have up there might not be right, or you might have to screen to make it visible. Just try and see - use a slightly different gradient or brush, and see if that helps. A slight change in brush and gradient makes a new icon, just with this simple method.

See?
RESOURCES
- Brush by amethystia100, via pstogimpbrushes.
- Gradient by adoralyna from her multi-gradients collection.
- Original image is here.
- And, the GIMP (but can cross over).

to

.
Before we begin, prepare your base through cropping, sharpening etc. As of now, do not attempt to lighten it via screen or any other method. Once you're done, you may move on to the steps outlined below. This a very simple tutorial, to hopefully get you to try gradients on different layer settings.

STEP ONE: Duplicate the base and set to overlay


STEP TWO: Add this brush (in white) to a new transperant layer


STEP THREE: Add this gradient and set it to burn

But remember, a lot of making icons is trial and error - the gradient and brush I have up there might not be right, or you might have to screen to make it visible. Just try and see - use a slightly different gradient or brush, and see if that helps. A slight change in brush and gradient makes a new icon, just with this simple method.

See?
RESOURCES
- Brush by amethystia100, via pstogimpbrushes.
- Gradient by adoralyna from her multi-gradients collection.
- Original image is here.
- And, the GIMP (but can cross over).