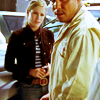
tutorial one
from this: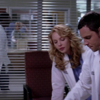
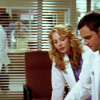
to this: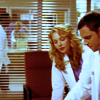
this tutorial is for Photoshop CS2.
it involves curves and selective colouring.
Start with your base
Add a Curves layer (Layers>New Adjustment Layer>Curves) and set it to...
[RGB]
Point One
Input: 185
Output: 221
Point Two
Input: 59
Output: 76
[GREEN]
Point One
Input: 162
Output: 213
Point Two
Input: 61
Output: 65
[BLUE]
Point One
Input: 178
Output: 211
Point Two
Input: 66
Output: 65
This is what your icon should look like now
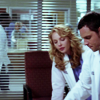
Then add a new layer ad fill it with #ffb400 and set it to Soft Light 30%
Then add another new layer and fill it with #d0471e and set it to Soft Light 10%
Your icon should look like this now
Now add a Selective Colouring layer (Layers>New Adjustment Layer>Selective Colour) and set it to...
REDS
Cyan: +28
Magenta: +9
Yellow: +47
YELLOWS
Cyan: +32
Magenta: -5
Yellow: +12
Your icon should look like this now

Now add another Curves layer (Layers>New Adjustment Layer>Curves) and set it to...
[RED]
Point One
Input: 201
Output: 183
Point Two
Input: 118
Output: 130
Point Three
Input: 57
Output: 74
[GREEN]
Point One
Input: 188
Output: 198
Point Two
Input: 61
Output: 65
[BLUE]
Point One
Input: 191
Output: 255
Point Two
Input: 128
Output: 134
Point Three
Input: 68
Output: 56
And that's it!
Now for all you lazy asses out there, I've uploaded the .psd file here.
It's really best with this tut that you play around with it. This tut works really well with Grey's Anatomy Caps but for other images it's best it you play around with it.
other icons using SIMILAR colouring
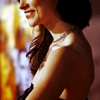

to this:
this tutorial is for Photoshop CS2.
it involves curves and selective colouring.
Start with your base
Add a Curves layer (Layers>New Adjustment Layer>Curves) and set it to...
[RGB]
![[RGB]](http://i176.photobucket.com/albums/w166/_iconsgrace/tutorial/3.png)
Point One
Input: 185
Output: 221
Point Two
Input: 59
Output: 76
[GREEN]
![[GREEN]](http://i176.photobucket.com/albums/w166/_iconsgrace/tutorial/4.png)
Point One
Input: 162
Output: 213
Point Two
Input: 61
Output: 65
[BLUE]
![[BLUE]](http://i176.photobucket.com/albums/w166/_iconsgrace/tutorial/5.png)
Point One
Input: 178
Output: 211
Point Two
Input: 66
Output: 65
This is what your icon should look like now
Then add a new layer ad fill it with #ffb400 and set it to Soft Light 30%
Then add another new layer and fill it with #d0471e and set it to Soft Light 10%
Your icon should look like this now
Now add a Selective Colouring layer (Layers>New Adjustment Layer>Selective Colour) and set it to...
REDS
Cyan: +28
Magenta: +9
Yellow: +47
YELLOWS
Cyan: +32
Magenta: -5
Yellow: +12
Your icon should look like this now
Now add another Curves layer (Layers>New Adjustment Layer>Curves) and set it to...
[RED]
![[RED]](http://i176.photobucket.com/albums/w166/_iconsgrace/tutorial/8.png)
Point One
Input: 201
Output: 183
Point Two
Input: 118
Output: 130
Point Three
Input: 57
Output: 74
[GREEN]
![[GREEN]](http://i176.photobucket.com/albums/w166/_iconsgrace/tutorial/9.png)
Point One
Input: 188
Output: 198
Point Two
Input: 61
Output: 65
[BLUE]
![[BLUE]](http://i176.photobucket.com/albums/w166/_iconsgrace/tutorial/10.png)
Point One
Input: 191
Output: 255
Point Two
Input: 128
Output: 134
Point Three
Input: 68
Output: 56
And that's it!
Now for all you lazy asses out there, I've uploaded the .psd file here.
It's really best with this tut that you play around with it. This tut works really well with Grey's Anatomy Caps but for other images it's best it you play around with it.
other icons using SIMILAR colouring