Tutorial 03 - Coloring
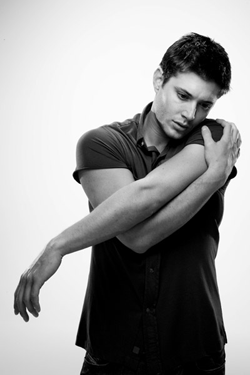
here it is! the tutorial, to THIS picture :D
click to have the full from -> to

made in Photoshop CS 2, translatable.
Beware: I don’t explain every single thing I do, you have to think a bit for yourself.
And you need a basic knowledge and the way how to use Adjustment Layers
We start with this picture:

Step 1:
The skin:
- new layer
- brush tool
- color: #f4c29a
- color the skin and hair area
it should look like this then:

set it on color burn
it looks like this now:

now erase the eyes, the lips and wherever the color is on the shirt and background.
like this:

now set the layer on 13%

Step 2:
More skin:
- duplicate the skin layer
- set it on soft light with 40%
- and again.
With the two new layers it should look like this:

Step 3:
A bit darker:
- new layer
- filling: #000000
- erase the eyes
- set on soft light with 45%
result:

Step 4:
But his left eye bugs us a bit, so we lighten it a bit.
Eye:
- new layer
- brush tool
- color: #ffffff
- color the eye area (only the LEFT ONE! - better use a brush with blurred edges)
- set the layer on soft light and 55%
now you can see the eye but it doesn’t look unreal:

closeup:

Step 5:
Back to the skin:
- duplicate the skin layer again
- drag it over the last layer (the eye layer) you’ve created
- set it on overlay and 40%
should look like this:

Step 6:
More skin:
- new layer
- do the same like in the first first step
- color: #e3cec2
- set it on soft light and 40%
result:

duplicate this layer and set it on multiply and 30%

but we don’t like the color of his face so:
face:
- new layer
- color: #ffffff
- color the face/neck/hair area
- erase the unnecessary parts
- set it on soft light and 20%

Step 7:
The shirt:
- new layer
- brush tool
- color: #dd0b0b
- color the shirt and again erase the parts that you don’t need
- set on overlay and 40%
see:

duplicate this layer and set it on soft light and 30%
now the shirt is brighter:

Step 8:
With the face that pale, he looks creepy, so we’re going to make it darker:
Face:
- new layer
- brush tool
- color: #b37350
- color the face and neck area, this time spare the the hair
- erase the lips and eyes
- set it on multiply and 25%
result:

Step 9:
And here is maybe the most diffucult part (at least when you don’t have a tutorial ^^):
The lips:
- new layer
- brush tool
- color: #cf7175
- now brush over the lips
- erase the parts that are not the lips
- set it to color burn and 20%
and you get this:

The lips 2:
- duplicate the layer you created before
- set it on soft light and 30%
now it looks like this:

The Lips 3:
- new layer
- brush tool
- color: #ff9f9f
- again color the lips and erase the unnecessary parts
- set it to overlay and 20%
result:

The lips 4:
- like before
- color: #cc7175
- maybe blur it a bit, motion blur
- set to screen and 23%
like this:

The lips 5:
- like before (without the bluring)
- color: #d44a5c
- set to soft light and 20%
now we should have this:

The lips 6:
- like before
- color: #f0aebc
- set it to soft light and 10%
the finals result for the lips:

Step 10:
Now lets finish up the hair.
Hair:
- new layer
- brush tool
- color: #120a03
- color the hair, better use a brush with blurred edges
- erase the parts that touch the face
- set it to soft light and 60%
and you should get this:

Hair 2:
- like before
- color: #fbe2ce
- set to soft light and 100%
see:

Hair 3:
- like before
- color: #696450
- set to normal and 30%
result:

Hair 4:
- duplicate the last created layer
- set it to multiply and 30%
the final result:

Step 11:
But I think it still doesn’t look that good, so we’re gonna add a bit more contrast and brightness.
Final:
- new adjustment layer
- brightness/contrast
- brightness: +5 | contrast: +7
and here it is:

download the .psd file + step by step pictures + tutorial HERE
wallpaper over HERE!
original over HERE!
icons over HERE!
+ No hotlink!
+ Please comment if you like/use
+ Credit if taking!!! / credit nilsi_pilsifan or crisisarrives
+ join this comm to see the updates
+ want to become an affiliate? comment HERE
I hope the tutorial was understandable and helpful! :D
Nilsi :)
click to have the full from -> to

made in Photoshop CS 2, translatable.
Beware: I don’t explain every single thing I do, you have to think a bit for yourself.
And you need a basic knowledge and the way how to use Adjustment Layers
We start with this picture:

Step 1:
The skin:
- new layer
- brush tool
- color: #f4c29a
- color the skin and hair area
it should look like this then:

set it on color burn
it looks like this now:

now erase the eyes, the lips and wherever the color is on the shirt and background.
like this:

now set the layer on 13%

Step 2:
More skin:
- duplicate the skin layer
- set it on soft light with 40%
- and again.
With the two new layers it should look like this:

Step 3:
A bit darker:
- new layer
- filling: #000000
- erase the eyes
- set on soft light with 45%
result:

Step 4:
But his left eye bugs us a bit, so we lighten it a bit.
Eye:
- new layer
- brush tool
- color: #ffffff
- color the eye area (only the LEFT ONE! - better use a brush with blurred edges)
- set the layer on soft light and 55%
now you can see the eye but it doesn’t look unreal:

closeup:

Step 5:
Back to the skin:
- duplicate the skin layer again
- drag it over the last layer (the eye layer) you’ve created
- set it on overlay and 40%
should look like this:

Step 6:
More skin:
- new layer
- do the same like in the first first step
- color: #e3cec2
- set it on soft light and 40%
result:

duplicate this layer and set it on multiply and 30%

but we don’t like the color of his face so:
face:
- new layer
- color: #ffffff
- color the face/neck/hair area
- erase the unnecessary parts
- set it on soft light and 20%

Step 7:
The shirt:
- new layer
- brush tool
- color: #dd0b0b
- color the shirt and again erase the parts that you don’t need
- set on overlay and 40%
see:

duplicate this layer and set it on soft light and 30%
now the shirt is brighter:

Step 8:
With the face that pale, he looks creepy, so we’re going to make it darker:
Face:
- new layer
- brush tool
- color: #b37350
- color the face and neck area, this time spare the the hair
- erase the lips and eyes
- set it on multiply and 25%
result:

Step 9:
And here is maybe the most diffucult part (at least when you don’t have a tutorial ^^):
The lips:
- new layer
- brush tool
- color: #cf7175
- now brush over the lips
- erase the parts that are not the lips
- set it to color burn and 20%
and you get this:

The lips 2:
- duplicate the layer you created before
- set it on soft light and 30%
now it looks like this:

The Lips 3:
- new layer
- brush tool
- color: #ff9f9f
- again color the lips and erase the unnecessary parts
- set it to overlay and 20%
result:

The lips 4:
- like before
- color: #cc7175
- maybe blur it a bit, motion blur
- set to screen and 23%
like this:

The lips 5:
- like before (without the bluring)
- color: #d44a5c
- set to soft light and 20%
now we should have this:

The lips 6:
- like before
- color: #f0aebc
- set it to soft light and 10%
the finals result for the lips:

Step 10:
Now lets finish up the hair.
Hair:
- new layer
- brush tool
- color: #120a03
- color the hair, better use a brush with blurred edges
- erase the parts that touch the face
- set it to soft light and 60%
and you should get this:

Hair 2:
- like before
- color: #fbe2ce
- set to soft light and 100%
see:

Hair 3:
- like before
- color: #696450
- set to normal and 30%
result:

Hair 4:
- duplicate the last created layer
- set it to multiply and 30%
the final result:

Step 11:
But I think it still doesn’t look that good, so we’re gonna add a bit more contrast and brightness.
Final:
- new adjustment layer
- brightness/contrast
- brightness: +5 | contrast: +7
and here it is:

download the .psd file + step by step pictures + tutorial HERE
wallpaper over HERE!
original over HERE!
icons over HERE!
+ No hotlink!
+ Please comment if you like/use
+ Credit if taking!!! / credit nilsi_pilsifan or crisisarrives
+ join this comm to see the updates
+ want to become an affiliate? comment HERE
I hope the tutorial was understandable and helpful! :D
Nilsi :)