TUTORIAL NUMBER TWENTY-SIX.
blue-ish coloring tutorial pscs2.
As requested by a lot of people.
• Not Translatable.
• Intermediate/Advanced.
• If you have any questions, feel free to ask.
• JOIN and FRIEND the community to keep up with updates.
• Request for tutorials can be made HERE.
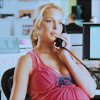
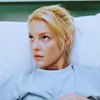
Going from THIS to

<< from this to this >>
First you need to open your program you'll be using. I'll be using PSCS2.
Open up your image. I'll be using THIS screencap from the movie Knocked Up by shadeofpoison.
Crop and resize however you wish.

Duplicate your base.
Set layer to SCREEN / OPACITY 50.
LAYER >> NEW ADJUSTMENT LAYER >> CURVES.
RGB: Input: 70, Output: 187
Set layer to SOFT LIGHT / OPACITY 100.


LAYER >> NEW ADJUSTMENT LAYER >> COLOR BALANCE
Shadows: 18 / 16 / 21
Midtones: 18 / 16 / 21
Highlights: 18 / 16 / 21
Preserve luminosity should be checked.
LAYER >> NEW ADJUSTMENT LAYER >> CHANNEL MIXER
Red: 100 / 18 / 16 / -21
Green: 18 / 100 / 16 / -21
Blue: 18 / 16 / 100 / -21
Set layer to COLOR / OPACITY 100.


LAYER >> NEW ADJUSTMENT LAYER >> SELECTIVE COLOR
Whites: 100 / 0 / -100 / 0
LAYER >> NEW ADJUSTMENT LAYER >> SELECTIVE COLOR
Reds: -100 / 100 / 100 / 21
Set layer to COLOR / OPACITY 25.

Flatten image and then add anything you'd like to reach your desired icon.
If I have confused you with anything, or you have any questions, feel free to ask me.
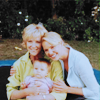
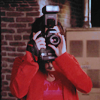
OTHER EXAMPLES

Like what you see? Join the community.
As requested by a lot of people.
• Not Translatable.
• Intermediate/Advanced.
• If you have any questions, feel free to ask.
• JOIN and FRIEND the community to keep up with updates.
• Request for tutorials can be made HERE.
Going from THIS to
<< from this to this >>
First you need to open your program you'll be using. I'll be using PSCS2.
Open up your image. I'll be using THIS screencap from the movie Knocked Up by shadeofpoison.
Crop and resize however you wish.
Duplicate your base.
Set layer to SCREEN / OPACITY 50.
LAYER >> NEW ADJUSTMENT LAYER >> CURVES.
RGB: Input: 70, Output: 187
Set layer to SOFT LIGHT / OPACITY 100.
LAYER >> NEW ADJUSTMENT LAYER >> COLOR BALANCE
Shadows: 18 / 16 / 21
Midtones: 18 / 16 / 21
Highlights: 18 / 16 / 21
Preserve luminosity should be checked.
LAYER >> NEW ADJUSTMENT LAYER >> CHANNEL MIXER
Red: 100 / 18 / 16 / -21
Green: 18 / 100 / 16 / -21
Blue: 18 / 16 / 100 / -21
Set layer to COLOR / OPACITY 100.
LAYER >> NEW ADJUSTMENT LAYER >> SELECTIVE COLOR
Whites: 100 / 0 / -100 / 0
LAYER >> NEW ADJUSTMENT LAYER >> SELECTIVE COLOR
Reds: -100 / 100 / 100 / 21
Set layer to COLOR / OPACITY 25.
Flatten image and then add anything you'd like to reach your desired icon.
If I have confused you with anything, or you have any questions, feel free to ask me.
OTHER EXAMPLES
Like what you see? Join the community.