TUTORIAL NUMBER EIGHT.
bright coloring tutorial / pscs2.
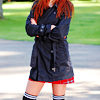
Going from THIS to
First you need to open your program you'll be using. I'm using PSCS2.
Open up you image. I'll be using THIS picture of Alexz Johnson.
Crop & Resize to 100x100.
FILTER >> SHARPEN >> UNSHARP MASK
Radius: 0.70
Strength: 25
Clipping: 0

LAYER >> NEW ADJUSTMENT LAYER >> SELECTIVE COLOR

Duplicate layer. Set this layer to COLOR / OPACITY 25.

LAYER >> NEW ADJUSTMENT LAYER >> COLOR BALANCE
SETTINGS;
shadows; -15 / 21 / 35
midtones; -15 / 21 / 35
highlights; -15 / 21 / 35
Make sure PRESERVE LUMINOSITY is checked on.

LAYER >> NEW ADJUSTMENT LAYER >> CURVES

Set this layer to SOFT LIGHT / OPACITY 100
Merge all.

Your done. =]
Keep in mind that depending on your base your icon will turn out different & may require different settings.
EXAMPLES;


Like what you see? Join the community.
Going from THIS to

First you need to open your program you'll be using. I'm using PSCS2.
Open up you image. I'll be using THIS picture of Alexz Johnson.
Crop & Resize to 100x100.
FILTER >> SHARPEN >> UNSHARP MASK
Radius: 0.70
Strength: 25
Clipping: 0

LAYER >> NEW ADJUSTMENT LAYER >> SELECTIVE COLOR

Duplicate layer. Set this layer to COLOR / OPACITY 25.

LAYER >> NEW ADJUSTMENT LAYER >> COLOR BALANCE
SETTINGS;
shadows; -15 / 21 / 35
midtones; -15 / 21 / 35
highlights; -15 / 21 / 35
Make sure PRESERVE LUMINOSITY is checked on.

LAYER >> NEW ADJUSTMENT LAYER >> CURVES

Set this layer to SOFT LIGHT / OPACITY 100
Merge all.

Your done. =]
Keep in mind that depending on your base your icon will turn out different & may require different settings.
EXAMPLES;


Like what you see? Join the community.