Finally!!! Pattern and How-To!
Taking a break from all my crazy work to get this to you lovelies!!!

Lots of how to pictures below!
Yea!!!
Remember that this pattern is for your own enjoyment and that of fellow Who fans. Please don't use my pattern to make dolls to sell. Thanks!
You'll Need:
- Copy of the pattern (found at http://www.myimaginaryboyfriend.com/adiposepatterns.html )
- 1/2 yd. White Polar Fleece (will make at least 3 Adipose)
- Black Embroidery Floss
- White Embroidery Floss
- Iron-on Transfer Pen (I use, and LOVE, the black Sulky brand pen)
- Tracing paper
- White Thread
- Scissors
- Sewing machine
Directions:
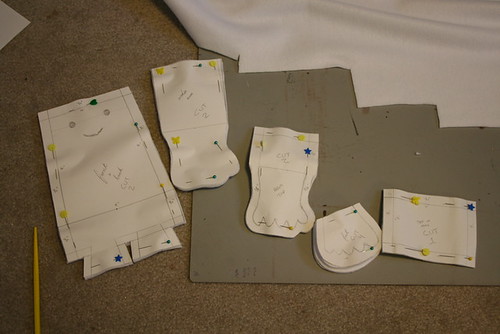
1. Cut out pattern and pin pieces to fabric. Cut 2 of the body pieces, 1 top piece, 2 top arm/side, 2 bottom arm/side, and 4 feet

2. Use tracing paper and iron-on transfer pen to make patterns of the face, arms, and feet. Remember that iron-on works as mirror image so reverse the face pattern. Also remember to make hands and feet for both left and right. Iron patterns onto fabric. I set my iron to wool which was warm enough to transfer but didn't melt the polar fleece. Still be careful. . . that stuff MELTS! Trust me.

3. Embroider the face. I used a split stitch.

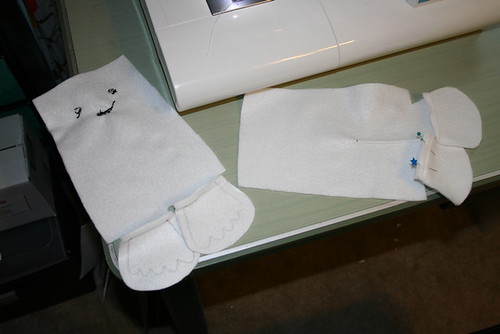
4. Fold back in half and make a small mark 3" up from the base of the body, between the legs. Pin and sew up to the mark using the smallest seam allowance possible, I eyeballed it but it came out to be about 1/8". This make the Adipose bottom!

monster butt seam!

monster butt!
5. Use sewing machine to sew feet onto front and back of monster.

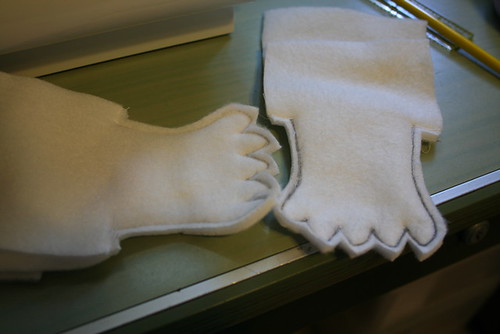
6. Sew up legs and feet. Use 3/8" seam allowance for legs and follow pattern lines for feet. Trim excess fabric from around feet, careful not to trim too close to the stitches.

7. Pin sides together and sew up the arms following the iron-on outline.

8. Trim excess fabric from arms.

9. Turn arms right side out and stuff.

10. Do the same with legs, turn the right side out and stuff.
11. Sew top of head to the front and back.
12. Pin sides onto the body.

13. Sew sides on remember to leave a hole to turn the doll right side out. I left the hole on the bottom right side.

14. Turn right side out!

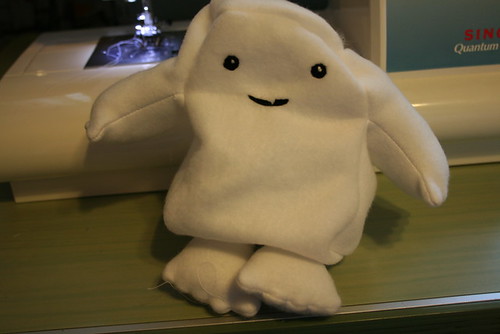
15. Stuff your Adipose! Sew up the opening by hand using a hidden stitch. Frolic and wave at your new lump of fat!

I think that covers it all. . . Let me know if you have any questions!
Hearts!
erika

Lots of how to pictures below!
Yea!!!
Remember that this pattern is for your own enjoyment and that of fellow Who fans. Please don't use my pattern to make dolls to sell. Thanks!
You'll Need:
- Copy of the pattern (found at http://www.myimaginaryboyfriend.com/adiposepatterns.html )
- 1/2 yd. White Polar Fleece (will make at least 3 Adipose)
- Black Embroidery Floss
- White Embroidery Floss
- Iron-on Transfer Pen (I use, and LOVE, the black Sulky brand pen)
- Tracing paper
- White Thread
- Scissors
- Sewing machine
Directions:
1. Cut out pattern and pin pieces to fabric. Cut 2 of the body pieces, 1 top piece, 2 top arm/side, 2 bottom arm/side, and 4 feet

2. Use tracing paper and iron-on transfer pen to make patterns of the face, arms, and feet. Remember that iron-on works as mirror image so reverse the face pattern. Also remember to make hands and feet for both left and right. Iron patterns onto fabric. I set my iron to wool which was warm enough to transfer but didn't melt the polar fleece. Still be careful. . . that stuff MELTS! Trust me.

3. Embroider the face. I used a split stitch.

4. Fold back in half and make a small mark 3" up from the base of the body, between the legs. Pin and sew up to the mark using the smallest seam allowance possible, I eyeballed it but it came out to be about 1/8". This make the Adipose bottom!

monster butt seam!

monster butt!
5. Use sewing machine to sew feet onto front and back of monster.

6. Sew up legs and feet. Use 3/8" seam allowance for legs and follow pattern lines for feet. Trim excess fabric from around feet, careful not to trim too close to the stitches.

7. Pin sides together and sew up the arms following the iron-on outline.

8. Trim excess fabric from arms.

9. Turn arms right side out and stuff.

10. Do the same with legs, turn the right side out and stuff.
11. Sew top of head to the front and back.
12. Pin sides onto the body.

13. Sew sides on remember to leave a hole to turn the doll right side out. I left the hole on the bottom right side.

14. Turn right side out!

15. Stuff your Adipose! Sew up the opening by hand using a hidden stitch. Frolic and wave at your new lump of fat!

I think that covers it all. . . Let me know if you have any questions!
Hearts!
erika