6 ~ Tutorial
This is a tutorial for this icon requested by tinitrinity
I use CS5. There is Selective Coloring and Vibrance Layers involved that may not be transferable.
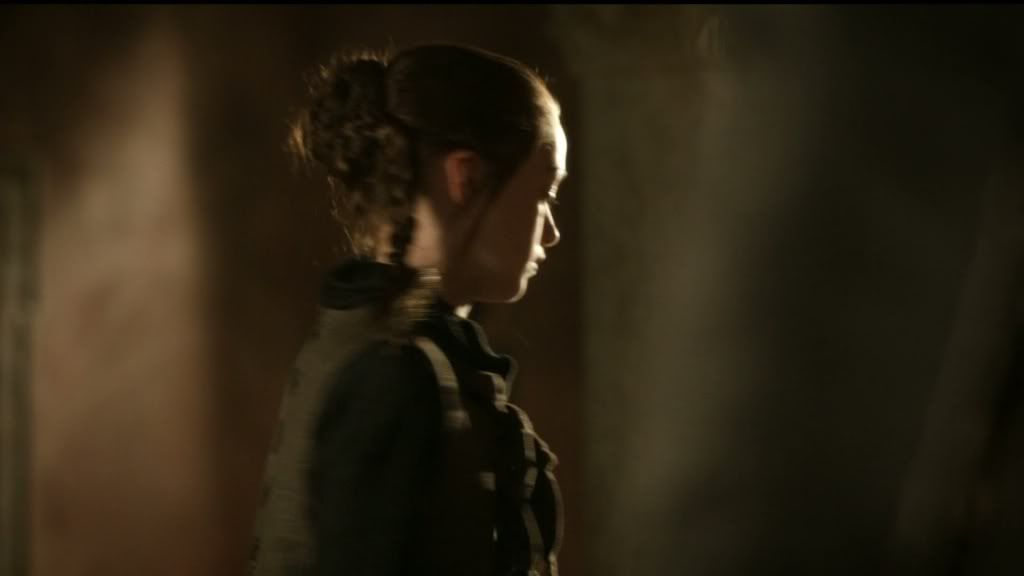
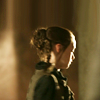
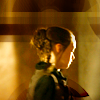
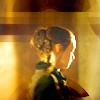
1. First we start out with this screencap: Picture
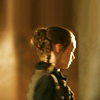
2. I cropped the cap so that Arya is basically in the middle of the icon. I wanted to get some negative space so that meant that I would have to extend the background.
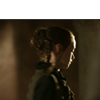
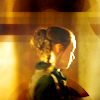
3. To extend the background I used the Smudge Tool to smudge the background you see into the empty space at the top.
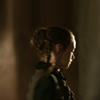
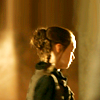
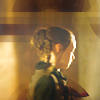
4. Then duplicate that layer 3 times.
-Set the first layer on Soft Light at 100% opacity
-Set the second layer on Screen at 100% opacity
-Set the third layer on Screen at 100% opacity
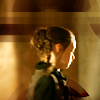
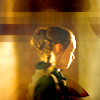
5. Now, the coloring is a little dull so I am going to add a Selective Color Layer to make the colors pop out more, especially the yellows and reds.
Reds: Cyan(-95)/Magenta(0)/Yellow(+77)/Black(-12)
Yellow: Cyan(-31)/Magenta(-12)/Yellow(+14)/Black(-11)
6. Now I want to make those reds and yellows more vibrant so I add a Levels Layer.
- Levels: 15/1.14/227
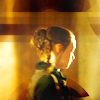
7. You can definitely tell that the background has been smudged so I chose a texture I thought would go well with the icon and cover up the smudging.
-

by innocent_lexys
-Set this texture to Multiply at 100% opacity
8. Stamp Visible Layer (Ctrl+alt+shift+E)
9. Now I want to add more vibrancy so I add a Vibrance Layer.
-Vibrance +35/Saturation +7
10. Now I am going to add a texture I used to use all the time just because it toned the icon down and then I will add more levels. I don't know if it actually makes sense but it was what I did for a little while. It lightens the icon up a tad.
-
by vikyvampirs90
11. Levels Layer: 39/1.16/243

12. I wanted the icon to be more saturated so I added a Saturation Layer through the Hue/Saturation adjustment. I am not 100% sure on the saturation level because I didn't make a note of it but I would guess probably about +13.
13. Now for a Brighness/Contrast level because the icon could use it.
-Brightness +9/Contrast +5
14. Stamp Visible Layer (Ctrl+alt+shift+E)
- I set this layer on soft light with 56% opacity
- It was too bright on her face and body so I erased those parts from this layer
15. The background is a little too dark so I added a light texture to lighten it up a bit. I cannot remember who the texture was made by.
set to Screen at 9% opacity
16. Sharpen to your liking
