tutorial 06
well, I got bored and I decided to make another tutorial, this is REALLY easy and anyone can do it.
we're going from this-->
to this-->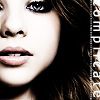
-okay, lets start, I got this base of Michelle:

-it was bad quality at first so I sharpened her eyes and her mouth, which were the parts I wanted most noticable. then I blured her skin, I can't explain it very well but make sure that whatever picture you get it's High quality and don't sharpen it too much.
-duplicate your base 3 times setting each one to soft light and desaturate by going to image>adjustments>desaturate, for PSP users I think you just lower the saturation to -100.. that's all I know, okay so now after you've duplicated them 3 times, or whatever works for your icon.
-now, go to layer>new layer adjustments>hue>saturation and set the saturation to -48 or so, and set the layer opacity to 40-50.
-make a new layer and flood fill it with black setting the mode to overlay and the opacity between 10-20.
-now, go back to the base, copy and paste it over everything, set it to soft light and desaturate.
-now add your text, i chose to make mine sideways which you can do by going to edit>transform>rotate.
-now add your brushes, textures, etc. and ta da!!
I left mine plain b/c I liked it but if you like you can add a brush like so: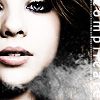
. I got that brush from 100X100_brushes i think, I'm not too sure who made it though.
AGIAN, PLEASE, PLEASE DO NOT!!! copy this tutorial exactly, I thought it would be nice to share some of the things I do with you guys<33
also, made from this "technique" these icons:
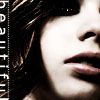
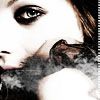
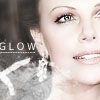
you may snag those icon, but with credit:)
also, when yu have an image that you find bad quality, make sure you first sharpen the parts you want to show up first, then get your blur tool and smooth out the skin, make sure the strength for the skin is ALWAYS between 80-100. and if the icon seems still a bit blegh, then blur the whole thing and fade blur to aroun 30.
I hope you found this usful, if you have ANY questions ask, and please don't ask me ANYTHING about PSP cuz I use PS CS.
we're going from this-->

to this-->

-okay, lets start, I got this base of Michelle:

-it was bad quality at first so I sharpened her eyes and her mouth, which were the parts I wanted most noticable. then I blured her skin, I can't explain it very well but make sure that whatever picture you get it's High quality and don't sharpen it too much.
-duplicate your base 3 times setting each one to soft light and desaturate by going to image>adjustments>desaturate, for PSP users I think you just lower the saturation to -100.. that's all I know, okay so now after you've duplicated them 3 times, or whatever works for your icon.
-now, go to layer>new layer adjustments>hue>saturation and set the saturation to -48 or so, and set the layer opacity to 40-50.
-make a new layer and flood fill it with black setting the mode to overlay and the opacity between 10-20.
-now, go back to the base, copy and paste it over everything, set it to soft light and desaturate.
-now add your text, i chose to make mine sideways which you can do by going to edit>transform>rotate.
-now add your brushes, textures, etc. and ta da!!
I left mine plain b/c I liked it but if you like you can add a brush like so:

. I got that brush from 100X100_brushes i think, I'm not too sure who made it though.
AGIAN, PLEASE, PLEASE DO NOT!!! copy this tutorial exactly, I thought it would be nice to share some of the things I do with you guys<33
also, made from this "technique" these icons:


you may snag those icon, but with credit:)
also, when yu have an image that you find bad quality, make sure you first sharpen the parts you want to show up first, then get your blur tool and smooth out the skin, make sure the strength for the skin is ALWAYS between 80-100. and if the icon seems still a bit blegh, then blur the whole thing and fade blur to aroun 30.
I hope you found this usful, if you have ANY questions ask, and please don't ask me ANYTHING about PSP cuz I use PS CS.