(no subject)
requested by cats_like_trees
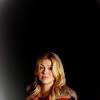
from
to
000
crop your image
001
copy your base and set it to screen (opacity: 41%)

002
make a new adjustment layer -> curves
RGB
1st: move the point from the bottom right-hand corner to Input:14 Output:0
2nd: make a point at Input:80 Output:152
looks like this

003
make a new adjustment layer -> color balance
Shadows: -40 | -1 | -1
Midtones: -5 | +14 | +18
Highlights: -4 | -7 | +2

004
add a new adjustment layer -> brightness/contrast
Brightness: +2
Contrast: +16

005
make a new adjustment layer -> selective color
Reds: -14 | 0 | +23 | +17
Yellows: 0 | 0 | -32 | 0
Whites: -12 | 0 | +18 | +20
Neutrals: 0 | -11 | -10 | +8

006
make a second new adjustment layer -> selective color
Neutrals: -6 | -1 | +6 | +19

007
add a new adjustment layer -> curves
RGB
1st: Input:131 Output:149
looks like this

008
and the last step:
new adjustment layer -> color balance
Highlights: 0 | 0 | +43
other icons made with similar settings
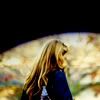
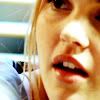
and some more of the icons over here
I won't upload the psd.
My tutorials usually aren't very difficult and if you still have a problem or don't understand something, I'll always try to help you.
from
to
000
crop your image
001
copy your base and set it to screen (opacity: 41%)
002
make a new adjustment layer -> curves
RGB
1st: move the point from the bottom right-hand corner to Input:14 Output:0
2nd: make a point at Input:80 Output:152
looks like this
003
make a new adjustment layer -> color balance
Shadows: -40 | -1 | -1
Midtones: -5 | +14 | +18
Highlights: -4 | -7 | +2
004
add a new adjustment layer -> brightness/contrast
Brightness: +2
Contrast: +16
005
make a new adjustment layer -> selective color
Reds: -14 | 0 | +23 | +17
Yellows: 0 | 0 | -32 | 0
Whites: -12 | 0 | +18 | +20
Neutrals: 0 | -11 | -10 | +8
006
make a second new adjustment layer -> selective color
Neutrals: -6 | -1 | +6 | +19
007
add a new adjustment layer -> curves
RGB
1st: Input:131 Output:149
looks like this
008
and the last step:
new adjustment layer -> color balance
Highlights: 0 | 0 | +43
other icons made with similar settings
and some more of the icons over here
I won't upload the psd.
My tutorials usually aren't very difficult and if you still have a problem or don't understand something, I'll always try to help you.