Tutorial #14
WHOA 14 TUTORIALS ALREADY???Look, I'm being productive and posting icons and tutorials now! Sweet~ And I'm downloading music 'cause I'm weird like that. Hell, I'm running my own music dump. XD Anyway, here's a tut requested by laury_kos. This uses Selective Coloring, a few Gradient Maps, heavy use of textures and Photoshop. Not newbie-friendly because I'm like that. It's also intended for images that are light in color. Note: This also uses a few steps from one of anty_'s tutorials.
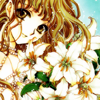
to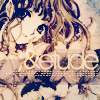
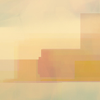
1. Open up a clean-looking texture from your folders. (Clean-looking textures, for me, are simple-looking ones, like this one by dieaku)
2. Open up your image, crop, go to Select->All, then copy+paste it on the texture. You might want to duplicate your base a bunch of times.
3. Desaturate the first copy of your image and set it to Colour Burn.
4. Set the second not-desaturated copy of the base to Lighten. Adjust the opacity to your liking.
5. Got myself another texture by dieaku (this one) and set it to Darken 100%. (You can use a texture similar to this.)
6. Get a texture from 77words's mixed pack and set it to Multiply.
7. Duplicate that texture and set it to Multiply.
8. New layer: Fill it with a light green color and set it to Saturation. Lower the opacity to your liking. 8D
9. If you've duplicated your base four times, set the third copy on top of everything. Desaturate and set to Soft Light.
10. New Adjustment layer->Brightness & Contrast. Toy with the settings.
11. New layer. Get out any grunge bar brushes you have and put it on the layer. This is will act as your text area. (Make sure it's black and set it to Soft Light.) If it's not dark enough, duplicate the layer and adjust the opacity to your liking.
12. New layer: Type your text and apply your tiny text here.
13. New color layer: Fill it with a dark blue color and set it to Exclusion.
14. Make three gradient maps out of any random gradients you have and set them all to soft light. You can adjust their opacities to your liking.
15. Duplicate the texture from step 5 and set to Multiply. Again, adjust the opacity.
16. New adjustment layer->Selective Coloring. Play with the settings. 8D;;
17. Set the last copy of your base on top of EVERYTHING. Do not destaurate. Set it to Soft Light.
TA-DA. YOU'RE DONE~
PLUGGAGE: makaingel ~ my music dump. XDXD And fireandwind and rainfall_icons. Because these communities have awesome icons.
to
1. Open up a clean-looking texture from your folders. (Clean-looking textures, for me, are simple-looking ones, like this one by dieaku)
2. Open up your image, crop, go to Select->All, then copy+paste it on the texture. You might want to duplicate your base a bunch of times.
3. Desaturate the first copy of your image and set it to Colour Burn.
4. Set the second not-desaturated copy of the base to Lighten. Adjust the opacity to your liking.
5. Got myself another texture by dieaku (this one) and set it to Darken 100%. (You can use a texture similar to this.)
6. Get a texture from 77words's mixed pack and set it to Multiply.
7. Duplicate that texture and set it to Multiply.
8. New layer: Fill it with a light green color and set it to Saturation. Lower the opacity to your liking. 8D
9. If you've duplicated your base four times, set the third copy on top of everything. Desaturate and set to Soft Light.
10. New Adjustment layer->Brightness & Contrast. Toy with the settings.
11. New layer. Get out any grunge bar brushes you have and put it on the layer. This is will act as your text area. (Make sure it's black and set it to Soft Light.) If it's not dark enough, duplicate the layer and adjust the opacity to your liking.
12. New layer: Type your text and apply your tiny text here.
13. New color layer: Fill it with a dark blue color and set it to Exclusion.
14. Make three gradient maps out of any random gradients you have and set them all to soft light. You can adjust their opacities to your liking.
15. Duplicate the texture from step 5 and set to Multiply. Again, adjust the opacity.
16. New adjustment layer->Selective Coloring. Play with the settings. 8D;;
17. Set the last copy of your base on top of EVERYTHING. Do not destaurate. Set it to Soft Light.
TA-DA. YOU'RE DONE~
PLUGGAGE: makaingel ~ my music dump. XDXD And fireandwind and rainfall_icons. Because these communities have awesome icons.