Tutorial 01: How to make an icon look original
Want to make a boring b&w picture more interesting? Want to be a little more creative?
How to go from this:

to this:
in 9 steps.
--i don't care about credit...it's just a tut--
--comments are always nice--
--hotlink and die--
This is the first tut I've put together as requested by
lil_chanteuse. It involves use of the lasso tool so beacause of that, I'll put the level of difficulty at intermediate. Everything else is pretty simple though. I hope I'm clear. If not, ask as many questions as you'd like and hopefully I can answer them. Done in CS3, but I'm sure its translatable.
Step 1
Take a picture, in this case we're using this one:

Step 2
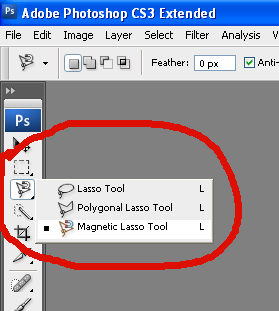
Cut out Peter from the picture by using either the pen, lasso, or eraser tool. I use the magnetic lasso tool so here's how I did it.
Go to your tool box and drag ur mouse down to the lasso tool. Right click it and pick magnetic lasso tool. This tool works by clinging to the edges of the subject that u would like to cut out. It may take a few hit and misses before u have a complete understanding of the tool, but try it out anyway.
Step 3
First, you might want to zoom in the picture. I zoomed in by 400%.
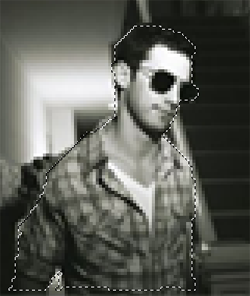
Start by clicking the point where u'd like to begin cutting. Keep dragging the lasso around his entire body (or simply his head, because we'll be focusing only on his head.) As you drag your mouse, the lasso will cling best to the points where colors are easily distinguishable. For the parts where the face or body fades into the background u will have to click the points u want it to stick to. After u fininish making the points around Peters body, click the point where u started. Once you click that point, the lasso tool will stop clinging and connect all your points. Now u can use photoshop normally.

==>
Step 4
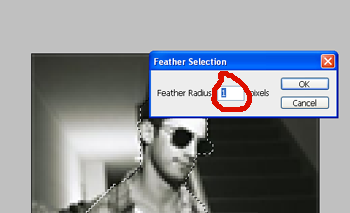
Click Select and go down to Modify then choose Feather (or press Alt+Ctrl+D). The feather tool feathers the edges of a subject that u have selected and are about to cut. In this case we have lassoed and selected Peter's body (or head) to be cut. A box will have popped up and u will type in either 2 or 1 pixels. The bigger the number, the more the edges will be feathered and vice versa. I typed in 1 because I do not want the edges of Peter's body featherd too much. However, if u think u haven't really done a good job of lassoeing Peter's body, then type in 2...or even 3 pixels. Click OK.
Step 5
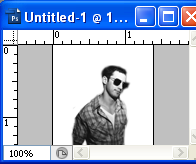
Once u select okay, you will go to Edit and click on Cut (Ctrl+X). Make a new 100x100 image, go back to Edit and click Paste (Ctrl+V). The lassoed image of just Peter should appear.
Step 6
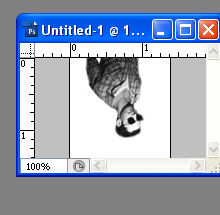
Clean soften the opacity of your eraser brush (90% should do it) and carefully erase any excess stuff that might've been cut with Peter's body. After you're done with that, go to Image, scroll down to Rotate Canvas and click on Flip Canvas Vertical. Once u've hit that, Peter should be upside down.
Step 7
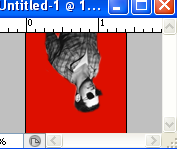
Go to the Layer palette and click on the Background layer. Now look on the bootom of the Layer palette (where the little pictures are) and click on the Create New layer button (which is next to the little garbage can). Once u have that new layer u can fill it with any color that's not too dark. In this case I used a bright shade of red (#dd0f00).

==>
Step 8 (you can skip this)
I used this texture, by
meivocis, and put it on Color Burn. You can leave the opacity at 100% if you'd like but in my icon I had it at 31%.

Step 9
Last, click on the layer that has Peter. Select Multiply. Then you just put the head (or body) where you want it and POOF, a really original looking icon.

==>
Latest Icon post found HERE