(no subject)
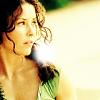
This tutorial was requested by _ensoleille for this icon:
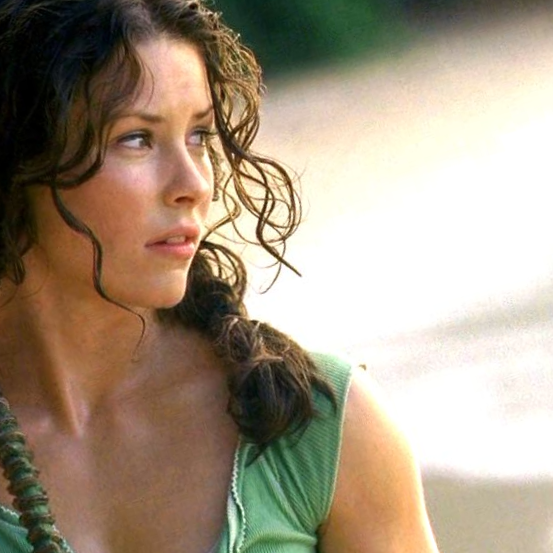
Cap originally from Lost Media.
All layers are 100% unless stated otherwise.
So I rotate the cap slightly to the left, and crop a perfect square. This is what I've got.
Duplicate the layer, set it to Screen. Grab a dark blue colour, I took #000040. Create an Exclusion layer and duplicate. Make three new dups of the bottom layer and drag them over the Exclusion layers. Set the lower one to Screen 54%, the middle to Soft Light and the top one to Overlay.
This is what I have now.
For the final piece of colouring, I add a new Curves Adjustment Layer with the following settings:
RGB: No editing.
Red: No editing.
Green: No editing.
Blue: Input-138 Output 116
It looks more yellow now, right?
Yeah so resize it to 100x100 px and sharpen. If you want to, take a circular brush with low Hardness and add a little blob of light somewhere near her neck.
Voilà!
What we wanted:
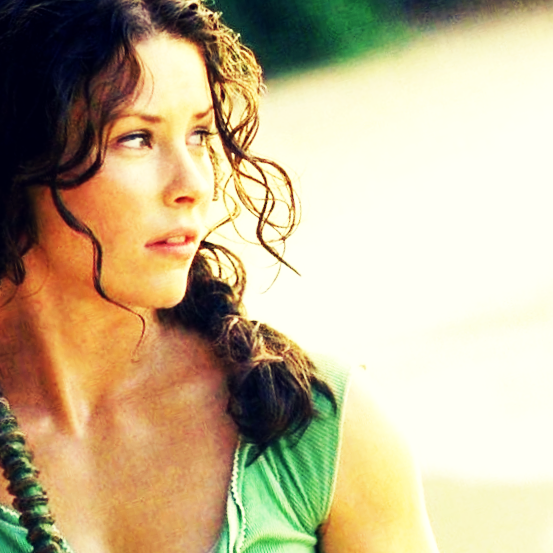
What we got:

Pretty close, right? I hope this tutorial was helpful to everyone and if anyone has any questions, please go ahead and ask them! :D
So I rotate the cap slightly to the left, and crop a perfect square. This is what I've got.
Duplicate the layer, set it to Screen. Grab a dark blue colour, I took #000040. Create an Exclusion layer and duplicate. Make three new dups of the bottom layer and drag them over the Exclusion layers. Set the lower one to Screen 54%, the middle to Soft Light and the top one to Overlay.
This is what I have now.
For the final piece of colouring, I add a new Curves Adjustment Layer with the following settings:
RGB: No editing.
Red: No editing.
Green: No editing.
Blue: Input-138 Output 116
It looks more yellow now, right?
Yeah so resize it to 100x100 px and sharpen. If you want to, take a circular brush with low Hardness and add a little blob of light somewhere near her neck.
Voilà!
What we wanted:
What we got:
Pretty close, right? I hope this tutorial was helpful to everyone and if anyone has any questions, please go ahead and ask them! :D