POT tutorial
Wll there was a long since I made a tutorial so i decided to make one
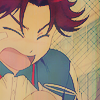
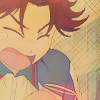
Go from this:
to this:
Other icons make with this tutorial
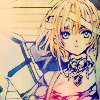
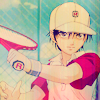
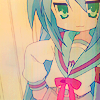
-Made in PS CS2
-Transbalable
-Works with manga and anime images
1-.Crop your base,resize it to 100x100 and sharpen once

2-.Duplicate it once and set it in Soft Light 100%

3-.Make a new layer,fill it with #080f1f in Exclusion 100%

4-.Make another new layer fill it with #bccff9 in Soft Light 100%

5-.Make a new layer fill it with #f9e1bc in Multiply 100%

6-.Open a Color Balnce layer with this settings:
Midtones
+13,-17,+8

7-. Open a Hue/Saturation layer with this settings:
Master
Hue:0 Saturation:+24,Brightness:0

8-.Duplicate your base,bring it to the top,desaturate it,put a Guassion Blur of 1,3 and set it in Soft Light

9-.Make a new Layer,fill it with #fe97d9 in Soft Light 64% of Opacity

10-.Make a new layer,fill it with #aafac2 in Color Burn 87% of Opacity

11.,Make a new layer,fill it with #0c1534 in Exclusion 100%

12-.Open a Brightness/Contrast Layer with this settings
Brightness:+4, Contrast:+8

13-.Put this texture made by ? if some one knows tell me please in Soft Light 70% of Opacity

14-.Put this texture made by
77words
in Soft Light 100%

15-.Put this other textures also made by
77words
in Darken 40% of opacity
16-.Open a color balance layer with this settings:
Midtones
+3,-33,+1
17-.Put this textures is the last one I promise xD made by ? in Screen 100%
18-.Make another new layer fill it with #b7c7fd in soft Light 100%

19-.The last color layer xD fill it with #afb0b2 in Color Burn 100%

20-.Open The last Color Balance layer with this settings:
Midtones
-39,+13,+21

21-.Open a brightness/Contarst layer with this settings
Brightness:-7,Contrast:+22

22.,As the last step open a Hue/Saturation layer with this settings
Master:
Saturation,+20

I hope you like the tutorial n_n I know is long xDD
Go from this:

to this:

Other icons make with this tutorial


-Made in PS CS2
-Transbalable
-Works with manga and anime images
1-.Crop your base,resize it to 100x100 and sharpen once

2-.Duplicate it once and set it in Soft Light 100%

3-.Make a new layer,fill it with #080f1f in Exclusion 100%

4-.Make another new layer fill it with #bccff9 in Soft Light 100%

5-.Make a new layer fill it with #f9e1bc in Multiply 100%

6-.Open a Color Balnce layer with this settings:
Midtones
+13,-17,+8

7-. Open a Hue/Saturation layer with this settings:
Master
Hue:0 Saturation:+24,Brightness:0

8-.Duplicate your base,bring it to the top,desaturate it,put a Guassion Blur of 1,3 and set it in Soft Light

9-.Make a new Layer,fill it with #fe97d9 in Soft Light 64% of Opacity

10-.Make a new layer,fill it with #aafac2 in Color Burn 87% of Opacity

11.,Make a new layer,fill it with #0c1534 in Exclusion 100%

12-.Open a Brightness/Contrast Layer with this settings
Brightness:+4, Contrast:+8

13-.Put this texture made by ? if some one knows tell me please in Soft Light 70% of Opacity

14-.Put this texture made by
77words
in Soft Light 100%

15-.Put this other textures also made by
77words
in Darken 40% of opacity

16-.Open a color balance layer with this settings:
Midtones
+3,-33,+1

17-.Put this textures is the last one I promise xD made by ? in Screen 100%

18-.Make another new layer fill it with #b7c7fd in soft Light 100%

19-.The last color layer xD fill it with #afb0b2 in Color Burn 100%

20-.Open The last Color Balance layer with this settings:
Midtones
-39,+13,+21

21-.Open a brightness/Contarst layer with this settings
Brightness:-7,Contrast:+22

22.,As the last step open a Hue/Saturation layer with this settings
Master:
Saturation,+20

I hope you like the tutorial n_n I know is long xDD