|tutorial: dean & jo from supernatural
A Supernatural coloring tutorial as requested by spg_spn_girls.

to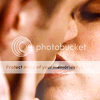
Made in Photoshop CS5.
Some selective coloring was used, so this may not be translatable.
OVERVIEW
Ah, Jo and Dean from 5x10 Abandon All Hope. I made this icon quite a long while ago, but I think I still remember how I made it. It may not look exactly the same, but I'll do my best to get it pretty close. This tutorial will just cover image prep and coloring. I will not be going into detail on tools and functions. You should have a good knowledge of your graphics program!
IMAGE & CROPPING
Choosing the image for this icon was pretty simple - I knew that I wanted to make an icon of Jo and Dean from this episode. However, the key scenes (mostly from the end of the episode) were too dark and really hard to work with, so I chose the scene were Dean propositions Jo and she pretends to kiss him, because the shots were so lovely -- lots of close ups and good lighting!
The cap I chose (resized down from 1280x720 to 400x225):

This is a great image to work with! It's well lit and has endless possibilities for crops. I really wanted to focus on Jo's eyes, lips and hand for this icon and leave Dean more in the background. I also wanted more contrast because the cap is a little washed out.
The cropped base, achieved by pasting the 400x225 size image into a 200x200 square and using Free-Transform to shrink the image & crop, then resized down to 100x100:

COLORING
NOTE: The coloring detailed below is not the exact coloring I used for this icon. Since this icon was created quite a long time ago, I'm just going to guess on how I achieved the coloring. Studying the icon, I notice it has strong red/yellow tones in it, so I think I went about the coloring in the following way:
01. Layer -> New Adjustment Layer -> Selective Color (Soft Light -> Opacity: 100% Fill: 56%)
REDS
Cyan; -23
Magenta; 0
Yellow; +8
Black; -11
WHITES
Cyan; 0
Magenta; 0
Yellow; +15
Black; +11
NEUTRALS
Cyan; 0
Magenta; +3
Yellow; 0
Black; -4
02. Duplicate base -> Drag to top -> Screen -> Opacity: 100% Fill: 100%
03. Duplicate Screen layer x 1
Coloring so far:

04. Layer -> New Fill Layer -> Solid Color -> Fill with #1c1501 -> Soft Light -> Opacity: 52% Fill: 100%
05. Duplicate base -> Drag to top -> Soft Light -> Opacity: 100% Fill: 100%
06. Duplicate Soft Light layer x 1
Coloring so far:

07. Layer -> New Fill Layer -> Solid Color -> Fill with #ffffff -> Soft Light -> Opacity: 100% Fill: 100%
08. Duplicate base -> Drag to top -> Overlay -> Opacity: 100% Fill: 20%
Coloring so far:

09. Layer -> New Adjustment Layer -> Color Balance (Normal -> Opacity: 100% Fill: 100%)
SHADOWS
+6, 0, -3
MIDTONES
+17, 0, -8
HIGHLIGHTS
0, 0, 0
10. Duplicate Color Balance layer x 1
Coloring so far:

11. Layer -> New Adjustment Layer -> Hue/Saturation -> Normal -> Opacity: 100% Fill: 100%
MASTER
hue; 0
saturation; +7
lightness; 0
RED
hue; O
saturation; +19
lightness; 0
Coloring so far:

12. Grabbed this black and white light texture (not sure who made it, sorry!) and set it to Screen -> Opacity: 100% Fill: 79%. I erased bits of the texture so it wasn't entirely covering Jo and Dean's faces (it looked too washed out).
Coloring so far:

13. CTRL+ALT+SHIFT+E (or copy-merge & paste) -> Filter -> Blur -> Gaussian Blur -> Radius: 10.0 -> Soft Light -> Opacity: 30% Fill: 100%
14. CTRL+ALT+SHIFT+E (or copy-merge & paste) -> Filter -> Sharpen -> Normal -> Opacity: 30% Fill: 100%
And the final result:

(+ my layer palette)
Compared to the original:
CREDITS
Screencaps by: Home of the Nutty.com
Some tips from a tutorial by: cakeholes
Some tips from tutorials found at icon_tutorial
Please use this tutorial as a guide! I do not provide PSD's, sorry.
to
Made in Photoshop CS5.
Some selective coloring was used, so this may not be translatable.
OVERVIEW
Ah, Jo and Dean from 5x10 Abandon All Hope. I made this icon quite a long while ago, but I think I still remember how I made it. It may not look exactly the same, but I'll do my best to get it pretty close. This tutorial will just cover image prep and coloring. I will not be going into detail on tools and functions. You should have a good knowledge of your graphics program!
IMAGE & CROPPING
Choosing the image for this icon was pretty simple - I knew that I wanted to make an icon of Jo and Dean from this episode. However, the key scenes (mostly from the end of the episode) were too dark and really hard to work with, so I chose the scene were Dean propositions Jo and she pretends to kiss him, because the shots were so lovely -- lots of close ups and good lighting!
The cap I chose (resized down from 1280x720 to 400x225):
This is a great image to work with! It's well lit and has endless possibilities for crops. I really wanted to focus on Jo's eyes, lips and hand for this icon and leave Dean more in the background. I also wanted more contrast because the cap is a little washed out.
The cropped base, achieved by pasting the 400x225 size image into a 200x200 square and using Free-Transform to shrink the image & crop, then resized down to 100x100:
COLORING
NOTE: The coloring detailed below is not the exact coloring I used for this icon. Since this icon was created quite a long time ago, I'm just going to guess on how I achieved the coloring. Studying the icon, I notice it has strong red/yellow tones in it, so I think I went about the coloring in the following way:
01. Layer -> New Adjustment Layer -> Selective Color (Soft Light -> Opacity: 100% Fill: 56%)
REDS
Cyan; -23
Magenta; 0
Yellow; +8
Black; -11
WHITES
Cyan; 0
Magenta; 0
Yellow; +15
Black; +11
NEUTRALS
Cyan; 0
Magenta; +3
Yellow; 0
Black; -4
02. Duplicate base -> Drag to top -> Screen -> Opacity: 100% Fill: 100%
03. Duplicate Screen layer x 1
Coloring so far:
04. Layer -> New Fill Layer -> Solid Color -> Fill with #1c1501 -> Soft Light -> Opacity: 52% Fill: 100%
05. Duplicate base -> Drag to top -> Soft Light -> Opacity: 100% Fill: 100%
06. Duplicate Soft Light layer x 1
Coloring so far:
07. Layer -> New Fill Layer -> Solid Color -> Fill with #ffffff -> Soft Light -> Opacity: 100% Fill: 100%
08. Duplicate base -> Drag to top -> Overlay -> Opacity: 100% Fill: 20%
Coloring so far:
09. Layer -> New Adjustment Layer -> Color Balance (Normal -> Opacity: 100% Fill: 100%)
SHADOWS
+6, 0, -3
MIDTONES
+17, 0, -8
HIGHLIGHTS
0, 0, 0
10. Duplicate Color Balance layer x 1
Coloring so far:
11. Layer -> New Adjustment Layer -> Hue/Saturation -> Normal -> Opacity: 100% Fill: 100%
MASTER
hue; 0
saturation; +7
lightness; 0
RED
hue; O
saturation; +19
lightness; 0
Coloring so far:
12. Grabbed this black and white light texture (not sure who made it, sorry!) and set it to Screen -> Opacity: 100% Fill: 79%. I erased bits of the texture so it wasn't entirely covering Jo and Dean's faces (it looked too washed out).
Coloring so far:
13. CTRL+ALT+SHIFT+E (or copy-merge & paste) -> Filter -> Blur -> Gaussian Blur -> Radius: 10.0 -> Soft Light -> Opacity: 30% Fill: 100%
14. CTRL+ALT+SHIFT+E (or copy-merge & paste) -> Filter -> Sharpen -> Normal -> Opacity: 30% Fill: 100%
And the final result:
(+ my layer palette)
Compared to the original:
CREDITS
Screencaps by: Home of the Nutty.com
Some tips from a tutorial by: cakeholes
Some tips from tutorials found at icon_tutorial
Please use this tutorial as a guide! I do not provide PSD's, sorry.