SEPHIROTH Final Fantasy Cosplay Making Of
OCTOBER 2017 UPDATE!!
Seems like Photobucket has finally kicked the bucket! If you like our tutorials or wanna see this one. Please like us on facebook!
https://www.facebook.com/AlitaArleh.Cosplay/
Our tutorials will slowly move over there!
And this particular one now lives here!
https://www.facebook.com/pg/AlitaArleh.Cosplay/photos/?tab=album&album_id=1327503854038129
Love, Alita and Arleh~
-------
It's finally that time again to show you the secrets behind the cosplay!
Myself and arlo_arleh did Sephiroth and Cloud Final Fantasy Advent Children Cosplay for Mini Animania 2010.
Sephiroth granted, is one of those 'traditional' as you would say cosplays that every costumer should try at least once. I've been slightly obsessed with the idea of being able to do it well, nay, do it better than the stock standard average, since this cosplay at least to me is not just showing you can look like the character, but have the serious construction skills to back it up.
It's worse since I happen to be a short asian girl who is tan enough to make people go "wait, seriously, YOU'RE doing to attempt Sephiroth, hold on, ghhwkkk, I just need to like... ahahahaha, go over here and AHAHAHAHAHAHAHAHAHAAHAHA." at me.
So NOT ONLY did I have to make a costume which had to be better than the gigantic range of ready-to-buy-from-an-ebay-store costumes, but I had to somehow gain myself 6 inches worth of height, lighten my skin, and construct armour.
Meaning possibly for the first time I had to make 90% of this costume from coat, to buckles, to armour, to shoes and am proud to say how everything was done impeccably (I also went insane and weaved a wig, but then said screw it, I'll just buy one from maple and not have it look like ass).
And as I was doing this, over about 6-8 weeks. arlo_arleh made pants. How she managed to pull an entire FFAC!Cloud costume out of her ass in two days I will never figure out. That's how she works and thus continues to make my life HELLLLLLL.
Since there is a SEVERE lack of tutorials for this costume online (I LOOKED) I thought this might be the guide that an aspiring cosplayer will one day refer to and go, OH that's wtf it looks like from the back, or OH that's the order I should make things in.
ANYWAYS onto the costume.
WARNING! IMAGE HEAVY NOT FOR DIAL UP FOR EVEN SLOW BROADBAND!
THE COAT
I bought 5 x $28/m pleather from My Hung (my favoured asian fabric store), and made sure this time that the pleather was not the kind that started disintergrating as soon as you sewed it. (Like the sort that did in my Gravitation cosplay). Since pleather tends to be thin, and his coat is suppose to be REAL leather, I had to add some weight to it, so I also bought around 5 m of interfacing to line the entire jacket at around $14 a metre for the fabric kind and not the paper iron on stuff that rips apart in my sewing machine D:
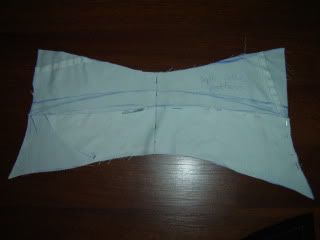
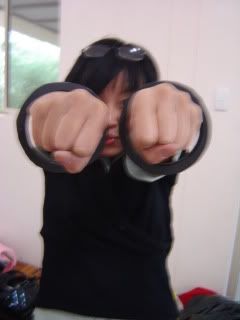
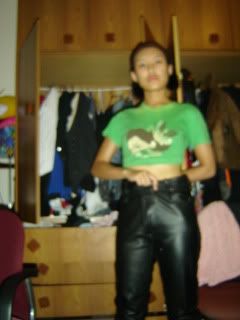
I made a pattern from very well fitted winter coat.
Here's Arleh to demonstrate.
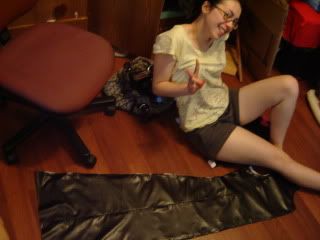
I personally find it easier to get an old piece of clothing I KNOW fits me to a T rather than muck around with pattern pieces. That way I can just trace and cut. The leather and lining and interfacing should be cut at the same time so they're all exactly the same size.
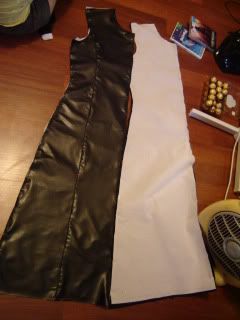
I ended up with 7 panels altogether, four in front (as these had to be symmetrical) and 3 in back since I wanted the seam in a certain place.
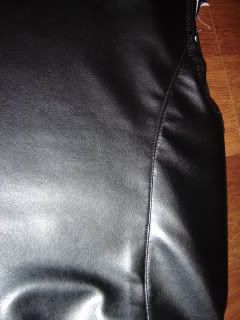
The seams on the coat I double-sewed down so they lie flat. Check out that 1mm perfection of straightness awwwriiight.
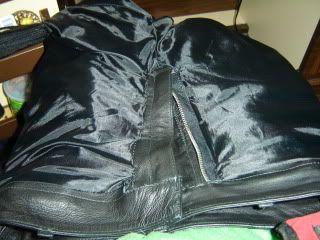
I REALLLY WANTED TO DO AN INVISIBLE ZIP since Arleh has already made a set of detachable wings for Howl's Moving Castle (see previous post), meaning I can just BORROW her backback, stick one wing on it, and later be all, ONE WINGED ANGEL DADADADADA SEPHIROTH!!! dodododododo in it.
However I didn't want the back of the coat to be marred by an ugly zipper, so this had to be perfectly invisible.
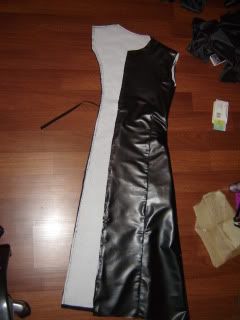
Therefore I left the appropriate side unsewn.
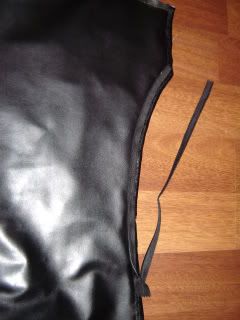
And put a zipper there instead, careffffffffully sewing it invisibly. You can do this without an invisible zipper foot no matter WHAT Arleh says. God there went $4.50 wasted.
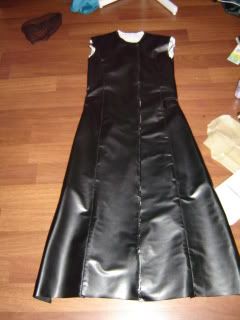
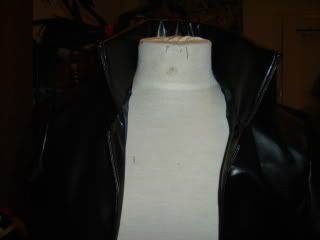
Sewed it all together!
Then sleeves and hem was adjusted for my tiny self. In women's size it's around a size 8-10, that's how tiny I am. I left the front sides un-sewn for now since I still need to add buckles.
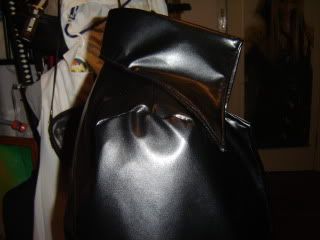
THE COLLAR
Jesus christ this was the hardest collar I have ever made, since it's such a particular shape, and at such a steep bend 3 inches from the neckline, and a weird curved point that getting the shape right took around EIGHT HOURS. No shameful tucking this time, I promised Arleh this won't be a repeat of my Howl coat collar which was hilariously folded over.
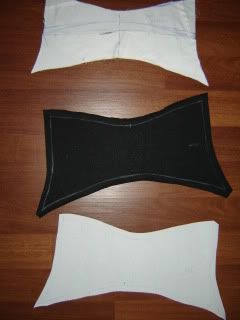
The original pattern and the leather and interfacing. Only one layer of interfacing.
The pattern was made from scrap. So for future cosplayers, this is what a Sephiroth collar should look like in pattern form. Your work, done for you.
Sewed the leather and interfacing together with a quick zigzag, because WE DO NOT HAVE AN OVERLOCKER. Myself and Arleh argued whether this would be the time to charge over at 3AM to Mew's house (and her overlocker) and cash in the favour she owed us. But we are still saving that one up Mew eh he he.
Then I added a piece of plastic inside the collar before I sewed it down since otherwise it will not stand up straight. This is the same technique used in Chinese Shirt collars to ensure its washable. However instead of nice plastic I just used the bottom of a Woolworths shopping bag oh yeaaaah. Class.
Then I sewed it down careeeeeefully along the same seam on the neckline. So there you go, collar!
While I was doing this, I made 14 little belts for the buckles to wrap around. These took forever. Goddamn Nomura and his USELESS accessories.
THE BUCKLES
I made these out of sculpey ($23.95 from an art store), and by some miracle managed to make them as straight and strong as possible. The key to this was wrapping a post-it around a small 15cm ruler to mould the sculpey. Using just the ruler the clay would stick to it and cause residue, but with a post-it, you can just throw away the post-it once it gets too sticky. And thus, dead straight edges. I made one extra in case of failure. This took about 7 hours all up.
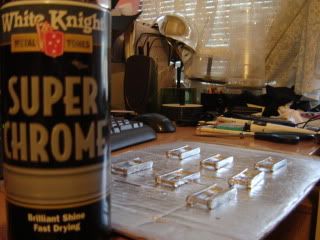
Got SUPER CHROME spray paint from the hardware store. This makes anything look like real metal. My new favourite spray paint.
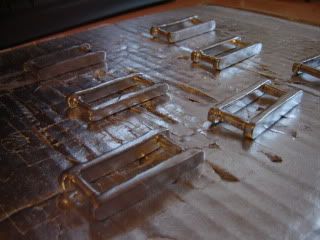
My little beauties *sob*...
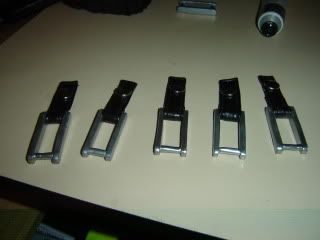
Then hand sewed the tiny little belts around the buckles. And added snap clasps.
There were goddamn SEVEN of these uggggh.
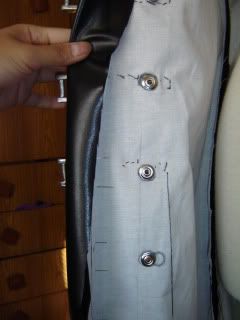
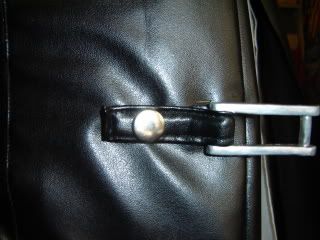
Ah, snap clasps. And hammered these onto the coat as well. Then hand stitched them so they weren't being all sad and falling down.

Then on the corresponding belts, I got a piece of $1.24 aluminum corner protector from the hardware store, and cut little strips to make the little belt loops around these belts. Surprisingly scissors can cut through aluminum.
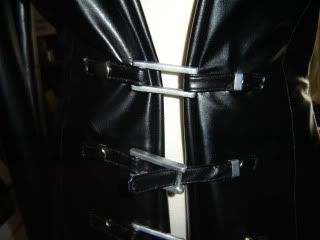
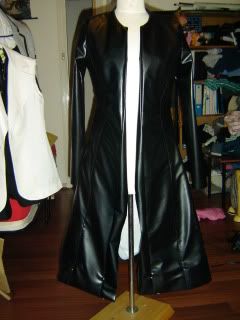
FLAWLESS VICTORY.
TADAAAAAA
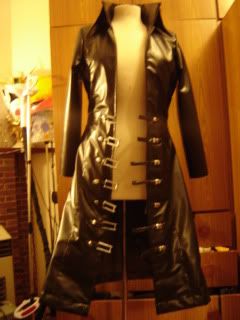
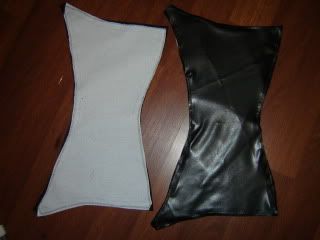
The front edges of the coat were sewed down so it laid straight and so was the hem.
And of course always last went on the lining. ITS FULLY LINED BABY this was for comfort since otherwise the PVC fake leather will make me die of heatstroke.
Then I made the arm thingos.
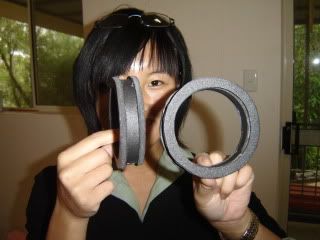
Out of foam.
WOOOSH. Covered these with acrylic so they could withstand more handling, and THEN sprayed with trusty ole Super Chrome.
I then used Shoe Glue to stick on bits of velcro inside the cuffs, and then sewed on the corresponding Velcro on the coat sleeves.
AND COAT WAS DONE.
Meanwhile. Arleh finished buying her fabric. *headdesk*
PANTS
I lucked out at an Op Shop, and found a size 46 pair of MEN's REAL LEATHER pants. These could only belong to a biker. Or a gay man. OR A GAY BIKER. And argued my way from $60 down to $30 for a pair of genuine leather pants. This made me happy. I was desperate to get real leather somewhere in this costume, and while I couldn't afford to deck the whole coat, at least the pants are exactly as Sephiroth would've worn them... Like a gay biker. Lololol
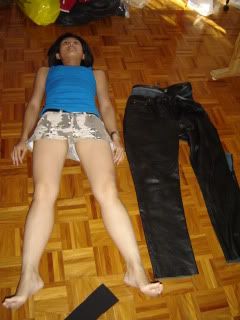
I could fit my legs in one pant leg AHAHAAA.
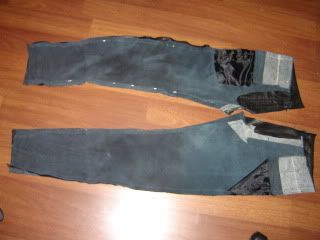
So I recut them to something more approaching my size, it had to be skintight as they must fit inside a pair of boots as well.
Sewed it back together and broke around 4 sewing machine needles.
I had to LINE it as well since once again, full leather doesn't breathe. At points of making the pants, I stared at them, and quelled at the idea of wearing them for even 1 minute in the 33C heat we have here, that's how much I hated wearing them.

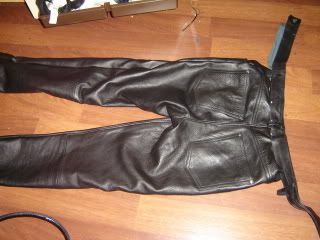
Made new belt loops and hand stitched through 16 layers of leather to get them on. Ugh. Had to put two lots since Seph has TWO WAIST BELTS. WTF NOMURA. WHY.
Some 1960s style 8MM camera-style success!
Then its ARMOUR TIME!
PAULDRONS
I was stumped FOREVER as to how to make these. Others have made it completely out of foam, but ended up with terrible seams where there should be none. I was determined to have an actual armour curve to mine.
So THANK GOD FOR ONCE I WAS SMALL. Since it meant I could cheat!
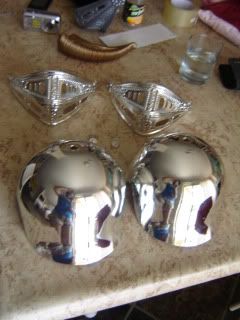
I went to a costume store and found two tiny child's toy roman soldier helmets. See PERFECT SIZE. And since I'm such a tiny person they fit perfectly for my shoulder. Arleh also got one for cloud, but a cheaper less shiny one since she could get away with it.
Then I used a whiteboard marker to draw my lines on the helmet and cut them with THE MIRACLE OF SCISSORS!
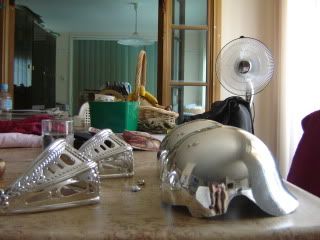
Then began the horror.
I had to VERY CAREFULLY cut out holes in the helmets and not scratch any other bit. I tried drilling them, that failed miserably. So the only solution was to press down hard in a circle for hours, a stanley knife until a hole came free. Each 3 holes took around 4 hours each. So all up 12 hours and about a week of cramped up hand muscles to get these 12 tiny holes in. FFFFFFfff. The unnerving thing was knowing if I made a mistake I would have to begin again. There was a lot of angst during this period.
Then I went back to foam! And cut out a 0.5cm strip of 70cmish foam so I could seamlessly edge the helmets in one piece. I stanley knifed along the edge of the foam and them hot glue gun'ned them on.
Look at that glorious lensflare.
Then I started on the second piece which goes under the helmet by cutting that out of foam:
And edged these too!
And the last piece:
This one I also cut out a hole and another bit of foam to make it all pretty around the square.
I then stuck a needle inside the foam, followed by a piece of wire so it could act like a buckle around that square bit for the belts to come.
Then Trial and Error to fit them together:
After working out how the fuck they actually managed to stick together (I was stumped a looooong time), I decided there HAS to be practical use for those stupid belts which go under the arm of this costume right? RIGHT? (This is called believing in logic where in anime there is none).
So I shoe glued bits of velcro on where I wanted them to stick together (and also sewed them on just in case).

Then cut holes and put wire into this bit. Which I then wrapped velcro around the hole to attach THROUGH the window to the upper helmet.
I got $5 belts from a cheapie asian store, and used these as my straps, and then pulled them through my carefully thought out holes so the buckle ended up underneath my shoulders. And Tada! A practical solution to how to get these things to stay on my shoulders. Little Seph Figurine is there being helpful because no way could I figure out this costume without him.
Then spray painted in a Matte-ish Silver. I am ridiculously proud of them.
THEN THE MIDDLE BELT! Or what I call the...
SOLDIER WRESTLING CHAMPIONSHIP BELT
I got SUPER THIN foam (not the same as the pauldrons), and made a little pillow case out of leather for it essentially. Then I used upholstery thread and punched through this motherfucker until I got this:
I used my fail!straps from my coat (there were many) to make little 'holders' inside this for the suspenders. Then big long straps for my shoulders.
Those clips are suspender holders and are available at any haberdashery section in big fabric stores.
Put snap clasps on the front for accuracy, tiny weeny belt loops once again out of my fail!coat belts, and velcro was put on the side so the whole thing can close around my waist.
Snap clasps was also how it attached from the back. So uh, yeah, you can see that from how I'm making this I intended to just be BARECHESTED around this bit ohoho. Sometimes (almost never) it is good to be flat as a pancake.
And then the most goddamn mindboggling thing I've ever done.
It was now TWO DAYS from the convention and I had not made boots yet AHAHA. So here is how to make a complete pair of cosplay boots in under 8 hours LOL.
Got the soles from an old pair of lolita platforms which I broke months ago, and added extra foam on top for EVEN MORE HEIGHT. Look at these chunky mothers.

Then I wanted to make a fake heel so it looked less stompy. The pink foam btw is the same as the stuff in the wrestling belt. And I shoe glued these on after some careful measuring.
Then after whining to Arleh (who by now had started her vest TWO DAYS BEFORE THE CONVENTION, and also another costume which went on top of the ACCloud costume) I had no goddamn idea how I would pull this off. I thought, I would give this girl's Princess Leia Boot tutorial a try.
Essentially she used an existing boot and wrapped it in muslin to make a pattern. So I said, what the hell, stuck another pair of boots on top of my soles and wrapped it tight in muslin and made a pattern from that.

Since it was the day before the convention I was just hoping to god it will work.
Cut out all my pattern pieces... LOOK HOW I MANAGED TO JUUUUUUUUUUUUUUST have enough fabric left for this. Otherwise I would've been screwed.
And sewed it together in 2 hours ahahaha. With zipper and all.

Then stood back in amazement that I managed to sew thigh high boots in that time. I'm like a third-world-kid-making-Nikes-for-commission-of-1c-per-shoe fast at this point lol.
Got some rubber for the shoes and shoe glued it all on. The pins are there to hold it in place while the glue dries.
WOOHOO. And since by this picture IT WAS THE MORNING OF THE CON I was like, yikes. How the crap did I pull this off.
Then it was time to pull it all together, 2 hours before I had to leave the house.
I taped my endowments down and to the side with sports tape so my chest could be bare.
I made myself VAMPIRE FRESH courtesy of Maybelline Dream Matte Mousse Ivory.

Terrible picture is terrible.
I DID sew a Wig:
With the wefts facing up so I could get easier LIFT. And if it wasn't made of such hideously terrible fibres I would've used it...
And then I abandoned it like a cheap hooker after receiving a wig from Maple, Japan courtesy of t8-steve.
SO THE END RESULT!!!!

My Masamune is all to t8-steve who worked long and hard to make me the perfect replica of the real metal sword I had in my possesion so it could be convention safe.
See how he made this glorious overcompensation of a weapon Part 1 and Part 2.
But no really, I adore the sword, much better than anything I would've been able to do so.

Photography credit is all to the wonderful Anna at Queencattabby @ Deviantart.
If you have any further questions, feel free to ask!
Q: Was this costume uncomfortable to wear?
A: F-YES. I was sweating like a pig you cannot even imagine.
Now, over to arlo_arleh for her Making of AC Cloud!
Seems like Photobucket has finally kicked the bucket! If you like our tutorials or wanna see this one. Please like us on facebook!
https://www.facebook.com/AlitaArleh.Cosplay/
Our tutorials will slowly move over there!
And this particular one now lives here!
https://www.facebook.com/pg/AlitaArleh.Cosplay/photos/?tab=album&album_id=1327503854038129
Love, Alita and Arleh~
-------
It's finally that time again to show you the secrets behind the cosplay!
Myself and arlo_arleh did Sephiroth and Cloud Final Fantasy Advent Children Cosplay for Mini Animania 2010.
Sephiroth granted, is one of those 'traditional' as you would say cosplays that every costumer should try at least once. I've been slightly obsessed with the idea of being able to do it well, nay, do it better than the stock standard average, since this cosplay at least to me is not just showing you can look like the character, but have the serious construction skills to back it up.
It's worse since I happen to be a short asian girl who is tan enough to make people go "wait, seriously, YOU'RE doing to attempt Sephiroth, hold on, ghhwkkk, I just need to like... ahahahaha, go over here and AHAHAHAHAHAHAHAHAHAAHAHA." at me.
So NOT ONLY did I have to make a costume which had to be better than the gigantic range of ready-to-buy-from-an-ebay-store costumes, but I had to somehow gain myself 6 inches worth of height, lighten my skin, and construct armour.
Meaning possibly for the first time I had to make 90% of this costume from coat, to buckles, to armour, to shoes and am proud to say how everything was done impeccably (I also went insane and weaved a wig, but then said screw it, I'll just buy one from maple and not have it look like ass).
And as I was doing this, over about 6-8 weeks. arlo_arleh made pants. How she managed to pull an entire FFAC!Cloud costume out of her ass in two days I will never figure out. That's how she works and thus continues to make my life HELLLLLLL.
Since there is a SEVERE lack of tutorials for this costume online (I LOOKED) I thought this might be the guide that an aspiring cosplayer will one day refer to and go, OH that's wtf it looks like from the back, or OH that's the order I should make things in.
ANYWAYS onto the costume.
WARNING! IMAGE HEAVY NOT FOR DIAL UP FOR EVEN SLOW BROADBAND!
THE COAT
I bought 5 x $28/m pleather from My Hung (my favoured asian fabric store), and made sure this time that the pleather was not the kind that started disintergrating as soon as you sewed it. (Like the sort that did in my Gravitation cosplay). Since pleather tends to be thin, and his coat is suppose to be REAL leather, I had to add some weight to it, so I also bought around 5 m of interfacing to line the entire jacket at around $14 a metre for the fabric kind and not the paper iron on stuff that rips apart in my sewing machine D:
I made a pattern from very well fitted winter coat.
Here's Arleh to demonstrate.
I personally find it easier to get an old piece of clothing I KNOW fits me to a T rather than muck around with pattern pieces. That way I can just trace and cut. The leather and lining and interfacing should be cut at the same time so they're all exactly the same size.
I ended up with 7 panels altogether, four in front (as these had to be symmetrical) and 3 in back since I wanted the seam in a certain place.
The seams on the coat I double-sewed down so they lie flat. Check out that 1mm perfection of straightness awwwriiight.
I REALLLY WANTED TO DO AN INVISIBLE ZIP since Arleh has already made a set of detachable wings for Howl's Moving Castle (see previous post), meaning I can just BORROW her backback, stick one wing on it, and later be all, ONE WINGED ANGEL DADADADADA SEPHIROTH!!! dodododododo in it.
However I didn't want the back of the coat to be marred by an ugly zipper, so this had to be perfectly invisible.
Therefore I left the appropriate side unsewn.
And put a zipper there instead, careffffffffully sewing it invisibly. You can do this without an invisible zipper foot no matter WHAT Arleh says. God there went $4.50 wasted.
Sewed it all together!
Then sleeves and hem was adjusted for my tiny self. In women's size it's around a size 8-10, that's how tiny I am. I left the front sides un-sewn for now since I still need to add buckles.
THE COLLAR
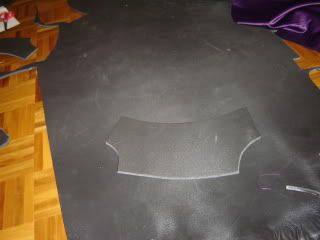
Jesus christ this was the hardest collar I have ever made, since it's such a particular shape, and at such a steep bend 3 inches from the neckline, and a weird curved point that getting the shape right took around EIGHT HOURS. No shameful tucking this time, I promised Arleh this won't be a repeat of my Howl coat collar which was hilariously folded over.
The original pattern and the leather and interfacing. Only one layer of interfacing.
The pattern was made from scrap. So for future cosplayers, this is what a Sephiroth collar should look like in pattern form. Your work, done for you.
Sewed the leather and interfacing together with a quick zigzag, because WE DO NOT HAVE AN OVERLOCKER. Myself and Arleh argued whether this would be the time to charge over at 3AM to Mew's house (and her overlocker) and cash in the favour she owed us. But we are still saving that one up Mew eh he he.
Then I added a piece of plastic inside the collar before I sewed it down since otherwise it will not stand up straight. This is the same technique used in Chinese Shirt collars to ensure its washable. However instead of nice plastic I just used the bottom of a Woolworths shopping bag oh yeaaaah. Class.
Then I sewed it down careeeeeefully along the same seam on the neckline. So there you go, collar!
While I was doing this, I made 14 little belts for the buckles to wrap around. These took forever. Goddamn Nomura and his USELESS accessories.
THE BUCKLES
I made these out of sculpey ($23.95 from an art store), and by some miracle managed to make them as straight and strong as possible. The key to this was wrapping a post-it around a small 15cm ruler to mould the sculpey. Using just the ruler the clay would stick to it and cause residue, but with a post-it, you can just throw away the post-it once it gets too sticky. And thus, dead straight edges. I made one extra in case of failure. This took about 7 hours all up.
Got SUPER CHROME spray paint from the hardware store. This makes anything look like real metal. My new favourite spray paint.
My little beauties *sob*...
Then hand sewed the tiny little belts around the buckles. And added snap clasps.
There were goddamn SEVEN of these uggggh.
Ah, snap clasps. And hammered these onto the coat as well. Then hand stitched them so they weren't being all sad and falling down.
Then on the corresponding belts, I got a piece of $1.24 aluminum corner protector from the hardware store, and cut little strips to make the little belt loops around these belts. Surprisingly scissors can cut through aluminum.
FLAWLESS VICTORY.
TADAAAAAA
The front edges of the coat were sewed down so it laid straight and so was the hem.
And of course always last went on the lining. ITS FULLY LINED BABY this was for comfort since otherwise the PVC fake leather will make me die of heatstroke.
Then I made the arm thingos.
Out of foam.
WOOOSH. Covered these with acrylic so they could withstand more handling, and THEN sprayed with trusty ole Super Chrome.
I then used Shoe Glue to stick on bits of velcro inside the cuffs, and then sewed on the corresponding Velcro on the coat sleeves.
AND COAT WAS DONE.
Meanwhile. Arleh finished buying her fabric. *headdesk*
PANTS
I lucked out at an Op Shop, and found a size 46 pair of MEN's REAL LEATHER pants. These could only belong to a biker. Or a gay man. OR A GAY BIKER. And argued my way from $60 down to $30 for a pair of genuine leather pants. This made me happy. I was desperate to get real leather somewhere in this costume, and while I couldn't afford to deck the whole coat, at least the pants are exactly as Sephiroth would've worn them... Like a gay biker. Lololol
I could fit my legs in one pant leg AHAHAAA.
So I recut them to something more approaching my size, it had to be skintight as they must fit inside a pair of boots as well.
Sewed it back together and broke around 4 sewing machine needles.
I had to LINE it as well since once again, full leather doesn't breathe. At points of making the pants, I stared at them, and quelled at the idea of wearing them for even 1 minute in the 33C heat we have here, that's how much I hated wearing them.
Made new belt loops and hand stitched through 16 layers of leather to get them on. Ugh. Had to put two lots since Seph has TWO WAIST BELTS. WTF NOMURA. WHY.
Some 1960s style 8MM camera-style success!
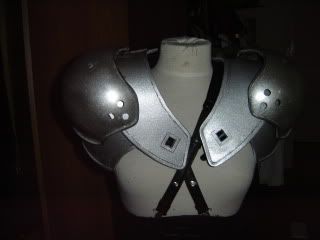
Then its ARMOUR TIME!
PAULDRONS
I was stumped FOREVER as to how to make these. Others have made it completely out of foam, but ended up with terrible seams where there should be none. I was determined to have an actual armour curve to mine.
So THANK GOD FOR ONCE I WAS SMALL. Since it meant I could cheat!
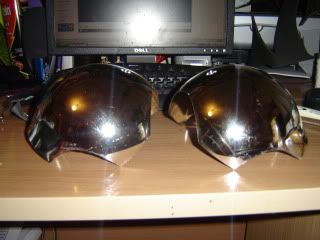
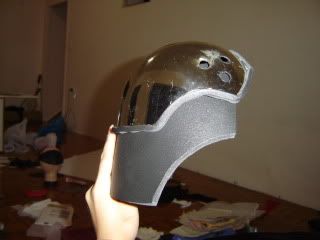
I went to a costume store and found two tiny child's toy roman soldier helmets. See PERFECT SIZE. And since I'm such a tiny person they fit perfectly for my shoulder. Arleh also got one for cloud, but a cheaper less shiny one since she could get away with it.
Then I used a whiteboard marker to draw my lines on the helmet and cut them with THE MIRACLE OF SCISSORS!
Then began the horror.
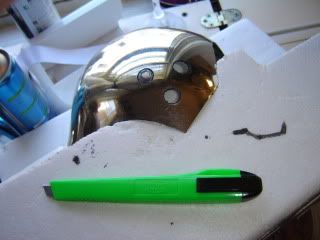
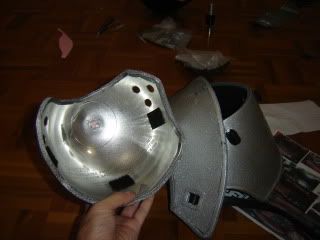
I had to VERY CAREFULLY cut out holes in the helmets and not scratch any other bit. I tried drilling them, that failed miserably. So the only solution was to press down hard in a circle for hours, a stanley knife until a hole came free. Each 3 holes took around 4 hours each. So all up 12 hours and about a week of cramped up hand muscles to get these 12 tiny holes in. FFFFFFfff. The unnerving thing was knowing if I made a mistake I would have to begin again. There was a lot of angst during this period.
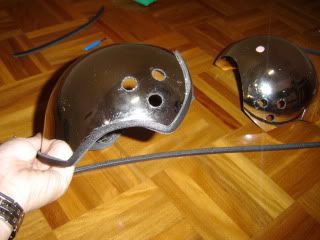
Then I went back to foam! And cut out a 0.5cm strip of 70cmish foam so I could seamlessly edge the helmets in one piece. I stanley knifed along the edge of the foam and them hot glue gun'ned them on.
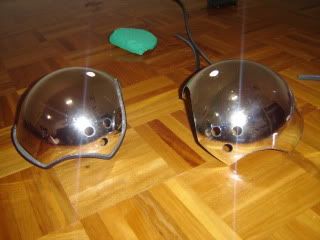
Look at that glorious lensflare.
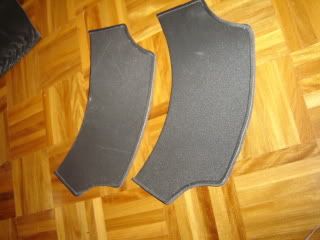
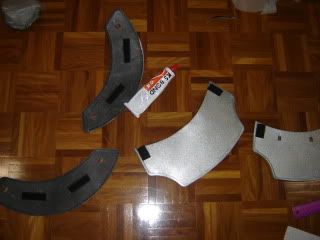
Then I started on the second piece which goes under the helmet by cutting that out of foam:
And edged these too!
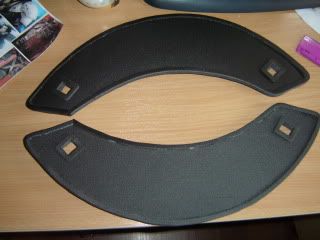
And the last piece:
This one I also cut out a hole and another bit of foam to make it all pretty around the square.
I then stuck a needle inside the foam, followed by a piece of wire so it could act like a buckle around that square bit for the belts to come.
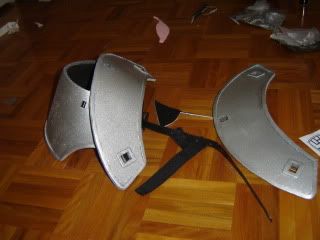
Then Trial and Error to fit them together:
After working out how the fuck they actually managed to stick together (I was stumped a looooong time), I decided there HAS to be practical use for those stupid belts which go under the arm of this costume right? RIGHT? (This is called believing in logic where in anime there is none).
So I shoe glued bits of velcro on where I wanted them to stick together (and also sewed them on just in case).
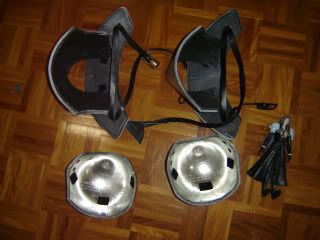
Then cut holes and put wire into this bit. Which I then wrapped velcro around the hole to attach THROUGH the window to the upper helmet.
I got $5 belts from a cheapie asian store, and used these as my straps, and then pulled them through my carefully thought out holes so the buckle ended up underneath my shoulders. And Tada! A practical solution to how to get these things to stay on my shoulders. Little Seph Figurine is there being helpful because no way could I figure out this costume without him.
Then spray painted in a Matte-ish Silver. I am ridiculously proud of them.
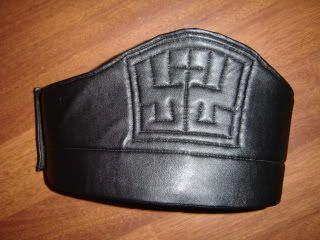
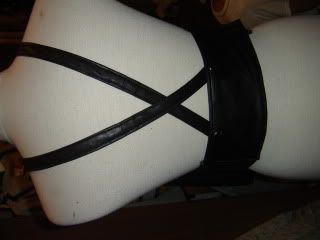
THEN THE MIDDLE BELT! Or what I call the...
SOLDIER WRESTLING CHAMPIONSHIP BELT
I got SUPER THIN foam (not the same as the pauldrons), and made a little pillow case out of leather for it essentially. Then I used upholstery thread and punched through this motherfucker until I got this:
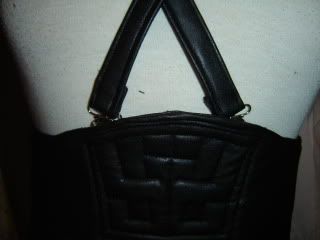
I used my fail!straps from my coat (there were many) to make little 'holders' inside this for the suspenders. Then big long straps for my shoulders.
Those clips are suspender holders and are available at any haberdashery section in big fabric stores.
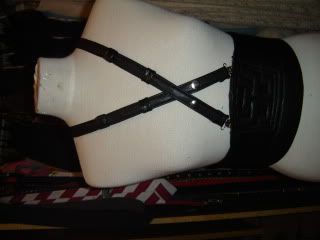
Put snap clasps on the front for accuracy, tiny weeny belt loops once again out of my fail!coat belts, and velcro was put on the side so the whole thing can close around my waist.
Snap clasps was also how it attached from the back. So uh, yeah, you can see that from how I'm making this I intended to just be BARECHESTED around this bit ohoho. Sometimes (almost never) it is good to be flat as a pancake.
And then the most goddamn mindboggling thing I've ever done.
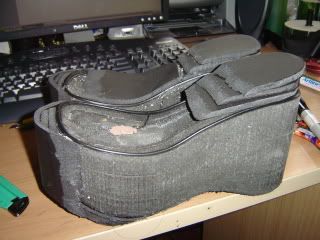
It was now TWO DAYS from the convention and I had not made boots yet AHAHA. So here is how to make a complete pair of cosplay boots in under 8 hours LOL.
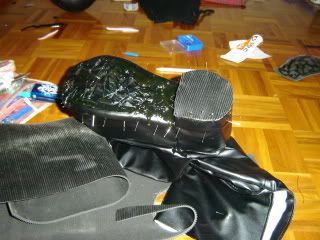
Got the soles from an old pair of lolita platforms which I broke months ago, and added extra foam on top for EVEN MORE HEIGHT. Look at these chunky mothers.
Then I wanted to make a fake heel so it looked less stompy. The pink foam btw is the same as the stuff in the wrestling belt. And I shoe glued these on after some careful measuring.
Then after whining to Arleh (who by now had started her vest TWO DAYS BEFORE THE CONVENTION, and also another costume which went on top of the ACCloud costume) I had no goddamn idea how I would pull this off. I thought, I would give this girl's Princess Leia Boot tutorial a try.
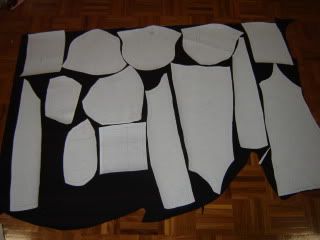
Essentially she used an existing boot and wrapped it in muslin to make a pattern. So I said, what the hell, stuck another pair of boots on top of my soles and wrapped it tight in muslin and made a pattern from that.
Since it was the day before the convention I was just hoping to god it will work.
Cut out all my pattern pieces... LOOK HOW I MANAGED TO JUUUUUUUUUUUUUUST have enough fabric left for this. Otherwise I would've been screwed.
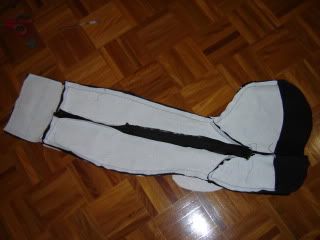
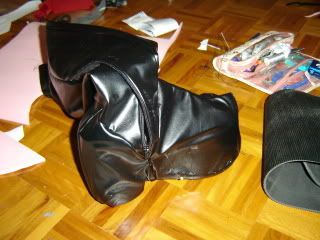
And sewed it together in 2 hours ahahaha. With zipper and all.
Then stood back in amazement that I managed to sew thigh high boots in that time. I'm like a third-world-kid-making-Nikes-for-commission-of-1c-per-shoe fast at this point lol.
Got some rubber for the shoes and shoe glued it all on. The pins are there to hold it in place while the glue dries.
WOOHOO. And since by this picture IT WAS THE MORNING OF THE CON I was like, yikes. How the crap did I pull this off.
Then it was time to pull it all together, 2 hours before I had to leave the house.
I taped my endowments down and to the side with sports tape so my chest could be bare.
I made myself VAMPIRE FRESH courtesy of Maybelline Dream Matte Mousse Ivory.
Terrible picture is terrible.
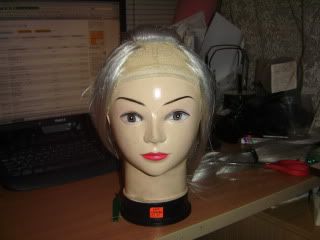
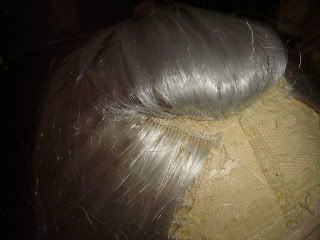
I DID sew a Wig:
With the wefts facing up so I could get easier LIFT. And if it wasn't made of such hideously terrible fibres I would've used it...
And then I abandoned it like a cheap hooker after receiving a wig from Maple, Japan courtesy of t8-steve.
SO THE END RESULT!!!!
My Masamune is all to t8-steve who worked long and hard to make me the perfect replica of the real metal sword I had in my possesion so it could be convention safe.
See how he made this glorious overcompensation of a weapon Part 1 and Part 2.
But no really, I adore the sword, much better than anything I would've been able to do so.
Photography credit is all to the wonderful Anna at Queencattabby @ Deviantart.
If you have any further questions, feel free to ask!
Q: Was this costume uncomfortable to wear?
A: F-YES. I was sweating like a pig you cannot even imagine.
Now, over to arlo_arleh for her Making of AC Cloud!