Tutorial #39 - Hermione Granger icon 4
Coloring tutorial requested by 30yearwar.
Going from this to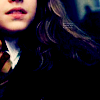
.
USING PSP8.
PLEASE DON'T COPY THIS ICON, USE THE STEPS TO CREATE SOMETHING THAT IS YOUR OWN; THAT'S MAKES IT MORE FUN, ANYWAY :)
- cropped this picture that was given as a challenge at hermione_lims, rotated it 10 degrees to the left and cropped it down to a 100x100 base.
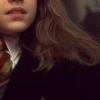
- Duplicated the base and set it to screen 100. Then create a new layer and flood fill with a blueish color (#003660). Set that to exclusion 55.
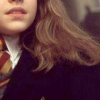
>
>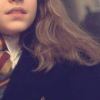
*NOTE: Number of sreen layers may depend on how dark/light your image is; the same goes for the opacity of the layer. I suggest playing around with it until it looks good to you.
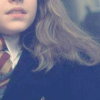
- Create another new layer and fill it with a real light blue (#92CAE7); set that layer to soft light 100.

>
- Do a Copy Merged (Ctrl+Shift+C) and paste as a new layer on the top. Set that layer to burn 100.
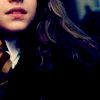
- Duplicate this Copy Merged layer, but change the opacity and blend mode to Overlay 60.

*NOTE: As with the screen layers, the opacity will depend on your image.
- Next up the contrast by 5, just to give it a bit more depth.
- For the final step, I used a tiny text brush (by myself) in white.

>
And that's it. :)
**Opacities for layers may vary depending upon your image; don't be afraid to experiment!**
It's a bit brighter than the original but that IS the coloring I used on the icon. Hope this helps someone!
FRIEND ME | RESOURCES | OTHER TUTORIALS
Going from this to
.
USING PSP8.
PLEASE DON'T COPY THIS ICON, USE THE STEPS TO CREATE SOMETHING THAT IS YOUR OWN; THAT'S MAKES IT MORE FUN, ANYWAY :)
- cropped this picture that was given as a challenge at hermione_lims, rotated it 10 degrees to the left and cropped it down to a 100x100 base.
- Duplicated the base and set it to screen 100. Then create a new layer and flood fill with a blueish color (#003660). Set that to exclusion 55.
>
>
*NOTE: Number of sreen layers may depend on how dark/light your image is; the same goes for the opacity of the layer. I suggest playing around with it until it looks good to you.
- Create another new layer and fill it with a real light blue (#92CAE7); set that layer to soft light 100.
>
- Do a Copy Merged (Ctrl+Shift+C) and paste as a new layer on the top. Set that layer to burn 100.
- Duplicate this Copy Merged layer, but change the opacity and blend mode to Overlay 60.
*NOTE: As with the screen layers, the opacity will depend on your image.
- Next up the contrast by 5, just to give it a bit more depth.
- For the final step, I used a tiny text brush (by myself) in white.
>
And that's it. :)
**Opacities for layers may vary depending upon your image; don't be afraid to experiment!**
It's a bit brighter than the original but that IS the coloring I used on the icon. Hope this helps someone!
FRIEND ME | RESOURCES | OTHER TUTORIALS