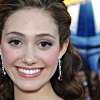
Tutorial #30 - Emmy Rossum icon 9
Coloring tutorial requested by paris_pinkxo
going from this to
.
*USING PSP8*
PLEASE DON'T COPY THIS ICON, USE THESE STEPS TO CREATE SOMETHING THAT IS YOUR OWN; THAT'S MAKES IT MORE FUN, ANYWAY :)
- Take this picture from Emmy Rossum Fan and crop it down to a 100x100 base. Use an Unsharp Mask [my settings] to prep the base:

- Duplicate the base layer 3 times. Set the layer closest to the base layer to Screen, 57%, set the one directly above that one to Screen, 36% and desaturate it and then set the top one to Soft Light, 30%.

- Create a new layer just above the original base layer and flood fill with a dark blue (#000040); set it to Exclusion, 100.

>
- Create another new layer above all of the other layers (above the top Soft Light layer) and flood fill it with this blue-gray color (#596471); set it to Burn, 34%.

>
- The final step is a Curves Adjustment Layer. In between the two screen layers, create this new adjustment curves layer and use these settings:
RGB: Input 0, Output 0
RED: I 30, O 10
GREEN: I 19, O 23
BLUE: I 11, O 42
RESULT:

Any then do whatever else you'd like to do to it :)
**Opacities for layers may vary depending upon your image; don't be afraid to experiment!**
I hope this helps someone!
FRIEND ME | RESOURCES | OTHER TUTORIALS
going from this to
.
*USING PSP8*
PLEASE DON'T COPY THIS ICON, USE THESE STEPS TO CREATE SOMETHING THAT IS YOUR OWN; THAT'S MAKES IT MORE FUN, ANYWAY :)
- Take this picture from Emmy Rossum Fan and crop it down to a 100x100 base. Use an Unsharp Mask [my settings] to prep the base:
- Duplicate the base layer 3 times. Set the layer closest to the base layer to Screen, 57%, set the one directly above that one to Screen, 36% and desaturate it and then set the top one to Soft Light, 30%.
- Create a new layer just above the original base layer and flood fill with a dark blue (#000040); set it to Exclusion, 100.
>
- Create another new layer above all of the other layers (above the top Soft Light layer) and flood fill it with this blue-gray color (#596471); set it to Burn, 34%.
>
- The final step is a Curves Adjustment Layer. In between the two screen layers, create this new adjustment curves layer and use these settings:
RGB: Input 0, Output 0
RED: I 30, O 10
GREEN: I 19, O 23
BLUE: I 11, O 42
RESULT:
Any then do whatever else you'd like to do to it :)
**Opacities for layers may vary depending upon your image; don't be afraid to experiment!**
I hope this helps someone!
FRIEND ME | RESOURCES | OTHER TUTORIALS