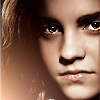
Tutorial #26 - Hermione Granger icon 2
Requested by paris_pinkxo
From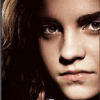
to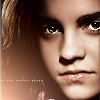
.
*USING PSP8*
PLEASE DON'T COPY THIS ICON, USE THE STEPS TO CREATE SOMETHING THAT IS YOUR OWN; THAT'S MAKES IT MORE FUN, ANYWAY :)
- I took this image from MuggleNet and resized it down to a 100x100 base:

- Sharpen it once then take the soften tool (my settings) and go over her skin avoiding the eyes, eye brows, nostrils and the lips.

- Then use the sharpen tool (my settings) and go over her bottom lip and both of her eyes a couple of times.
Next go to Adjust > Brightness and Contrast > Automatic Contrast Enhancement and use these settings:
Darker | Normal | Bold

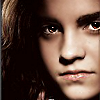
- Next I decided to to an effect on the eyes to make them stand out more. I duplicated the base layer, set it to dodge 100 and erased everything EXCEPT her eyes.

- Duplicate the layer with the eyes again, but change the blend mode to hard light 100. While that hard light layer is still selected, go to Adjust > Brightness and Contrast > Highlight/Midtone/Shadow; use these settings:
Shadow: 18
Midtone: 53
Highlight: 100
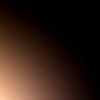
- For the light texture, I used one by bombayicons and set it to screen 100
>
- For the tiny text, I used a brush by tina_sparkle and set it off to the left in white.

>
And that's it :)
FRIEND ME | RESOURCES | OTHER TUTORIALS
From
to
.
*USING PSP8*
PLEASE DON'T COPY THIS ICON, USE THE STEPS TO CREATE SOMETHING THAT IS YOUR OWN; THAT'S MAKES IT MORE FUN, ANYWAY :)
- I took this image from MuggleNet and resized it down to a 100x100 base:
- Sharpen it once then take the soften tool (my settings) and go over her skin avoiding the eyes, eye brows, nostrils and the lips.
- Then use the sharpen tool (my settings) and go over her bottom lip and both of her eyes a couple of times.
Next go to Adjust > Brightness and Contrast > Automatic Contrast Enhancement and use these settings:
Darker | Normal | Bold
- Next I decided to to an effect on the eyes to make them stand out more. I duplicated the base layer, set it to dodge 100 and erased everything EXCEPT her eyes.
- Duplicate the layer with the eyes again, but change the blend mode to hard light 100. While that hard light layer is still selected, go to Adjust > Brightness and Contrast > Highlight/Midtone/Shadow; use these settings:
Shadow: 18
Midtone: 53
Highlight: 100
- For the light texture, I used one by bombayicons and set it to screen 100
>
- For the tiny text, I used a brush by tina_sparkle and set it off to the left in white.
>
And that's it :)
FRIEND ME | RESOURCES | OTHER TUTORIALS