Tutorial #22 - Emma Watson
USING PSP8
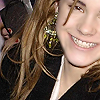
going from this to
PLEASE DON'T COPY THIS ICON, USE THE STEPS TO CREATE SOMETHING THAT IS YOUR OWN; THAT'S MAKES IT MORE FUN, ANYWAY :)
*FYI: this tutorial is very much like this one*
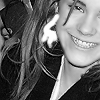
- I took this picture from Emma Watson Fan, rotated it 15 degrees to the right (Ctrl+R), and cropped it down to a 100x100 base.

- Sharpen it twice, then duplicate the base layer, sharpen that and reduce the layer opacity to 50.

MERGE LAYERS.
- Take the soften tool (my settings) and go over Emma's face,

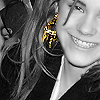
- Duplicate the base layer, and desaturate (Shift+H), leave the blend mode at Normal. Then take the eraser tool and erase the black and white part over her gold earring.

>
- Select the base layer, duplicate it twice; set the middle layer to screen, 62 and the top layer to overlay, 100.

- Duplicate the top, black and white layer and set it to Soft Light, 100.

- MERGE LAYERS.
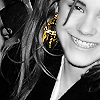
- Take the sharpen tool (my settings) and go over her eye and bottom lip.

- Now for the text. I used Book Antiqua. color white (#FFFFFF). and for the top line ("here at the"), the size is 4; for "end," the size is 5.:

>
I added a drop shadow (effects > 3d effects > drop shadow) to both lines, also.

And that's it :)
FRIEND ME | RESOURCES | OTHER TUTORIALS
going from this to
PLEASE DON'T COPY THIS ICON, USE THE STEPS TO CREATE SOMETHING THAT IS YOUR OWN; THAT'S MAKES IT MORE FUN, ANYWAY :)
*FYI: this tutorial is very much like this one*
- I took this picture from Emma Watson Fan, rotated it 15 degrees to the right (Ctrl+R), and cropped it down to a 100x100 base.
- Sharpen it twice, then duplicate the base layer, sharpen that and reduce the layer opacity to 50.
MERGE LAYERS.
- Take the soften tool (my settings) and go over Emma's face,
- Duplicate the base layer, and desaturate (Shift+H), leave the blend mode at Normal. Then take the eraser tool and erase the black and white part over her gold earring.
>
- Select the base layer, duplicate it twice; set the middle layer to screen, 62 and the top layer to overlay, 100.
- Duplicate the top, black and white layer and set it to Soft Light, 100.
- MERGE LAYERS.
- Take the sharpen tool (my settings) and go over her eye and bottom lip.
- Now for the text. I used Book Antiqua. color white (#FFFFFF). and for the top line ("here at the"), the size is 4; for "end," the size is 5.:
>
I added a drop shadow (effects > 3d effects > drop shadow) to both lines, also.
And that's it :)
FRIEND ME | RESOURCES | OTHER TUTORIALS