(no subject)
Tutorial for 
as requested by x_greyflowers_x Really simple, but with pretty results.
Don't copy word for word! Usually when I'm following tutorials, I will follow them exactly but with a different base image. So use a different base and don't mass produce. (Mass producing off tutorials = lame)
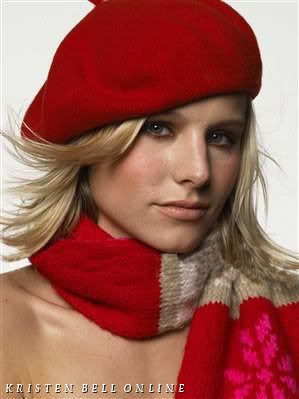
Step 1: This will only work on darkish icons with good contrast. So first, find you picture. Mine looks like THIS. I chose it because it has bright fall colours, but is still somewhat subdued. And, it's just a purdy picture all together. ^_^
Step 2: Crop your image! (I couldn't find my original crop so I just cropped it again)
Prepare your image: sharpen twice, LIGHTLY blur the skin. Too much blur=bad icon.
Step 3: Duplicate base and set to Screen (should look like:
) 100%
Step 4: Duplicate base again and drag to the top. Set to Soft Light. Lower the opacity of the Soft Light layer to 59%. (should look like:
)
Step 5: I thought that the scarf looked too bright and orange-y, so I used my eyedropper tool and picked up a darkish red from the scarf. Using my brush tool, I painted over the red sections of the scarf. Like so:
. Set layer to Colour Burn 100% opacity.
Step 6: EACDA2 fill layer (beige/yellow). Set to Multiply Opacity 50%.
Step 7: C4E0E3 fill layer (light blue). Set to Colour Burn Opacity 100%
Step 8: Merge your base layers (everything but the fill layers) and duplicate it (for mine, it looks like:
). Pull the duplicate to the top of your layers.
Step 9: Desaturate your top layer (the duplicate) (should look like:
)
Step 10: Set to Overlay. You should get your end result:
That's it! See? Really easy.
Feedback is love! (First tutorial, not that that's an excuse for anything)
as requested by x_greyflowers_x Really simple, but with pretty results.
Don't copy word for word! Usually when I'm following tutorials, I will follow them exactly but with a different base image. So use a different base and don't mass produce. (Mass producing off tutorials = lame)
Step 1: This will only work on darkish icons with good contrast. So first, find you picture. Mine looks like THIS. I chose it because it has bright fall colours, but is still somewhat subdued. And, it's just a purdy picture all together. ^_^
Step 2: Crop your image! (I couldn't find my original crop so I just cropped it again)
Prepare your image: sharpen twice, LIGHTLY blur the skin. Too much blur=bad icon.
Step 3: Duplicate base and set to Screen (should look like:
) 100%
Step 4: Duplicate base again and drag to the top. Set to Soft Light. Lower the opacity of the Soft Light layer to 59%. (should look like:
)
Step 5: I thought that the scarf looked too bright and orange-y, so I used my eyedropper tool and picked up a darkish red from the scarf. Using my brush tool, I painted over the red sections of the scarf. Like so:
. Set layer to Colour Burn 100% opacity.
Step 6: EACDA2 fill layer (beige/yellow). Set to Multiply Opacity 50%.
Step 7: C4E0E3 fill layer (light blue). Set to Colour Burn Opacity 100%
Step 8: Merge your base layers (everything but the fill layers) and duplicate it (for mine, it looks like:
). Pull the duplicate to the top of your layers.
Step 9: Desaturate your top layer (the duplicate) (should look like:
)
Step 10: Set to Overlay. You should get your end result:
That's it! See? Really easy.
Feedback is love! (First tutorial, not that that's an excuse for anything)