icon tutorial; colour my world ft. Maki
About time I updated haha. This time I'm here with a tutorial. Thought I would start with a simple one since it is our first XD.
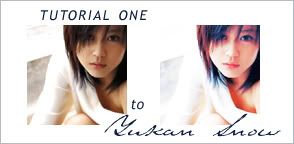
In this tutorial we will be going from
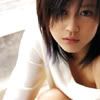
to
STEP 01. Duplicate your layer and set it to screen at 81% (depending on your picture, you may need to duplicate more layers).

----->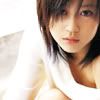
STEP 02. Layer --> New Adjustment Layer --> Curves.
RGB
point one . input: 81 output: 88
point two. input: 179 output: 203
BLUE
point one. input: 203 output: 255

----->
STEP 03. Layer --> New Adjustment Layer --> Selective Colour
REDS : -70, 6, 30, 0
CYANS : 100, 0, 0, 0
BLUE : 100, 0, 0, 0
WHITES : 50, 9, 0, 0
NEUTRALS : 18, -3, 9, 0

----->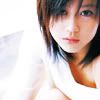
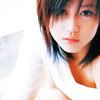
STEP 04. Layer --> New Adjustment Layer --> Selective Colour
REDS : -100, 0, 0, 0
CYANS : 100, 0, 0, 0
BLUE : 100, 0, 0, 0

----->
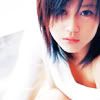
STEP 05. Layer --> New Adjustment Layer --> Curves
BLUE
point one. input: 194 out: 181
point two. input: 45 output:75

----->
you may stop here, but i went one more step just for the sake of it lol.
STEP 06. Layer --> New Adjustment Layer --> Hue/Saturation
Masters: 0, 9, 0

----->
Other icons made using this tutorial:
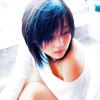

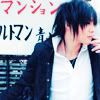
And there you have it. This has got to be the shortest tutorial I have ever written so consider yourselves lucky XD. Of course not all pictures will work with tutorial, you might have to experiment a little XP.
I would love to see some some outcomes so if you do use this tutorial, do come and show us XD. Crediting makes us happy aswell <3
Do not reproduce this tutorial in anyway, do not alter the steps and post it elsewhere claiming it is your own, this tutorial is copyrighted to Yukan Snow and is for your own use. Thank you.
credits to the Illustrious Forum Gallery and Soompi for the pictures.
In this tutorial we will be going from

to

STEP 01. Duplicate your layer and set it to screen at 81% (depending on your picture, you may need to duplicate more layers).

----->

STEP 02. Layer --> New Adjustment Layer --> Curves.
RGB
point one . input: 81 output: 88
point two. input: 179 output: 203
BLUE
point one. input: 203 output: 255

----->

STEP 03. Layer --> New Adjustment Layer --> Selective Colour
REDS : -70, 6, 30, 0
CYANS : 100, 0, 0, 0
BLUE : 100, 0, 0, 0
WHITES : 50, 9, 0, 0
NEUTRALS : 18, -3, 9, 0

----->

STEP 04. Layer --> New Adjustment Layer --> Selective Colour
REDS : -100, 0, 0, 0
CYANS : 100, 0, 0, 0
BLUE : 100, 0, 0, 0

----->

STEP 05. Layer --> New Adjustment Layer --> Curves
BLUE
point one. input: 194 out: 181
point two. input: 45 output:75

----->

you may stop here, but i went one more step just for the sake of it lol.
STEP 06. Layer --> New Adjustment Layer --> Hue/Saturation
Masters: 0, 9, 0

----->

Other icons made using this tutorial:


And there you have it. This has got to be the shortest tutorial I have ever written so consider yourselves lucky XD. Of course not all pictures will work with tutorial, you might have to experiment a little XP.
I would love to see some some outcomes so if you do use this tutorial, do come and show us XD. Crediting makes us happy aswell <3
Do not reproduce this tutorial in anyway, do not alter the steps and post it elsewhere claiming it is your own, this tutorial is copyrighted to Yukan Snow and is for your own use. Thank you.
credits to the Illustrious Forum Gallery and Soompi for the pictures.