Weekend crafting - part two
How to make a simple fabric pin board in 15mins.
----------------
1. Prepare materials.
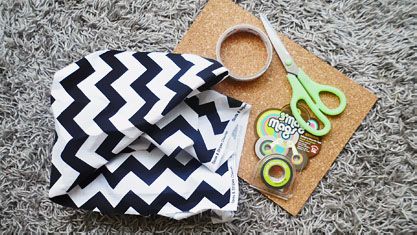
You'll need: patterned fabric of your choosing, corkboard, double-sided tape and fabric scissors. Ignore the magnetic tape, it turned out irrelevant.
2. Estimate and cut out fabric required.
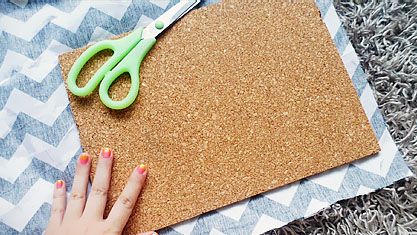
Try to align the pattern in the front and leave enough fabric in the back to tape. (If you're in the mood for effort, use mod podge to glue the whole thing down instead.)
3. Tape double-sided tape to the edge of the fabric and wrap it up.
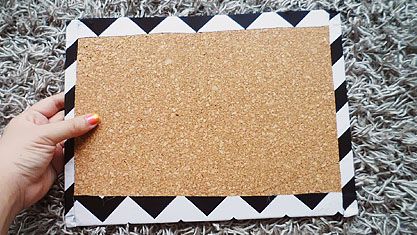
It's okay if it looks uneven at the back coz who's gonna see it right? Take care to tuck the corners in neatly.
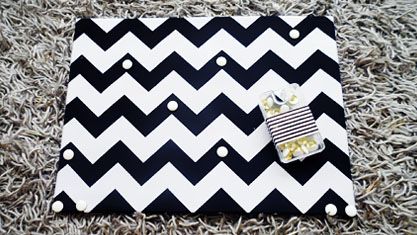
Optional: get pushpins that match the fabric.
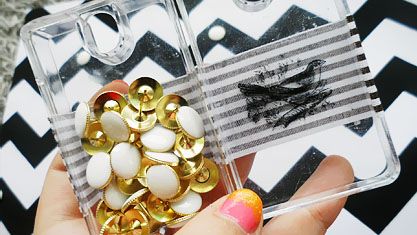
Got this at Daiso along with the corkboard. Taping fabric tape across the box is a simple way to make a makeshift hinge, plus it looks nicer than the original label!
4. Hang it up.
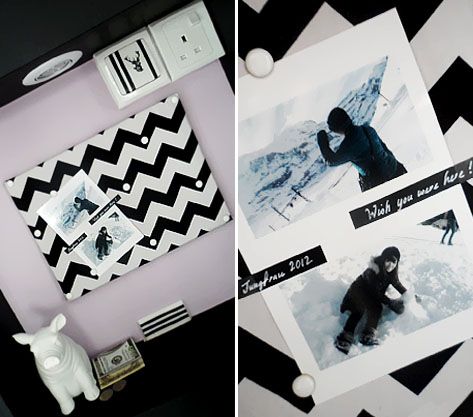
Finito! I use this to pin receipts and other useful stuff like the loyalty card for the hair salon downstairs too haha.
Close up on the light switch.
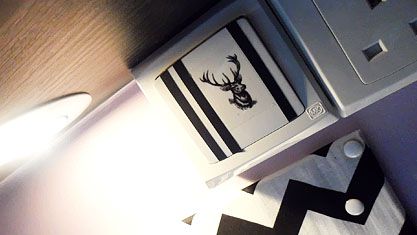
Cute, yes? Haha I think everyone should paste stickers on their light switches, it's the easiest way to make your home look a little more interesting!
Trim off excess with a penknife and remember to clean the switch before sticking anything on. It's also a good idea to try to match the stickers or colour scheme for the same set of switch if you can too.
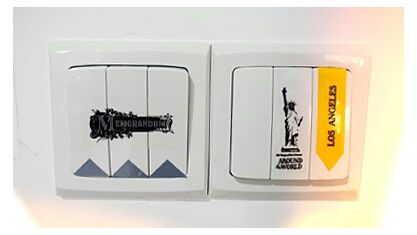
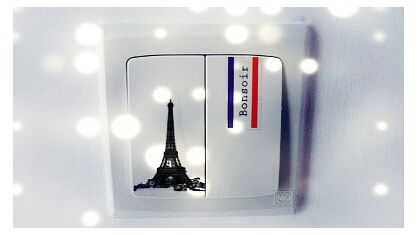
For large stickers, carefully cut along the edge with a penknife and trim by pressing the switch down and leaving the others up. Keep iconic or bold stickers for lights used more often, it's easier to tell a guest to just flick the statue of liberty for kitchen lights right?
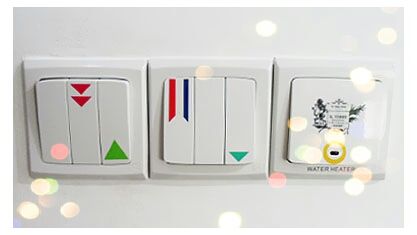
Confession: I'm terrible with my lefts and rights so stickers like these actually help me remember which switch works for what too. Instead of trying to remember the bathroom switch is "left on the middle row", I now tell myself it's the tricoloured switch. Easy peasy!
----------
I don't know if you know this already but electrical tape is really amazing when it comes to fuss free temporary decorations! There's like a million uses for it if you really want to get creative.
1. Labels

You can make mini labels for kitchen glassware/containers by writing on it with liquid chalk (or a permanent paint marker if you want something that won't clean off), or just use it as decoration. I pasted these on my planters to fancy them up a little! Yup, these are from IKEA too.
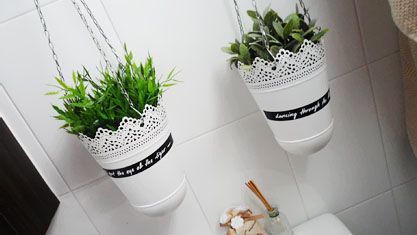

Katy Perry was playing on the radio aight? Hey it could've been worse, The Fox could've been playing.
2. Furniture
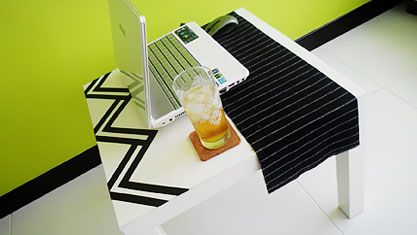
...Oh man, this is really starting to look like an IKEA sponsored post.
There's a whole lot of geometric patterns (excluding smooth curves and swirls) you can make with the tape, it all depends on how much time you're willing to spend doing it. A simple zigzag design like this took maaaaybe 20mins max? And that was only because I didn't have a cutting mat big enough to measure and cut all the strips at a go.
3. Cabinets
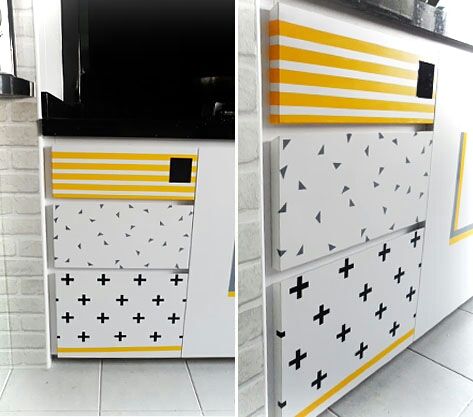
This one's probably the largest diy done so far and yet still relatively fast to complete, like about an hour or so with constant snack breaks in between. Was gonna try working on the rest of the kitchen cabinets too but then I got bored of cutting and sticking stuff.
Had this done up months ago but I forgot about it whoops. The house looks a lil' different now coz I did some minor redecorating since; gonna make another post on it when I get the time to clean up the place and take pics!
----------------
1. Prepare materials.
You'll need: patterned fabric of your choosing, corkboard, double-sided tape and fabric scissors. Ignore the magnetic tape, it turned out irrelevant.
2. Estimate and cut out fabric required.
Try to align the pattern in the front and leave enough fabric in the back to tape. (If you're in the mood for effort, use mod podge to glue the whole thing down instead.)
3. Tape double-sided tape to the edge of the fabric and wrap it up.
It's okay if it looks uneven at the back coz who's gonna see it right? Take care to tuck the corners in neatly.
Optional: get pushpins that match the fabric.
Got this at Daiso along with the corkboard. Taping fabric tape across the box is a simple way to make a makeshift hinge, plus it looks nicer than the original label!
4. Hang it up.
Finito! I use this to pin receipts and other useful stuff like the loyalty card for the hair salon downstairs too haha.
Close up on the light switch.
Cute, yes? Haha I think everyone should paste stickers on their light switches, it's the easiest way to make your home look a little more interesting!
Trim off excess with a penknife and remember to clean the switch before sticking anything on. It's also a good idea to try to match the stickers or colour scheme for the same set of switch if you can too.
For large stickers, carefully cut along the edge with a penknife and trim by pressing the switch down and leaving the others up. Keep iconic or bold stickers for lights used more often, it's easier to tell a guest to just flick the statue of liberty for kitchen lights right?
Confession: I'm terrible with my lefts and rights so stickers like these actually help me remember which switch works for what too. Instead of trying to remember the bathroom switch is "left on the middle row", I now tell myself it's the tricoloured switch. Easy peasy!
----------
I don't know if you know this already but electrical tape is really amazing when it comes to fuss free temporary decorations! There's like a million uses for it if you really want to get creative.
1. Labels
You can make mini labels for kitchen glassware/containers by writing on it with liquid chalk (or a permanent paint marker if you want something that won't clean off), or just use it as decoration. I pasted these on my planters to fancy them up a little! Yup, these are from IKEA too.
Katy Perry was playing on the radio aight? Hey it could've been worse, The Fox could've been playing.
2. Furniture
...Oh man, this is really starting to look like an IKEA sponsored post.
There's a whole lot of geometric patterns (excluding smooth curves and swirls) you can make with the tape, it all depends on how much time you're willing to spend doing it. A simple zigzag design like this took maaaaybe 20mins max? And that was only because I didn't have a cutting mat big enough to measure and cut all the strips at a go.
3. Cabinets
This one's probably the largest diy done so far and yet still relatively fast to complete, like about an hour or so with constant snack breaks in between. Was gonna try working on the rest of the kitchen cabinets too but then I got bored of cutting and sticking stuff.
Had this done up months ago but I forgot about it whoops. The house looks a lil' different now coz I did some minor redecorating since; gonna make another post on it when I get the time to clean up the place and take pics!