Banner/Sig. Tutorial No. 1: Yuuko
Banner/sig tutorial requested by
oishiionigiri--sorry this is out so late. I didn't know how to write a banner/sig tutorial so I had to go out and find some examples. Anyway, I found that making them is just like making icons, but on a larger canvas. All you need are some good quality bases.
Level: Easy
Program: Adobe Photoshop 7.0
Go from this to this: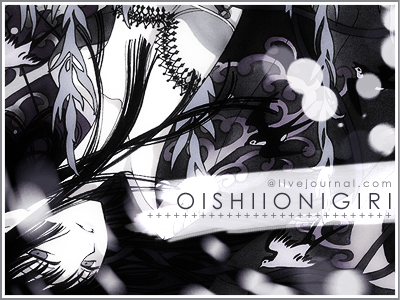
Before you start, keep in mind that to make a good banner or sig you should start with two things: a good quality picture (my favorite gallery site is Digik Gallery) and a large texture, which you can either make yourself, find on an LJ help community like
texturize, or browse deviantART. Once you have those, all you need is a little inspiration.
01. I chose to work with this picture of Yuuko because it has plenty of space on the sides for text, yet at the same time there are things to fill up empty space. I'm going to crop it at 400x300, which is the usual size for banners, so there's substantial space next to her.
You should have something like this:
02. Duplicate the layer and sharpen it (CTRL A>>CTRL C>>CTRL V, then FILTER>>SHARPEN>>SHARPEN). Set this layer to 65% opacity.
You should have something like this: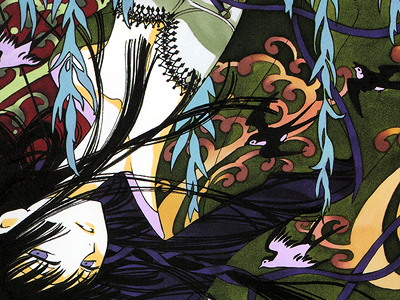
03. Duplicate the layer again--we're going to make the colors darker and richer, and give Yuuko's skin a nice glow at the same time. Go to FILTER>>BLUR>>GAUSSIAN BLUR. Set the radius to 7.5, then click OK. Set this layer to OVERLAY 100%.
You should have something like this: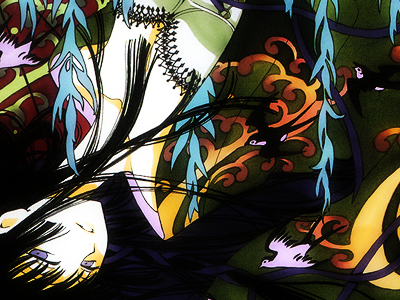
04. All these colors look a little too busy, so create a new layer and fill it with #393743. Set this layer to HUE at 85% opacity.
You should have something like this: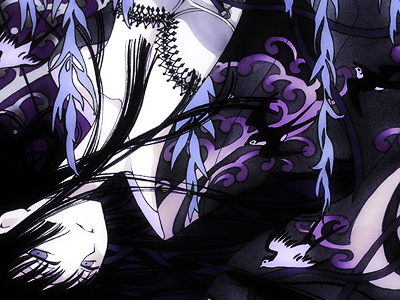
05. We're going to use a light texture to fill in some spaces on the side. I'm going to use this light texture that I just made from scratch, but you can use any that you want. Because it's so large, I cropped it at 400x300 so it looks like this. I copied this texture onto my project canvas and set the layer to SCREEN 100%.
You should have something like this: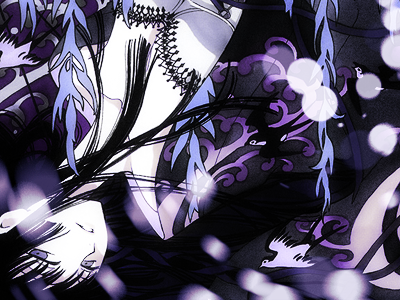
06. Create another new layer, and fill it with #000000. Set this layer to 75% HUE so it's slightly saturated.
You should have something like this: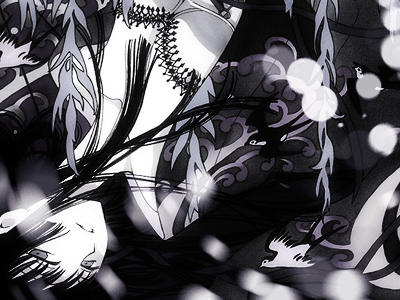
07. Open up this light texture and copy it onto your picture. Set this layer to LINEAR DODGE at 100%--this will be the contrast we need for putting on text. Because I think it's a little too long, I moved it slightly to the right.
You should have something like this:
08. Text time! Choose a font that's easy to read and is very clear. I prefer to use Century Gothic because the letters aren't too sharp. Type in 'O I S H I I O N I G I R I' in 22 pt Century Gothic at #393743 and move it to the middle of the light strip. Then type in '@ l i v e j o u r n a l . c o m' in 10 pt Century Gothic at #7A7A82. Move this on top of the username.
You should have something like this:
09. Create a new layer and add this decortive brush by me in #7A7A82 below the username.
You should have something like this: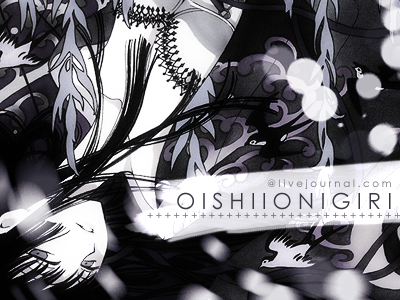
10. Create another new layer and use this line border brush by me in #7A7A82. Change blending options so there's a 3 pt stroke in #FFFFFF. There! You have your banner!
Your finished result should look like this:
_________
Was this tutorial helpful? Confusing? Too hard? Feedback would be wonderful!
[x] Like what you see? FRIEND
wicked_avis to stay updated on fresh tutorials, textures, brushes, and icons!
oishiionigiri--sorry this is out so late. I didn't know how to write a banner/sig tutorial so I had to go out and find some examples. Anyway, I found that making them is just like making icons, but on a larger canvas. All you need are some good quality bases.
Level: Easy
Program: Adobe Photoshop 7.0
Go from this to this:

Before you start, keep in mind that to make a good banner or sig you should start with two things: a good quality picture (my favorite gallery site is Digik Gallery) and a large texture, which you can either make yourself, find on an LJ help community like
texturize, or browse deviantART. Once you have those, all you need is a little inspiration.
01. I chose to work with this picture of Yuuko because it has plenty of space on the sides for text, yet at the same time there are things to fill up empty space. I'm going to crop it at 400x300, which is the usual size for banners, so there's substantial space next to her.
You should have something like this:

02. Duplicate the layer and sharpen it (CTRL A>>CTRL C>>CTRL V, then FILTER>>SHARPEN>>SHARPEN). Set this layer to 65% opacity.
You should have something like this:

03. Duplicate the layer again--we're going to make the colors darker and richer, and give Yuuko's skin a nice glow at the same time. Go to FILTER>>BLUR>>GAUSSIAN BLUR. Set the radius to 7.5, then click OK. Set this layer to OVERLAY 100%.
You should have something like this:

04. All these colors look a little too busy, so create a new layer and fill it with #393743. Set this layer to HUE at 85% opacity.
You should have something like this:

05. We're going to use a light texture to fill in some spaces on the side. I'm going to use this light texture that I just made from scratch, but you can use any that you want. Because it's so large, I cropped it at 400x300 so it looks like this. I copied this texture onto my project canvas and set the layer to SCREEN 100%.
You should have something like this:

06. Create another new layer, and fill it with #000000. Set this layer to 75% HUE so it's slightly saturated.
You should have something like this:

07. Open up this light texture and copy it onto your picture. Set this layer to LINEAR DODGE at 100%--this will be the contrast we need for putting on text. Because I think it's a little too long, I moved it slightly to the right.
You should have something like this:

08. Text time! Choose a font that's easy to read and is very clear. I prefer to use Century Gothic because the letters aren't too sharp. Type in 'O I S H I I O N I G I R I' in 22 pt Century Gothic at #393743 and move it to the middle of the light strip. Then type in '@ l i v e j o u r n a l . c o m' in 10 pt Century Gothic at #7A7A82. Move this on top of the username.
You should have something like this:

09. Create a new layer and add this decortive brush by me in #7A7A82 below the username.
You should have something like this:

10. Create another new layer and use this line border brush by me in #7A7A82. Change blending options so there's a 3 pt stroke in #FFFFFF. There! You have your banner!
Your finished result should look like this:

_________
Was this tutorial helpful? Confusing? Too hard? Feedback would be wonderful!
[x] Like what you see? FRIEND

wicked_avis to stay updated on fresh tutorials, textures, brushes, and icons!