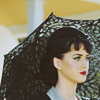
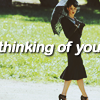
tutorial: katy perry
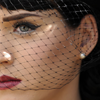
>
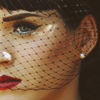
Made using photoshop CS2.
Prepare your base. I used a picture of Katy Perry.
First of all, we're going to brighten the image and add it some depth.
Layer>new adjustment layer>curves:
RGB: 71/65
156/170
Red: 74/67
178/164
Blue: 65/67
124/129
172/184
Now we're going to play with the shades and colors of the image, again using curves.
Layer>new adjustment layer>curves:
RGB: bottom left point 0/44
85/65
159/159
Blue: 93/76
Now we're going to make the image redder, using selective coloring:
Layer>new adjustment layer>selective color:
R: -20 10 15 10
Y: -20 0 0 -10
B(lack): 0 0 0 1
The next thing we're going to do is mute the colors a bit, using an exclusion layer.
Fill a new layer with #160b00 and set to exclusion.
Almost done. Now we want the reds to stand out, so we're adding some saturation.
Layer>new adjustment layer>hue/saturation:
R: 0 10 0
Y: 0 -10 0
That's it, I would love to see your results :)
PSD (please comment if taking, I don't want to start giving it uppon request only)
Examples:
Some icons on this post.
