tutorial: csi:ny

>

Made using photoshop CS2.
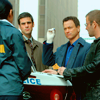
Prepare your base. I used a picture of CSI:NY.
We're going to brighten the image using curves.
Layer>new adjustment layer>curves:
RGB: 46/71
173/190
Now we're going to make the colors stand out.
Layer>new adjustment layer>channel mixer:
R: 150 -40 -20 0
G: -5 110 -5
B: -7 -13 117
The image is a bit to redish/yellowish, so we're going to add some blue.
Layer>new adjustment layer>color balance:
Midtones: -10 10 -5
Shadows: -5 -5 10
Highlights: -10 -2 -5
(I left 'preserve luminosity' unchecked, but you can try to see how your image will look with it checked)
The colors of the image are soft and faded, so we'll be using selective coloring.
Layer>new adjustment layer>selective color:
R: -20 5 10 0
Y: 50 10 20 0
C: 20 0 0 0
B: 20 0 0 0
N: -5 2 0 5
To make the colors even more vivid, we'll add some saturation.
Layer>new adjustment layer>hue/saturation:
Master: 0 5 0
Reds: 0 10 0
Yellows: 0 -10 0
Cyans: 0 20 0
Blues: 0 20 0
The image is too muted, so we'll add some contrast.
Layer>new adjustment layer:brightness/contrast:
Contrast: 15
Almost done. We're going to make the image a bit muted, in a way it will only affect the brightness and colors, and not collide with the previous step.
Fill a new layer with #1a0e04 and set if to exclusion, opacity: 50%.
We're done! Try to play around with layers and setting, and let me see your results :)
PSD (comment if taking)
Examples:


